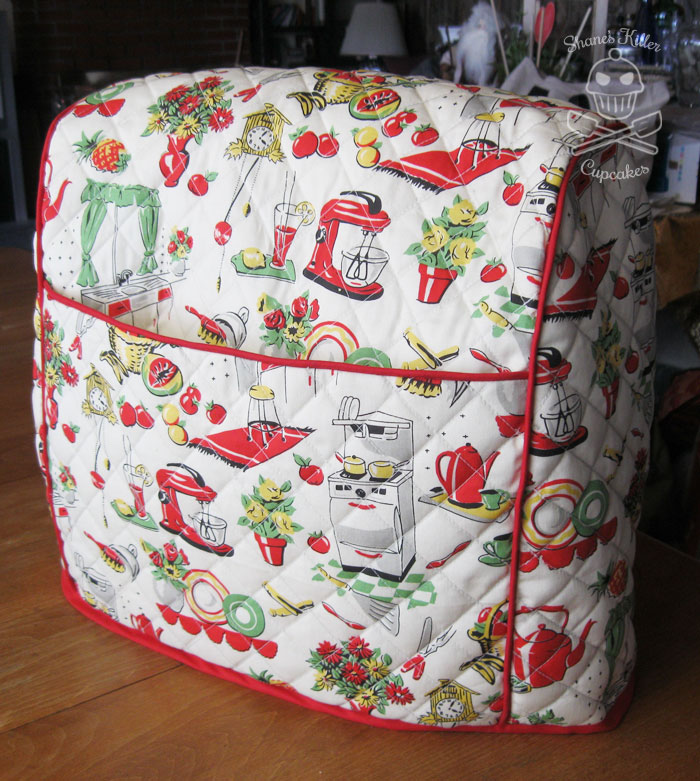
 I know a lot of you have a KitchenAid stand mixer and hate that it collects dust on your counter when you’re not using it. I’m new to the stand mixer. When I received mine for my birthday back in December, I had to get used to using it instead of the ancient hand mixer I’d been using since I was a kid.
The thing I hated most was having to wash the bowl every time I used it because it was covered in dust. This prompted me to look into getting a cover for it, but which one to choose? They run about $20-$40 on Amazon, but I didn’t see any designs I liked. I figured if I’m going to have to pay that much money for one, I might as well put that money into a customized homemade one.
The past few months I’ve been learning to sew. I’m pretty new at it, but when I saw the instructions for making my own cover on this About.com article, I decided to give it a shot. I even added a few things to it like a lining and a side pocket.
The pocket was a little tricky, but if you have some basic sewing skills, you can figure it out. I started with the outside part of the pocket. Cut out some pieces for the pocket from the outer fabric, interfacing, and the lining that will fit the width of the mixer cover side and go up about 9 inches. Sew the outer fabric (with interfacing attached) and the lining to some piping along one long side, then when you attach the rest of it together, remember to add it on to one side of the cover.
Another alteration I did works well for fabrics that have a pattern that goes in one direction, like the Fifties Kitchen by Michael Miller fabric that I used. I didn’t want the retro kitchen pattern to be upside down on one side, so I added an inch to the length of the long center piece, cut it down the middle and sewed it back together with a 1/2 inch seam so both sides were right side up. It worked out really well.
If you’re even more adventurous, you can quilt the fabric so it has that kind of design on it. I have no idea about quilting, but I just marked out some lines with pencil (although disappearing fabric ink is probably better) and sewed along the lines on the outer fabric that I’d already attached the interfacing to. I used a fusible interfacing that looked sort of like felt. Not sure what it’s called. Then I sewed the whole thing together with the lining added.
The only thing I had a problem with while using the About.com instructions, is that the measurements they gave for the stand mixer cover seemed to be about 1/2 inch too short for my mixer. So make sure it works for the mixer you have before cutting your fabric.
If you make a cover with these instructions or some other way, post a picture of the finished product in the comments below or on my Facebook page! I’d love to see what yours looks like.


