Check out this awesome infographic by Cakespy featuring a simple cookie recipe that can be made into over 300 tasty varieties!
Source: 300+ Cookie Dough Variations From One Simple Recipe
Pin It
Source: 300+ Cookie Dough Variations From One Simple Recipe
Pin It
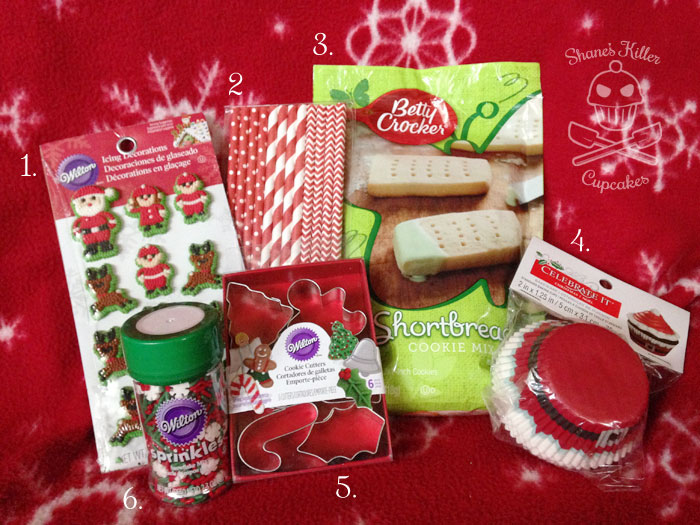
I love Christmastime and always like to celebrate it with my readers by putting together a little Christmas prize package to thank you for following me for the last few years.
I try to find some of the cutest baking supplies that pop up in stores at this time of year and supplement them with a few other fun things!
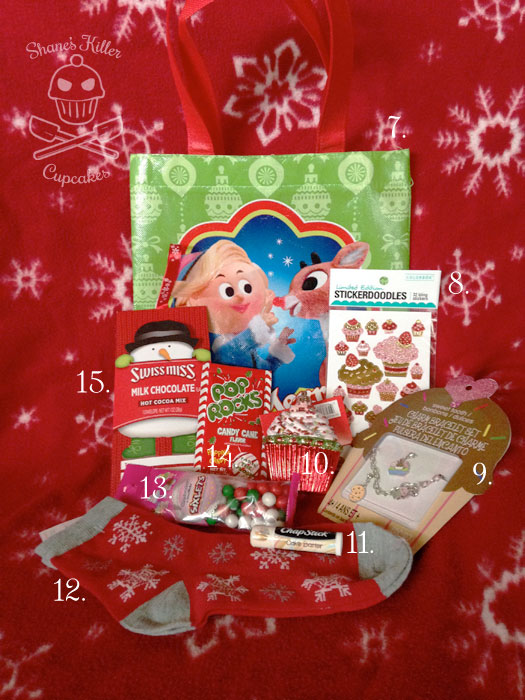
Here’s what you could win in this year’s giveaway:

I found the baking pan during after-Christmas sales last year to save for this year’s giveaway and totally forgot about it when I was taking the initial photos for the giveaway. Luckily for you, I remembered the pan at the last minute!
To enter the giveaway, enter your name and email into the mandatory entry space in the Rafflecopter widget below. You are now entered to win this entire package!
For extra entries, and a better chance at winning, fill in any of the optional entries thereafter.
The giveaway ends at 11:59 EST on December 14th (my birthday! whoo!) and is open only to US residents who are 18+ years old.
For complete rules click here.
Pin It I know a lot of you have a KitchenAid stand mixer and hate that it collects dust on your counter when you’re not using it. I’m new to the stand mixer. When I received mine for my birthday back in December, I had to get used to using it instead of the ancient hand mixer I’d been using since I was a kid.
The thing I hated most was having to wash the bowl every time I used it because it was covered in dust. This prompted me to look into getting a cover for it, but which one to choose? They run about $20-$40 on Amazon, but I didn’t see any designs I liked. I figured if I’m going to have to pay that much money for one, I might as well put that money into a customized homemade one.
The past few months I’ve been learning to sew. I’m pretty new at it, but when I saw the instructions for making my own cover on this About.com article, I decided to give it a shot. I even added a few things to it like a lining and a side pocket.
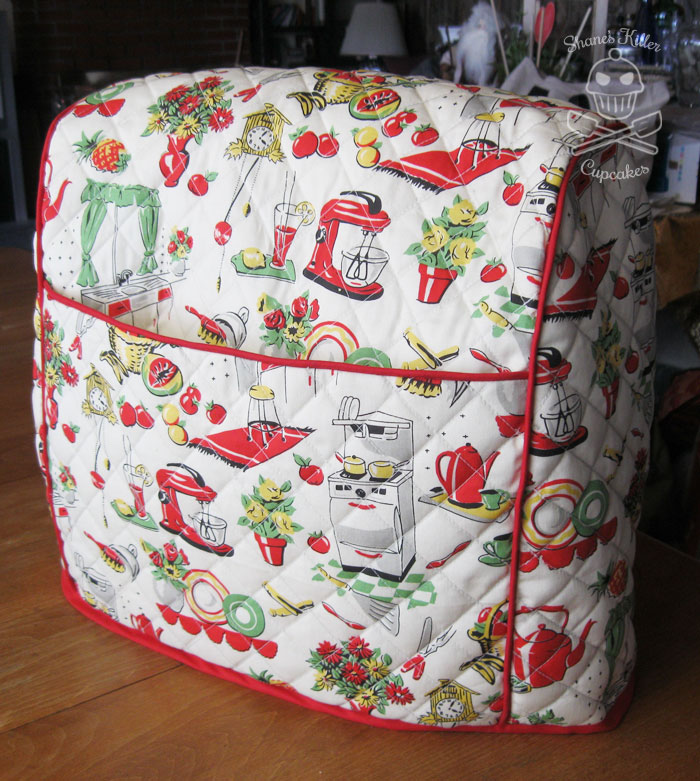
The pocket was a little tricky, but if you have some basic sewing skills, you can figure it out. I started with the outside part of the pocket. Cut out some pieces for the pocket from the outer fabric, interfacing, and the lining that will fit the width of the mixer cover side and go up about 9 inches. Sew the outer fabric (with interfacing attached) and the lining to some piping along one long side, then when you attach the rest of it together, remember to add it on to one side of the cover.
Another alteration I did works well for fabrics that have a pattern that goes in one direction, like the Fifties Kitchen by Michael Miller fabric that I used. I didn’t want the retro kitchen pattern to be upside down on one side, so I added an inch to the length of the long center piece, cut it down the middle and sewed it back together with a 1/2 inch seam so both sides were right side up. It worked out really well.
If you’re even more adventurous, you can quilt the fabric so it has that kind of design on it. I have no idea about quilting, but I just marked out some lines with pencil (although disappearing fabric ink is probably better) and sewed along the lines on the outer fabric that I’d already attached the interfacing to. I used a fusible interfacing that looked sort of like felt. Not sure what it’s called. Then I sewed the whole thing together with the lining added.
The only thing I had a problem with while using the About.com instructions, is that the measurements they gave for the stand mixer cover seemed to be about 1/2 inch too short for my mixer. So make sure it works for the mixer you have before cutting your fabric.
If you make a cover with these instructions or some other way, post a picture of the finished product in the comments below or on my Facebook page! I’d love to see what yours looks like.
Pin It
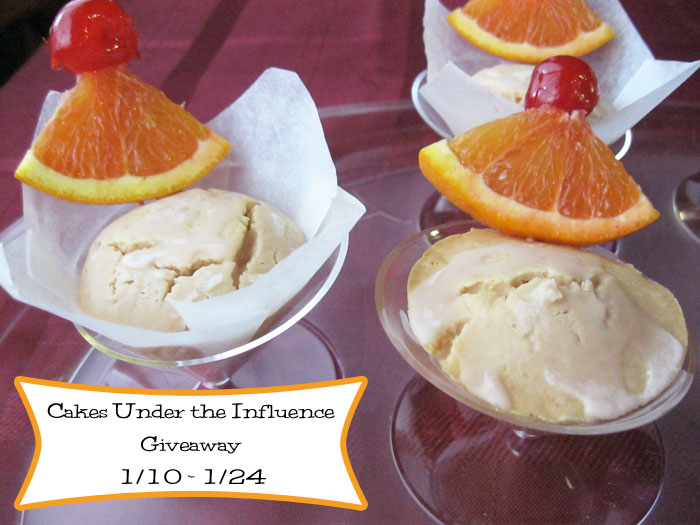 Yesterday I shared my review of Cakes Under the Influence Entertainer Kit and my Old Fashioned Cocktail cupcakes. Now here’s the good news: Cakes Under the Influence is offering to giveaway a Two Under the Influence Baking Kit to one of my readers!

This kit is perfect for a romantic night between you and a loved one or for those times you just want a little something sweet but don’t want to make a huge batch of treats.
The kit comes with:
Enter this giveaway by filling out the Rafflecopter widget below. The only mandatory entry is to leave your name and an email with which to contact you. All other entries are optional, but the more you complete, the better chance you have to win.
This giveaway is open to those who are 18+ and residents of the US only. For complete rules click here.
Pin It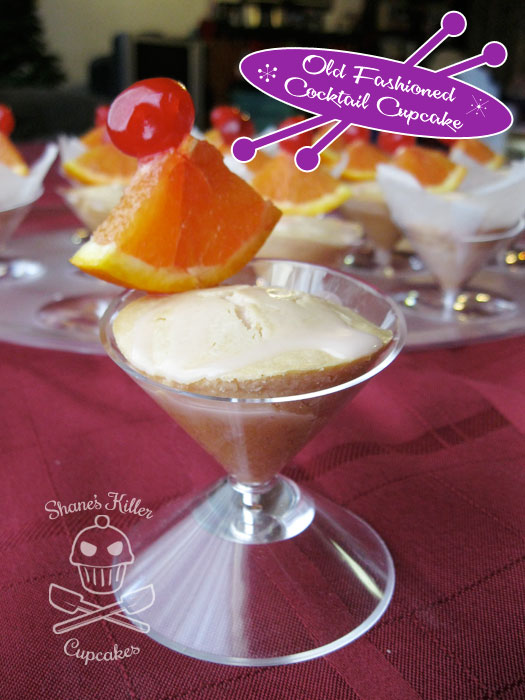 I love cocktails and cupcakes, so what could be more awesome than a cocktail cupcake?! NOTHING! Duh.
What’s even better is the baking supply company, Cakes Under the Influence, makes baking boozy cupcakes super easy with their easy-to-use kits. I got the chance to try out their nifty Entertainer Kit that has everything you’ll need (minus the alcohol) to make a set of cocktail cupcakes and display them. I wish I had had this kit last year when my boyfriend and I threw a ’60s themed cocktail party.
My kit included:
The kit was also supposed to come with access to the CUI Mobile app available on Apple and Android devices with access to CUI recipes and CUI Community features, but I couldn’t find the app in the Apple app store for my iPod Touch. I also don’t have any android devices, so I couldn’t use the app. Maybe others will have more luck.
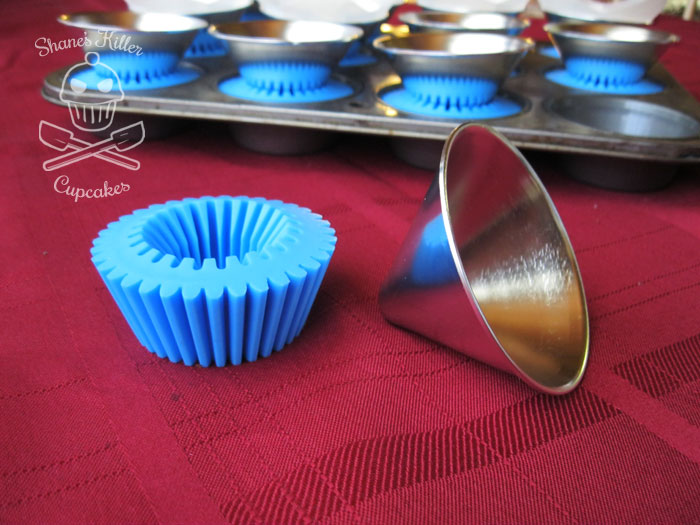
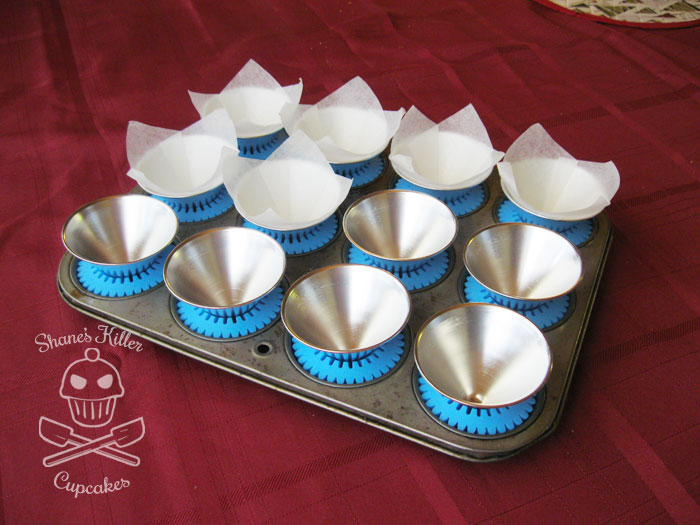
The silicone cupcake stands and aluminum molds worked just fine with my cupcake baking pan. You can use the paper liners with these molds or spray them with cooking spray and use them without paper liners. I decided to try both methods and found differing results. More on that later.
Here’s a quick animation from their website that visually shows how easy it is to use the kit:

The Cakes Under the Influence company encourages you to find new ways to use their product and to create new cocktail cupcake recipes to make with their cake mix. Since I received a package of cake mix with my review kit, I decided to come up with a cocktail recipe that I didn’t see available on their website.
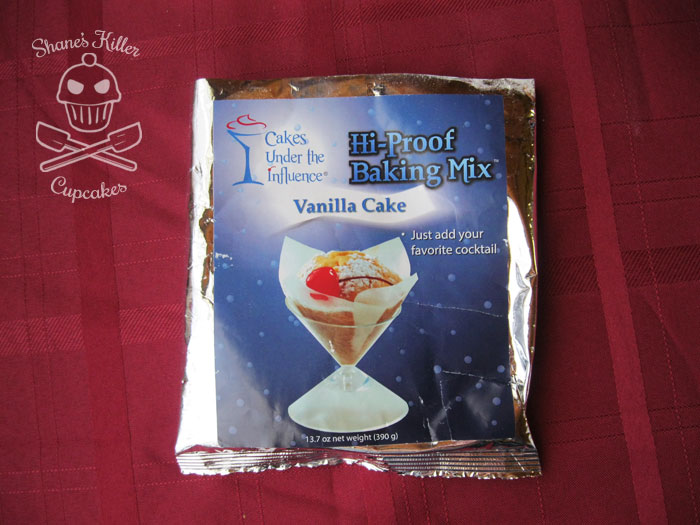
If you use their cake mix, all you have to do is add the ingredients of your favorite cocktail. It’s pretty darn easy. There are instructions on the back that you can follow, but I choose to modify the Manhattan Cocktail Cupcake Recipe from the CUI website to make Old Fashioned Cocktail cupcakes!
 Here’s what you’ll need for the cupcakes:
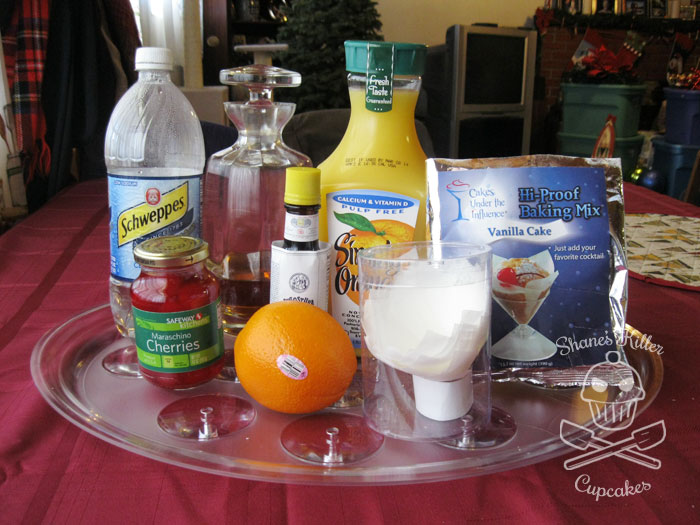
Ingredients
Instructions
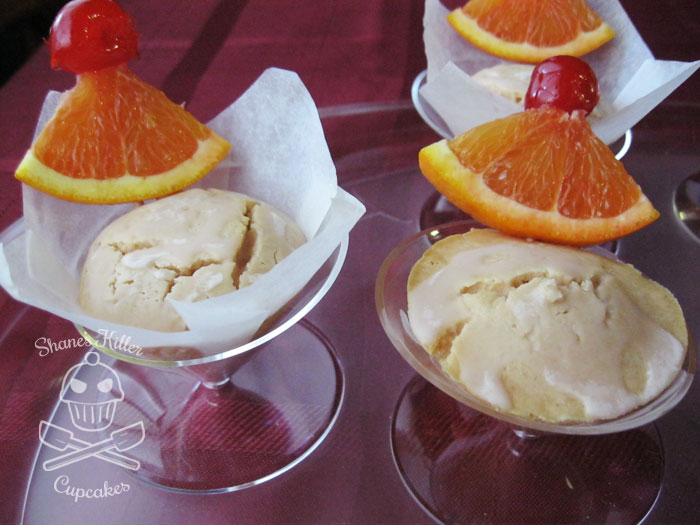
 I tasted the batter before it was cooked, and it really did taste like an Old Fashioned. Once cooked, the strength of the flavor had subsided a little since some of the alcohol had cooked out, but I still picked up the taste of an Old Fashioned. The whiskey drizzle on the top really enhanced the cake’s taste too. The consistency of the cake was almost muffin-like and wasn’t too sweet which I liked.
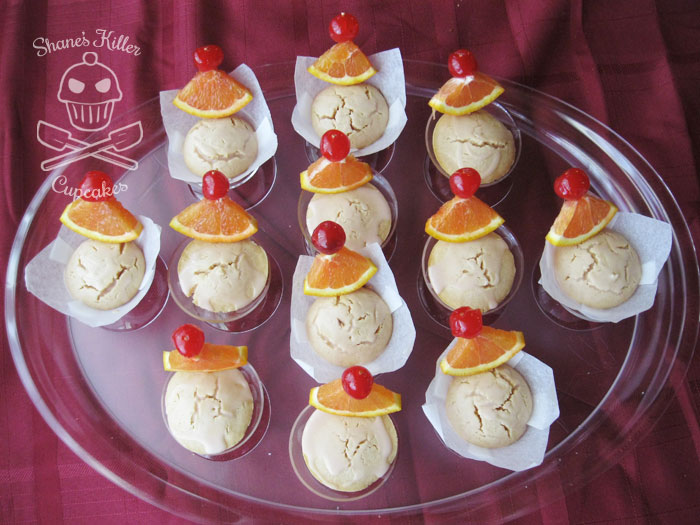
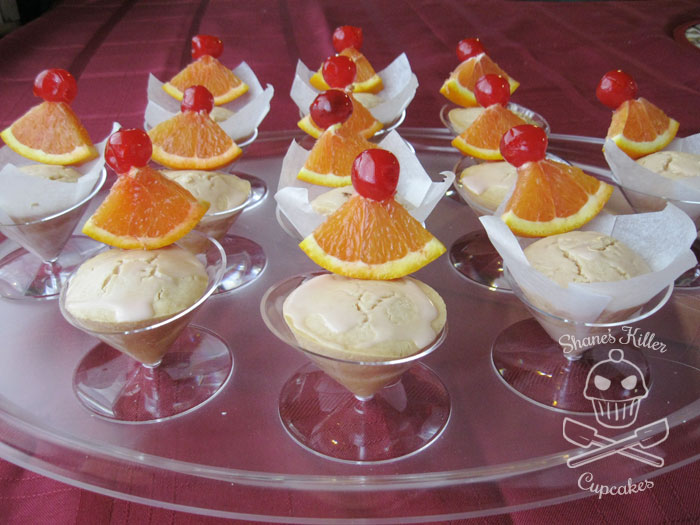 The acrylic stemware snapped into the included serving tray easily and looked pretty fancy once they were all on there. If you use the bases instead of the tray, I found that the tops didn’t snap into them, but rather fit tightly. A couple didn’t fit as tightly, and fell apart when I picked them up.
Since I made some of the cupcakes in the liners and some without, I noticed they cooked differently. The cake in the liners was more perfectly round on top, and the ones without were flatter. The cakes themselves tasted the same, but that might be something to keep in mind if you want a specific look for these cupcakes.
 Cakes Under the Influence has many different options so you can find the right product for your lifestyle. Don’t need a full Entertaining Kit? They have other kit options, including a 2-person package. Besides the mini martini molds and stemware, they also have margarita, champagne flutes, and shot glass shapes! If cupcakes aren’t your style, they offer large cake molds and cocktail cookie cutters as well.
These kits are great for adult parties or even a romantic night in. Like I mentioned before, I wish I had known about these when I had my cocktail party, because they would have been perfect! The best thing about this product is, except for the paper liners, it’s all reusable. Next time I throw a cocktail party, you better believe there’s going to be a set of Cake Under the Influence boozy cupcakes on the table.
Want to find out more about Cakes Under the Influence? Connect with them through any of the ways below:

 Hello, folks! It’s been a few days since I last updated my Advent Calendar of Fun, but I had good reason. My birthday was on Saturday, and I was busy with that, other holiday activities, and the actual advent calendar activities, so I didn’t have some to write the blog post until now.
We did quite a few things these past few days. We made treats, watched movies, and my grandma got a few little trinkets on days 12 – 16.
I let my grandma open this a day early, because I gave her some felt tip pens, but forgot to give them to her before we wrote her Christmas cards up on the 11th. Silly me.
For lucky Friday the 13th, I just gave her a chocolate marshmallow snowman candy since she hadn’t received candy in a while.
Since this day was my birthday, and I knew I’d be too busy for an activity, I gave her a pair of fuzzy warm socks that have anti-slip rubber nubs on the bottom. These kinds of socks are great for her because we don’t want her to slip and fall which is easy to do on our faux wood floors.
 Day 15
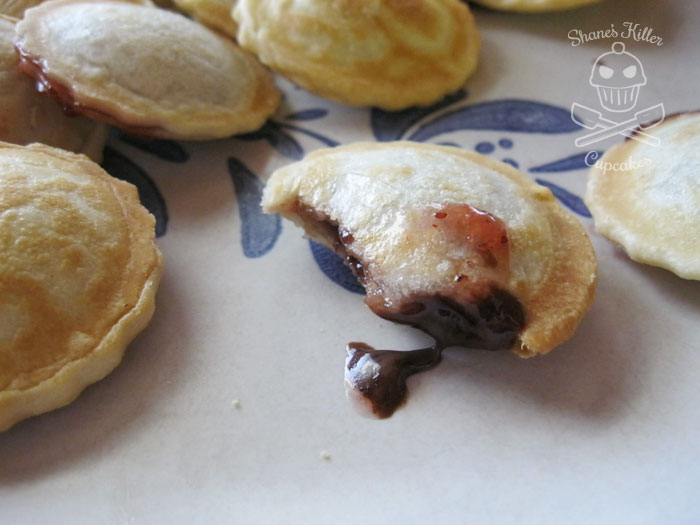
Yesterday we made mini pie bites with my Babycakes Pie Pop Maker. I love the line of Babycakes products, but sometimes they can be a little out of my price range. I found this Pie Pop Maker at the discount store Big Lots for $10 about a year ago but hadn’t used it much yet. What better time than the holidays to pull it out!

I usually don’t use the pop sticks because it seems wasteful since I usually eat 4 or 5 mini pies at a time. The size of these treats is perfect for desserts or appetizers. It also comes with its own dough cutting tool so that the crust fits perfectly into the machine.

For the fillings I tried two different flavors. I always like finding ways to use my IKEA lingonberry jam, so I made half of the mini pies with the jam filling and the other half with Trader Joe’s Cocoa Almond Spread.
 Both flavors tasted great! I would definitely use these again. The thing that’s great about the Pie Pop Maker is that it only takes about 2-4 minutes for each batch of 6. I wish I could make more at a time but since they cook so quickly, it didn’t take long before we had a plate full of delicious mini pies.
 For the last two pies I made, I put both fillings into one and it was pretty darn good too!
 Day 16
Today her advent calendar activity was to watch a Christmas themed movie. She also received a roll of Santa Bubble Tape gum. I haven’t had any of that type of gum since I was a kid.
For the movie, Grandma chose to watch How The Grinch Stole Christmas. This is one of my favorite Christmas movies from my childhood and I can’t wait to see it again. I guess today’s calendar mitten inadvertently had the theme of my childhood.

I can’t believe Christmas is almost here! I look forward to this Wednesday’s activity. You’ll have to come back to find out what it is.
If you’ve missed any of the previous days, here are the links:
You can find instructions for how to make this advent calendar at Holiday Crafts and Creations.
**The snowflakes in the title image are from www.obsidiandawn.com and www.graphicssoft.about.com**


