Zombie Brain Brownies

Posted on

Zombie Brain Brownies | Shane's Killer Cupcakes

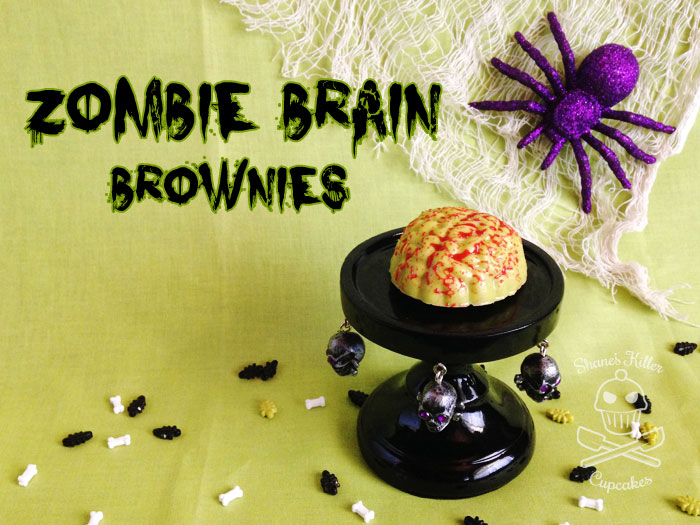
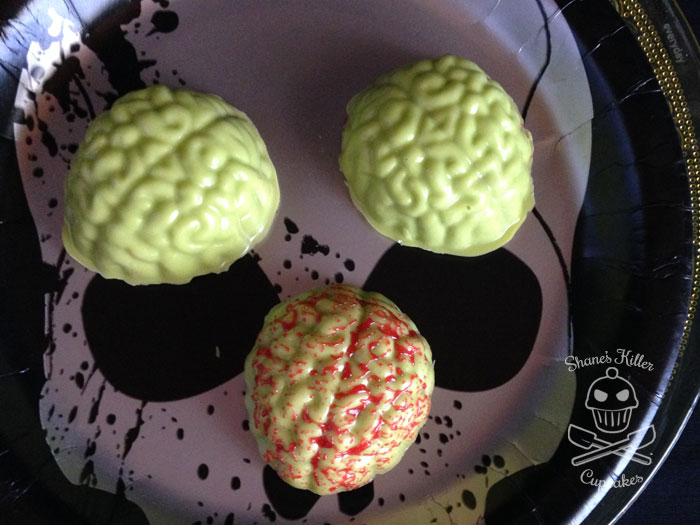
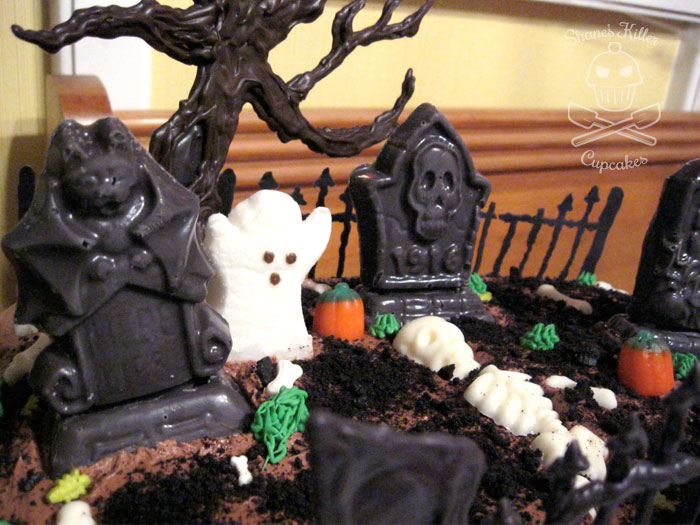
Happy Halloween, everyone! This is my favorite holiday and always like making some creepy treats for it too. This year I came up with Zombie Brain Brownies. They’re made from candy melts, brownie, and strawberry sauce mixed with fresh squeezed orange juice and triple sec. If you are looking for a non-alcoholic version, just omit the triple sec and add more orange juice.
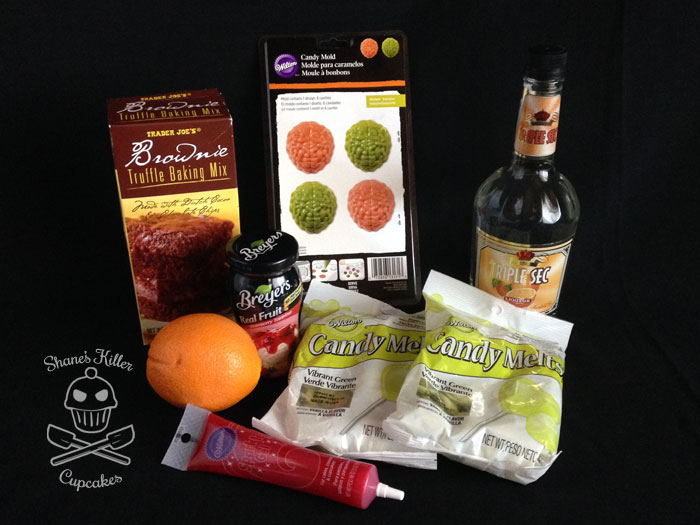
Zombie Brain Brownies

Ingredients

  • 1/2 cup strawberry topping
  • 2 tbs. triple sec*
  • 1 tb. of fresh orange juice
  • 1 batch of brownies (from a boxed mix or your own recipe)
  • 2-12oz. packages of candy melts in Vibrant Green
  • Red decorating gel
  • Optional
  • Red food coloring
  • Also needed
  • Brain shaped candy molds

Instructions

  1. Make a batch of brownies from scratch or boxed mix and let cool. Once cool, cut the crispy edges off the sides of the brownie (eat or discard).
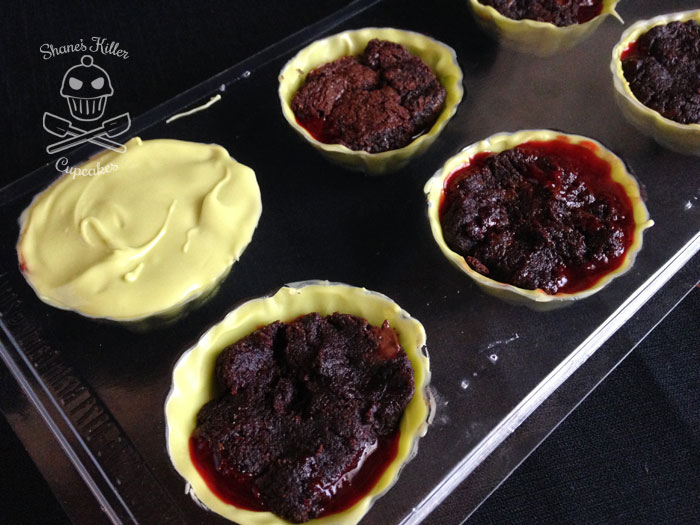
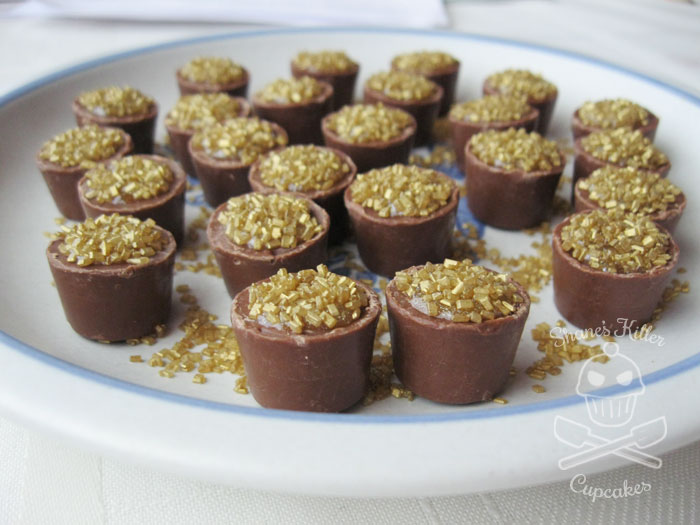
  2. Using the directions on the package, melt the candy melts and line the brain molds with a layer about 1/8" thick. I use the back of a spoon to achieve this. Don't fill in the entire brain cavity with candy melts, because we need to leave room for the strawberry sauce and brownie.
  3. Once the brain molds are all covered with candy melts, chill it in the freezer for 10 minutes to set it up.
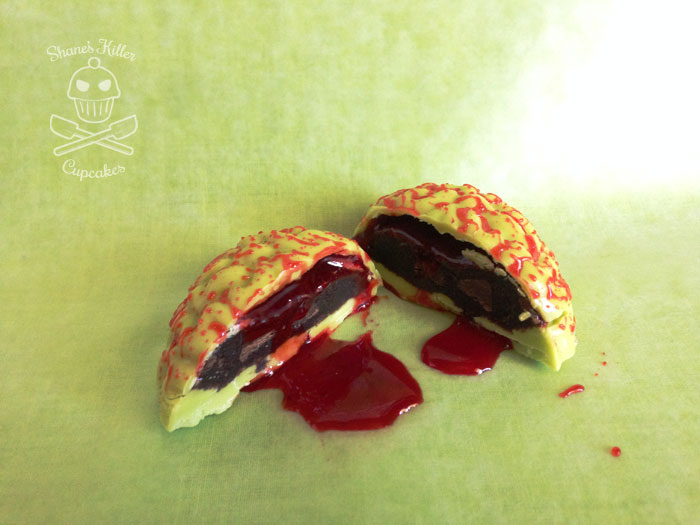
  4. While the brain molds are in the freezer, prepare your strawberry sauce by combining the strawberry topping, triple sec, and orange juice. If you want the sauce to be a brighter red color, add a few drops of red food coloring.
  5. Take the brain molds out of the freezer once the candy melts have set, and spoon a teaspoon of the strawberry sauce in each brain.
  6. Pull a small piece of brownie off and mash it into the brain on top of the sauce, making sure to not squish the sauce out.
  7. Re-melt candy melts if needed, and seal the brownie and sauce into the brain by covering the top with the candy. Make sure it meets with the sides of the candy melts you put in the brain earlier, or you'll have holes that the sauce could seep out of.
  8. Put the molds back in the freezer for 15 minutes to set the candy melts.
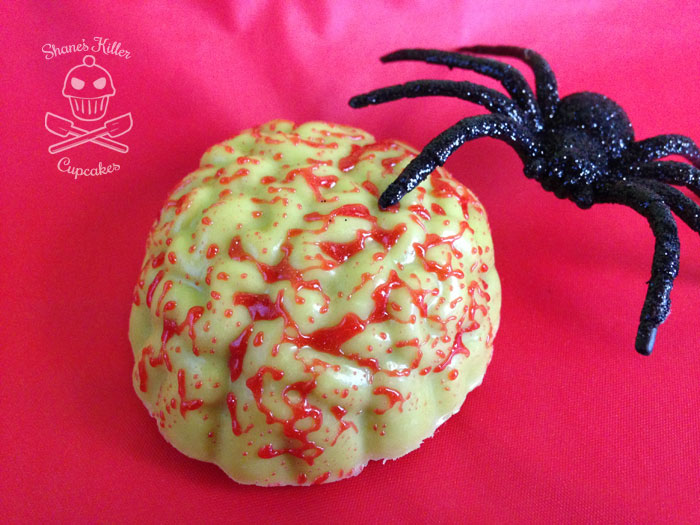
  9. Once the brains are set, pop them out carefully.
  10. Before serving them, slather the tops of the brains with the red decorating gel to make the brains look gooey and gross.

Notes

*If you want non-alcoholic treats, leave out the triple sec and add more orange juice.

https://shaneskillercupcakes.com/2015/10/zombie-brain-brownies/

Zombie Brain Brownies | Shane's Killer Cupcakes

If you want, you can slather some red gel over the top to make them bloody or leave it off for a more clean version. You could even get some green decorating gel and put it in the place of the blood for a more gooey oozing effect.

Zombie Brain Brownies | Shane's Killer Cupcakes

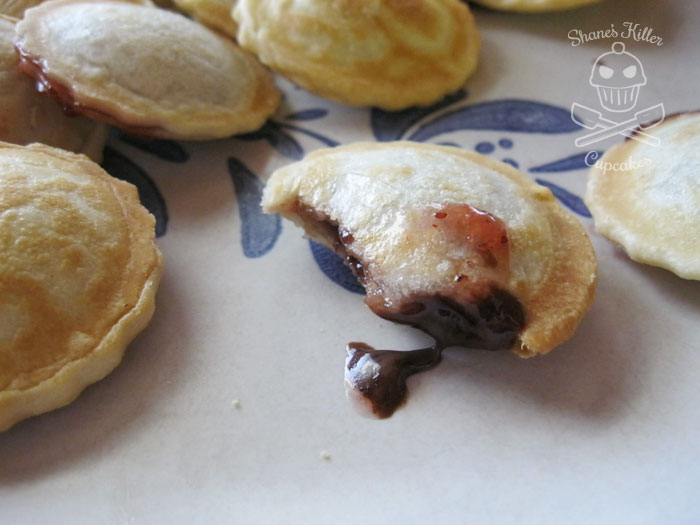
When you open them up some of the strawberry sauce could drip out so make sure to have some napkins around!

Zombie Brain Brownies | Shane's Killer Cupcakes

Have a fun and safe Halloween!
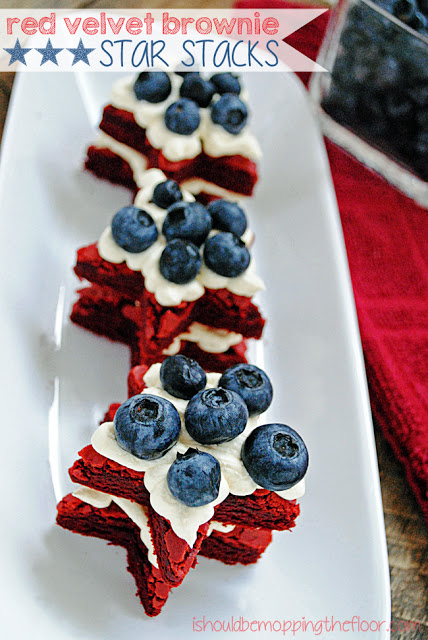
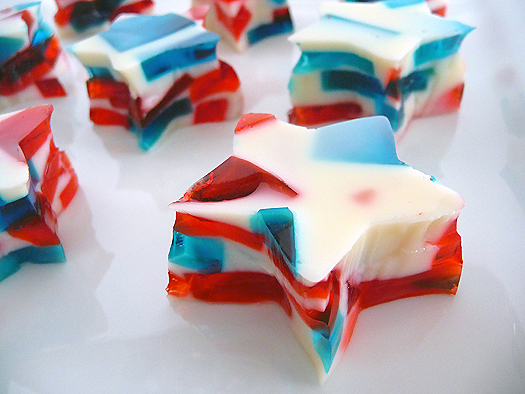
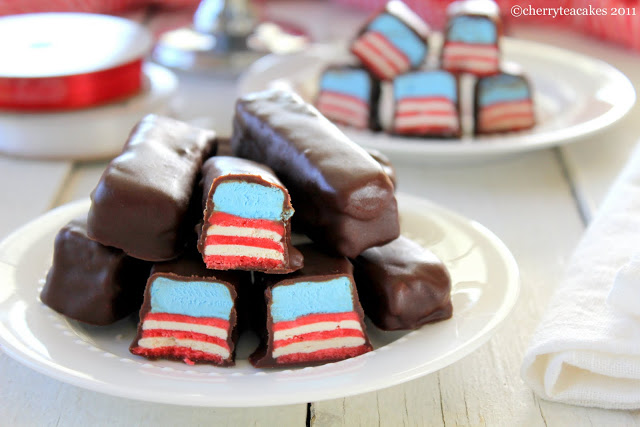
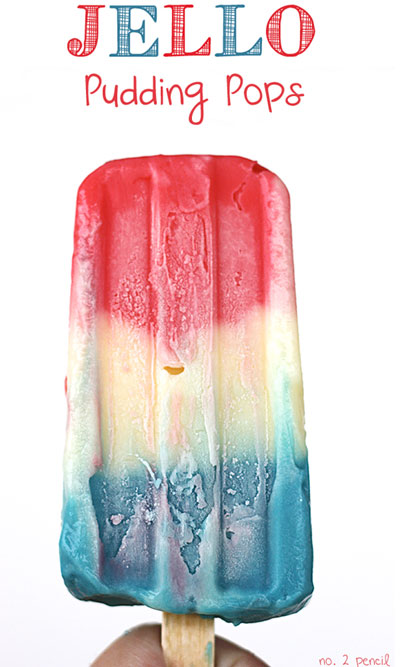
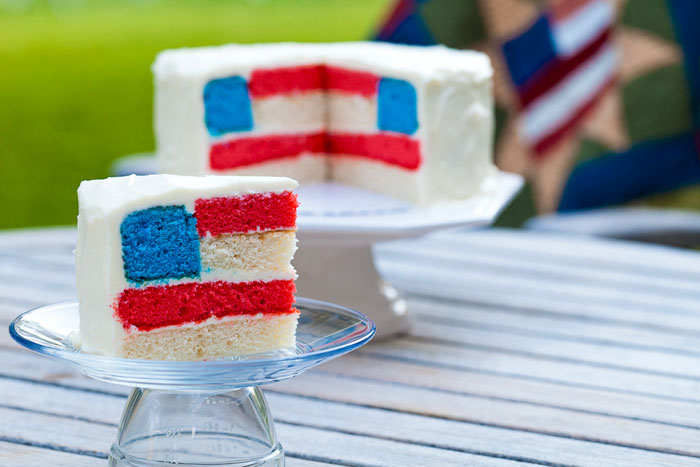
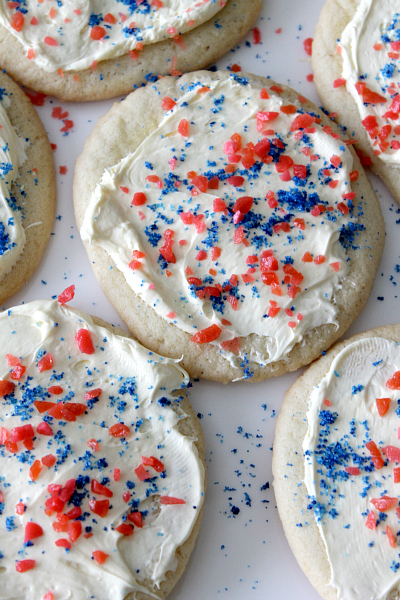
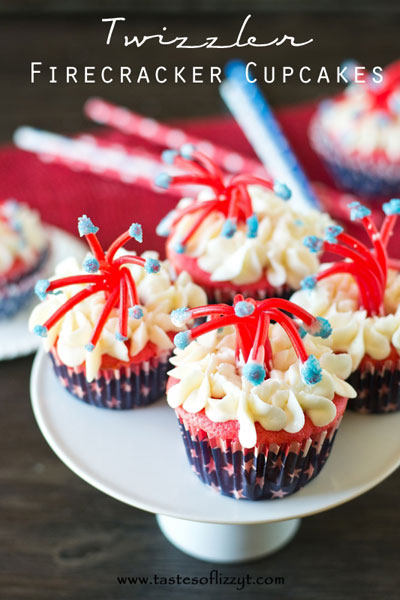
Pin It

Stars, Flags, and Firecrackers! It’s a 4th of July Dessert Round Up

Posted on

titleimage_2Fourth of July is this week and if you’re in the United States, you probably have a party or BBQ to attend. Still not sure what you’re going to bring to your potluck? Check out these deliciously patriotic sweets I’ve selected from around the Internet.
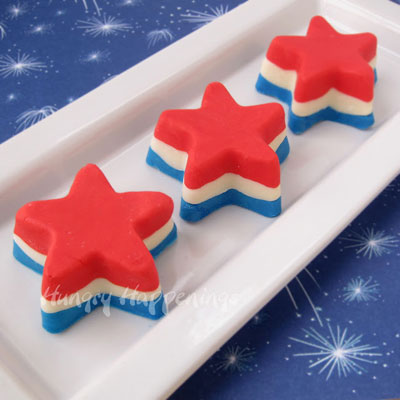
STARS

1. Red, White, and Blue Fudge Stars from Hungry Happenings

These layered stars, made from white chocolate, sweetened condensed milk, and food coloring, give a bright pop to any party table.

red-white-and-blue-desserts-for-4th-of-july-fudge-stars-
2.  Red Velvet Brownie Star Stacks from I Should Be Mopping the Floor

If brownies are more your style, try these stacked red velvet brownie stars with cool whip and blue berries.

red velvet brownies from cake mix


3. Red, White, and Blue Stained Glass Jello Stars from Brown Eyed Baker

I love these because they remind me of the jello desserts of the 1960s.

stained-glass-jello-singlestar


STRIPES

4. Red, White, and Blue Raspberry Candy Bars from Cherry Tea Cakes

These candy bars are a great surprise for your friends! From the outside they look normal, but one bite reveals the red, white, and blue stripes inside. I always love surprise inside treats.

IMG_9081


5. Jello Pudding Pops from Number 2 Pencil

If you have access to a freezer, these pudding pops are great for a hot summer day.

Jello-Pudding-Pops


6. Triple Berry Frozen Smoothies from In Katrina’s Kitchen

Made from a combination of yogurt, fruit, and honey, these delicious smoothies are a perfect cool down on 4th of July.

ae28fbcb48cf2a21572827289197e3e7

FLAGS

7. 4th of July Flag Cake from Secret Life of a Chef’s Wife

Here’s another version of the surprise inside treat. This cake is baked with several colored layers and combined to form a flag when cut into. Can you imagine what your friends will say when they see the inside?

Fourth_of_July_Cake-2


FIRECRACKERS

8. Firecracker Sugar Cookies from Mom Dot

To the unfamiliar, these look like your everyday sugar cookies with candy sugar and sprinkles on top. What they don’t know is these will pop and crackle in your mouth when you eat them! How you ask? The secret ingredient is Pop Rocks!

popcookie


9. Twizzler Firecracker Cupcakes from Tastes Of Lizzy T

To keep with the firecracker theme, here are some cute cupcakes that look like little firecrackers exploding.

Twizzler-Firecracker-Cupcakes-are-so-fun-for-a-July-4th-party


If you aren’t planning a red, white, and blue dish for your party but still want it to look festive, decorate it with flag picks!  To make your own, download my free American flag pick printable by clicking on the picture below:

IMG_3444

Have a fun and safe Independence Day!


***All photos were used with permission
Pin It

St. Patrick’s Day Pot o’ Gold Rainbow Cupcakes

Posted on

IMG_5601_2These cupcakes were a long time in the making. Last year I bought the makings for some rainbow cupcakes for a baby shower but never ended up making them. I didn’t want the candy to go to waste though, so I kept it in the back of my mind to find a good time to use them. Rainbow cupcakes would be good at any time, but I wanted it to be the right time, the right situation.

Then St. Patrick’s Day came around this year and it hit me: Now is the time! Rainbows are a great motif of St. Patrick’s Day and the beginning of spring, so I modified my idea and added little candy pots of gold to more fit the theme of St. Patrick’s Day.

IMG_5612

These cupcakes were fun to make because they’re covered in candy! I got inspiration for these cupcakes from Babble.com. For the decor, you’re going to need Airheads Xtremes Rainbow Berry Sour Candy strips, Rolos, gold sparkle gel, gold sugar sprinkles, green jimmies, green frosting dye, and white frosting. I used Just A Pinch’s Classic Vanilla Buttercream Frosting Recipe for the frosting.

Make a batch of cupcakes in whatever flavor you want. I chose to make chocolate cupcakes (recipe here) so the cake was the “dirt” under the grass. If you use my mom’s chocolate cake recipe, follow the recipe exactly, except cook the cupcakes for only 20-25 minutes, otherwise they’ll be overcooked.

IMG_5589While the cupcakes cooled, I made the pots o’ gold using the Rolos, the sparkle gel, and gold sugar sprinkles. Flip the Rolos upside down, add a glob of sparkle gel to the center, leaving the edges untouched, and sprinkle some gold sugar on top. Now you’ve got a treasury full of gold waiting to be placed at the end of the rainbow!

IMG_5593

Make your frosting next and color about half of it green. I did the green in batches because I didn’t want to make too much green and not have enough white frosting left over, but half green/half white should work out. If you want to be cautious, make a little green at a time until you’ve frosted the tops of all the cupcakes. Thin frosting is just fine for this project. Sprinkle the green jimmies on top of all the freshly frosted cupcakes for the grass. You might need to push them into the frosting to make them stick better.

IMG_5595Next cut the rainbow candy strips in half. This will give you 24 rainbows, just enough to cover 2 dozen cupcakes. If you end up with more cupcakes or need more than 24, you’ll need to buy a second package of the rainbow candy.

IMG_5597

With your left over white frosting placed in a frosting bag or zip lock fitted with a Wilton #12 tip, pipe small puffy clouds on two sides of each cupcake. Then stick each end of a rainbow strip into the clouds. Lastly, use a dot of sparkle gel to the side of one cloud to attach a pot o’ gold.

One last thing I will leave you with. Make sure these cupcakes don’t get too warm or they will get a bit droopy, as seen below:

IMG_0833I hope these cupcakes bring you luck this St. Patrick’s Day!

***Update: I included a link to where my inspriation for this cupcake originated.***
 
TidyMomFRIDAYS-1

Photobucket

Pin It

24 Days of Advent Calendar Fun: Days 12-16

Posted on

IMG_5153Hello, folks! It’s been a few days since I last updated my Advent Calendar of Fun, but I had good reason. My birthday was on Saturday, and I was busy with that, other holiday activities, and the actual advent calendar activities, so I didn’t have some to write the blog post until now.

We did quite a few things these past few days. We made treats, watched movies, and my grandma got a few little trinkets on days 12 – 16.

Day 12

I let my grandma open this a day early, because I gave her some felt tip pens, but forgot to give them to her before we wrote her Christmas cards up on the 11th. Silly me.

Day 13

For lucky Friday the 13th, I just gave her a chocolate marshmallow snowman candy since she hadn’t received candy in a while.

Day 14

Since this day was my birthday, and I knew I’d be too busy for an activity, I gave her a pair of fuzzy warm socks that have anti-slip rubber nubs on the bottom. These kinds of socks are great for her because we don’t want her to slip and fall which is easy to do on our faux wood floors.

IMG_5128Day 15

Yesterday we made mini pie bites with my Babycakes Pie Pop Maker. I love the line of Babycakes products, but sometimes they can be a little out of my price range. I found this Pie Pop Maker at the discount store Big Lots for $10 about a year ago but hadn’t used it much yet. What better time than the holidays to pull it out!

IMG_5140

I usually don’t use the pop sticks because it seems wasteful since I usually eat 4 or 5 mini pies at a time. The size of these treats is perfect for desserts or appetizers. It also comes with its own dough cutting tool so that the crust fits perfectly into the machine.

IMG_5139

For the fillings I tried two different flavors. I always like finding ways to use my IKEA lingonberry jam, so I made half of the mini pies with the jam filling and the other half with Trader Joe’s Cocoa Almond Spread.

IMG_5143Both flavors tasted great! I would definitely use these again. The thing that’s great about the Pie Pop Maker is that it only takes about 2-4 minutes for each batch of 6. I wish I could make more at a time but since they cook so quickly, it didn’t take long before we had a plate full of delicious mini pies.

IMG_5145For the last two pies I made, I put both fillings into one and it was pretty darn good too!

IMG_5147Day 16

Today her advent calendar activity was to watch a Christmas themed movie. She also received a roll of Santa Bubble Tape gum. I haven’t had any of that type of gum since I was a kid.

For the movie, Grandma chose to watch How The Grinch Stole Christmas. This is one of my favorite Christmas movies from my childhood and I can’t wait to see it again. I guess today’s calendar mitten inadvertently had the theme of my childhood.

IMG_5150

I can’t believe Christmas is almost here! I look forward to this Wednesday’s activity. You’ll have to come back to find out what it is.

If you’ve missed any of the previous days, here are the links:

You can find instructions for how to make this advent calendar at Holiday Crafts and Creations.

**The snowflakes in the title image are from www.obsidiandawn.com and www.graphicssoft.about.com**

Pin It

Spooky Graveyard Cake

Posted on

IMG_4585

It’s Halloween time! It’s my favorite time of year. This year I decided to do a graveyard cake. I’ve also been busy working on my Zoltar costume the past month. This cake has a bunch of candy melts for decoration and was made with my mom’s Triple Chocolate Cake and Sweet Savory Life’s Chocolate Buttercream Frosting.

100_3903

First try wasn’t cutting it

I did a graveyard cake in the past but was unhappy with how it turned out, so I felt like trying it again. The original one had cookies for tombstones and a real stick for a tree. It was cute, but I wanted something that was completely edible this time around and a little more extravagant.

Materials

  • Frosted 9in x 13in cake
  • Green frosting (for grass)
  • Candy melts in chocolate, black, and white.
  • Tombstones (made from cookies, fondant, candy molds, etc) I used Wilton’s Creepy Tombstone Candy Mold. This has been discontinued, but if you search around in stores and online, you might be able to find it. I found mine just last week at my local Michaels on clearance for $0.99!
  • Fence templates (Template 1, Template 2)
  • Tree template
  • Candy decor (candy corn pumpkins, Peep ghosts, bone candy, Wilton Skeleton Bones Candy Mold, bug candy, etc). You can decorate it with anything you like really. These were just the items I used for this cake.
  • Oreos or other chocolate cookie (for dirt)

I made the cake in a 9in x 13in cake pan but when turned out on the platter, was closer to 7in x 11in. The fence templates I’ve included are made for the 7in x 11in cake (although the fence doesn’t quite meet up everywhere.) If you make a larger (or smaller) cake resize the fences accordingly.

Once the cake has cooled and been frosted, place your tombstones. The ones I used were very big so that dictated the proportion of my cake. Then I made my skeleton with white candy melts in the Skeleton Bones Candy Mold and placed pieces of him in front of one of the tombstones. I also put the Peep ghost and other decor in the graveyard to my liking.

IMG_4578

Continue reading »

Pin It

Crab Cupcakes

Posted on

These cute crab cupcakes made by Entertain Exchange for a Crab Shack Summer Party caught my eye because I wondered where she found those adorable crab candies. Turns out she made them herself using a crab shaped silicone ice cube tray and candy melts! I would have never thought of that. Knowing that silicone ice trays work as candy molds opens up a huge selection of candy molds for me.

For the candy mold instructions go here.

[polldaddy rating=”5093286″]

Related Posts Plugin for WordPress, Blogger...