Halloween Oreo Truffles

Posted on

Halloween Oreo Truffles | Shane's Killer Cupcakes

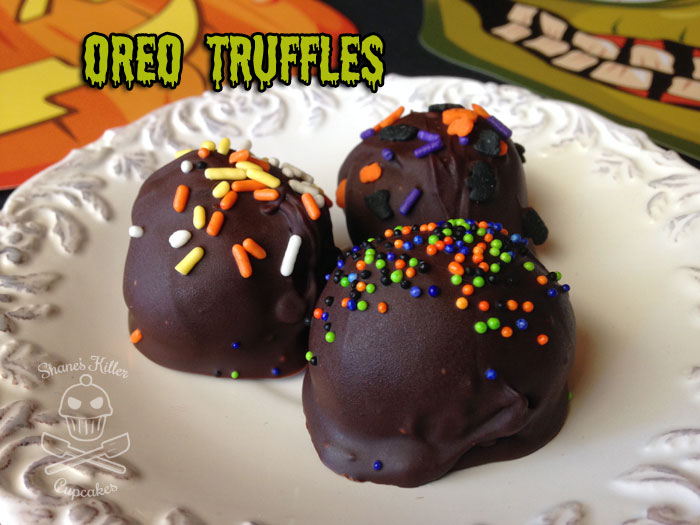
Welcome to October! With the holidays coming up, I thought I’d share some Oreo Truffles with you because they make great treats for all the parties you’ll inevitably be invited to during the holiday season.

If you’ve never had Oreo Truffles before, you really need to try them. They are simple to make and only include three ingredients: Oreos (or similar cookies), cream cheese, and chocolate. I’m amazed I’ve never made a blog post about them before now, to tell you the truth.

There’s something about the mixture of the cookies and the cream cheese that really makes these special. They are decadent and rich. The added chocolate coating only makes them better.

Halloween Oreo Truffles | Shane's Killer Cupcakes

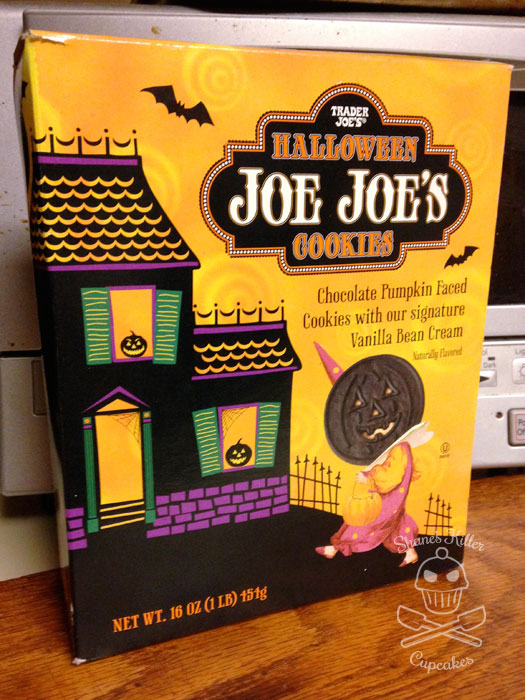
I saw these Halloween themed Joe Joe’s cookies at Trader Joe’s and thought the box was cool looking so I decided to try them. They were not very good. The chocolate cookies were fine but the filling was bland. It tasted like nothing, and definitely not vanilla. Should I just throw the box of cookies away? Continue eating the cookies and hating life? No! Just make them into Oreo Truffles! Even the blandness of the cookies could be fixed with a little cream cheese and chocolate. Once the cookies are combined with the other ingredients, they didn’t taste that much different than the truffles made with real Oreos. So if you ever end up with a crappy box of Oreo knock-offs, you know what to do!

Halloween Oreo Truffles | Shane's Killer Cupcakes

Halloween Oreo Truffles

Ingredients

  • Package of Oreos or other chocolate sandwich cookies
  • 8 oz. block of cream cheese (softened)
  • 8-14 oz. of semi-sweet baking chocolate or chocolate candy melts
  • Optional toppings:
  • Chopped nuts
  • Sprinkles
  • Sugar confetti
  • Crushed Oreos

Instructions

  1. Put the cookies whole in a large food processor* and crush until the cookies are a fine crumb. If you want to use crushed cookies for topping set some aside at this point.
  2. Put the softened cream cheese into a large bowl and pour the cookie crumbs on top.
  3. With your hands, combine the cookies and cream cheese until completely incorporated. It's a messy job, but at least you get to lick your fingers clean when you're done!
  4. Chill the mixture for 15-20 mins. to thicken it up.
  5. Then roll it into 1 inch balls and place on a wax paper covered jelly roll pan. Chill again for 30 mins.
  6. Melt the semi-sweet baking chocolate in the microwave on 30 sec. intervals, decreasing the time to 15 sec. intervals when the chocolate gets close to melted. You don't want to over heat your chocolate or it'll be ruined.
  7. When the balls are chilled, place each ball, one at a time, in the melted chocolate making sure it's covered completely.
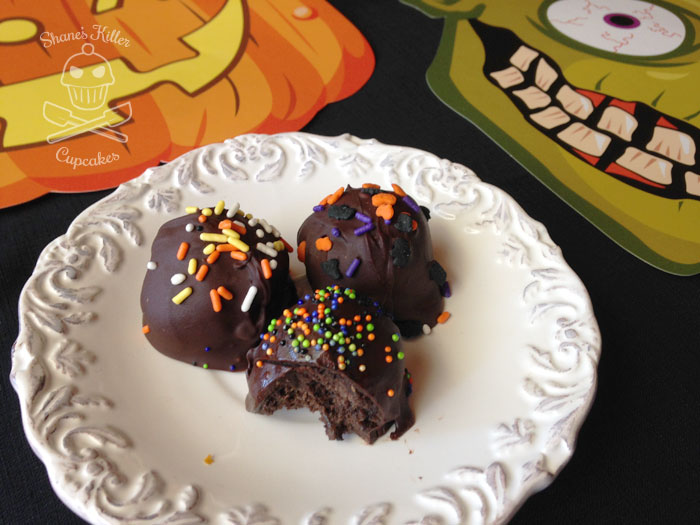
  8. With two forks, pick up the truffle out of the chocolate and place back on the wax paper. While the chocolate is still melted sprinkle the top with your toppings of choice.

Notes

*If you don't have a food processor, split the cookies apart, scrape the filling into a large bowl with the cream cheese and place the cookies in a large ziplock bag. I remove the filling ahead of crushing, because I find the cookies difficult to crush finely when the filling is included.

Crush the cookies finely in the ziplock bag with a mallet or something similar and then place them into the large bowl with the filling.

https://shaneskillercupcakes.com/2015/10/halloween-oreo-truffles/

These little truffles are great for the holidays and an easy, quick treat when you need to make something last minute.

Halloween Oreo Truffles | Shane's Killer Cupcakes

Pin It

Evil Witch Cupcakes

Posted on

IMG_3209

Wicked witches are one of my favorite Halloween monsters. I love that they use potions and spells and cats (CATS! I love cats) to enact evil. I just can’t get enough of them.

There are many ways to make them into cupcakes, but after looking for ideas online for witch cupcakes, none of them quite looked like how I wanted my witches to look. Some were too cutesy, others hinted at witches but didn’t have faces, and so on. I knew I wanted my witches to have certain features: a mean or scary face, a hat, and a nice big hooked nose with warts.

These were the cupcakes I came up with! Of course, when coming up with something new, you learn a few things along the way, especially what not to do! I like how they turned out, but they did put up a little fight while I was building them.

My troubles started when I could no longer find chocolate sugar cones in the stores. I know they existed in the past, because I bought some once, but I guess they have since been discontinued, as every store I checked only had regular sugar cones. I acquiesced and got the regular ones, but the chocolate ones would have worked better. I’ll get to why a little later.

IMG_3196

You’re going to want to collect quite a few things for this project. I’ll give you a list of all the items I used, but you’re in no way confined to it:

  • Sugar cones (preferably chocolate ones if you can find them)
  • Cupcakes of your choosing (I used Duncan Hines Devil’s Food)
  • Chocolate wafers (I used Nabisco Famous Chocolate Wafers)
  • Green chewy candy (Starbursts or Tootsie Rolls)
  • Decor gel in black and green
  • Green and yellow food coloring drops or gels
  • White frosting (I used this recipe from the Food Network)
  • Halloween candies and sprinkles (bugs, pumpkins, skulls and bones, colored sprinkles, etc.)
  • Candy eyeballs and/or M&Ms for eyes
  • Crispy chow mein noodles (I used these ones)
  • Candy melts in chocolate or black color

While you bake your cupcakes, you can get some of the decor items made. I made the witch hats first, because I knew they were going to take some construction time and need time to chill. If you can find chocolate sugar cones, this process will be much faster, as you won’t need to cover them in chocolate. Using chocolate cones is the preferred method, because the chocolate dipped hats were just a tad too heavy for my cupcakes and they toppled over! But if you can’t find the chocolate cones, here’s how to construct the hats.

IMG_3204

Cut the cones down a bit with a small serrated knife to make them fit the chocolate wafer cookies better. To keep it from cracking apart, make small cuts all the way around and then gently break it off. If it’s jagged, use a small cheese grater or a Microplane zester to file the bottom smooth.

IMG_3205

Next, melt your candy melts in a bowl and dip both the cookie wafers and the outside of the cones in it. While the chocolate is still wet, on a wax paper-lined cookie sheet, place the cone on top of the wafer to form a hat.

IMG_3206

If you find the chocolate cones, all you need to do is dip the bottoms of the cones in the melted chocolate and place them on the wafer brims to glue them together. Since the cookie wafers and chocolate cones are relatively the same color brown/black, they don’t need to be dipped fully in chocolate. This also makes the hats lighter and less likely to tip your witches over.

Stick the freshly dipped hats in the fridge to harden.

IMG_3208

The next things to work on are the noses. Warm the green chewy candies in the microwave for 10-15 seconds to make them pliable. I used green Tootsie Fruit Rolls for my noses. Each Tootsie Roll makes two noses. Shape the noses with your fingers until they look how you like. One thing I found out while making these is that the noses fell off the face easily, so to keep them on, cut a toothpick in two and stick it into the back of the nose.

Make your frosting, or use canned frosting, and color it the same green as the noses. You may need to use a little yellow coloring too.

For the witch hair, I used the crispy chow mein noodles dipped in chocolate. Chill these as well. You could use a number of things for the hair though. Another idea would be black licorice string.

IMG_3219

Decorate the hats when they are chilled with candy sprinkles. I used some of the decorating gel to draw a band around the hats and then placed different candies and sprinkles on them.

Once the cupcakes are cooled, peel the wrappers off of the ones you plan to make into witches. For the faces, the cupcakes will be placed on their sides, so cut off part of a side of a cupcake to create a flat surface for the cupcake to sit on. Cut off the opposite side to make a flat surface for the hat too. Then frost the cupcakes with your green frosting.

Place the eyes, nose, and hair onto the cupcake. For a craggily-looking witch, add some warts. I used a brown round candy sprinkle for her face warts and the decorating gels for warts on the noses. Draw on a mouth and for angry eyebrows, use a single sprinkle each. Lastly, place the hats on the top. If the hats are too heavy, like mine were, prop the cupcake up in the back with something. I used the tops of the ice cream cones that I had cut off earlier.

IMG_3232

Since the witches were difficult to put together, and kept threatening to fall apart, I only ended up making three and used the rest of my supplies to make other treats. The chocolate-dipped hats are pretty good treats on their own. Since I still had about 20 cupcakes left, I just frosted them normally, and decorated them with the Halloween sprinkles.

IMG_3224

One thing I loved about these witches is that each witch ended up with a different facial expression and personality. One looked mean, another scared, and the other looked confused.

IMG_3210
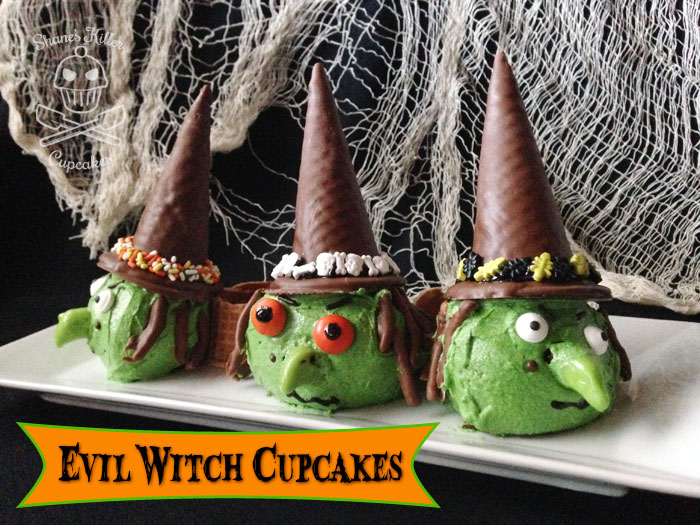
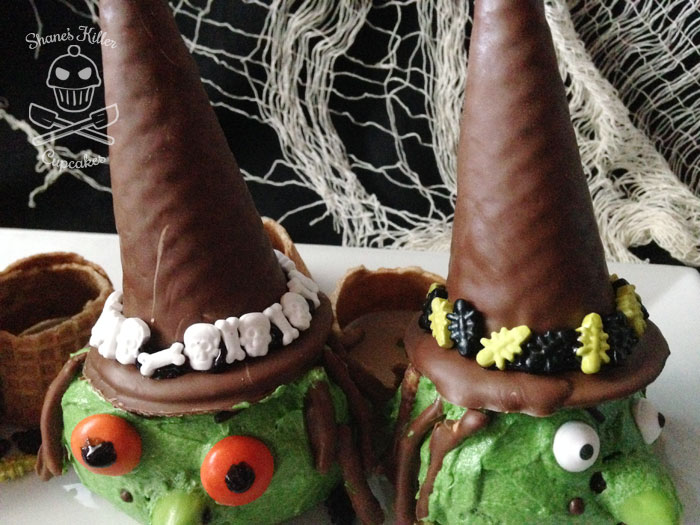
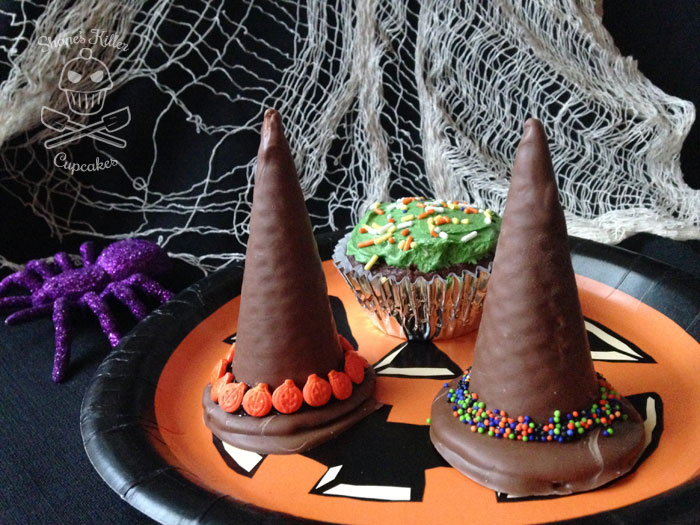
I hope you give these evil witch cupcakes a try this year even if they are a little difficult to construct. Since they are so customizable, they would be great for a decorating party.

Even my cat wanted to get in on the decorating!

IMG_3200

Photo shoot crasher

Have a safe and happy Halloween, everyone!

Pin It

Spooky Graveyard Cake

Posted on

IMG_4585

It’s Halloween time! It’s my favorite time of year. This year I decided to do a graveyard cake. I’ve also been busy working on my Zoltar costume the past month. This cake has a bunch of candy melts for decoration and was made with my mom’s Triple Chocolate Cake and Sweet Savory Life’s Chocolate Buttercream Frosting.

100_3903

First try wasn’t cutting it

I did a graveyard cake in the past but was unhappy with how it turned out, so I felt like trying it again. The original one had cookies for tombstones and a real stick for a tree. It was cute, but I wanted something that was completely edible this time around and a little more extravagant.

Materials

  • Frosted 9in x 13in cake
  • Green frosting (for grass)
  • Candy melts in chocolate, black, and white.
  • Tombstones (made from cookies, fondant, candy molds, etc) I used Wilton’s Creepy Tombstone Candy Mold. This has been discontinued, but if you search around in stores and online, you might be able to find it. I found mine just last week at my local Michaels on clearance for $0.99!
  • Fence templates (Template 1, Template 2)
  • Tree template
  • Candy decor (candy corn pumpkins, Peep ghosts, bone candy, Wilton Skeleton Bones Candy Mold, bug candy, etc). You can decorate it with anything you like really. These were just the items I used for this cake.
  • Oreos or other chocolate cookie (for dirt)

I made the cake in a 9in x 13in cake pan but when turned out on the platter, was closer to 7in x 11in. The fence templates I’ve included are made for the 7in x 11in cake (although the fence doesn’t quite meet up everywhere.) If you make a larger (or smaller) cake resize the fences accordingly.

Once the cake has cooled and been frosted, place your tombstones. The ones I used were very big so that dictated the proportion of my cake. Then I made my skeleton with white candy melts in the Skeleton Bones Candy Mold and placed pieces of him in front of one of the tombstones. I also put the Peep ghost and other decor in the graveyard to my liking.

IMG_4578

Continue reading »

Pin It

A Halloween Treat: Maggot and Worm Cupcakes

Posted on

Happy Halloween folks! Creep out your friends and family with these simple but gross maggot and worm cupcakes! I’m not kidding, they were easy to make. This was my first time working with fondant and it was pretty fun. It’s like sugar clay.

I’ve had a lot going on lately what with moving and Halloween costumes, so I planned to make some quick cupcakes for the Halloween party I went to. I found an awesome recipe for a doctored chocolate cake mix from My Baking Addiction. She fancied up a regular ol’ box of chocolate cake mix into something moist and delicious. Check out her website for the recipe!

For the frosting, I used Savory Sweet Life’s Chocolate Buttercream Frosting recipe. I love this frosting because it’s chocolately, not too sweet, and tastes great with chocolate cake.

You could put these creepy cupcake toppers on any type of cupcake though. It’s not difficult to make them either. I chose to go the store-bought route with my fondant this time since I’d never used it before. Some people suggested I make marshmallow fondant. Maybe next time.

If you start with white fondant, color the fondant a little bit at a time with gel or icing dyes. Liquid food coloring might thin out the fondant too much. Gel-like coloring is best. I added the coloring to the fondant with a toothpick and kneaded it until the color was uniform.

Make the shapes for your maggots and worms just like you would when you were a kid playing with clay. I flattened out a separate piece of fondant for the band on the worm and attached it after I had rolled out the worm’s body.

Clay tools are handy when sculpting fondant. I have this basic set I found on Amazon.

I used a small tool that I could easily make impressions on the fondant to create the ring indentations on the worms and maggots. If the fondant gets sticky from the moisture on your hands, have a little powdered sugar on hand to sprinkle on the fondant and your hands to dry it up.

Press your tool into the fondant all the way around the worms and maggots. I drew some features on the maggots with a food marker too.

To make them even more realistic, I made a sugary glaze to brush on top of the maggots and worms once I had placed them on the cupcakes. The glaze recipe is below.

Sugary Glaze

Ingredients

  • 1/4 cup sugar
  • 1 tbs cornstarch
  • 1/2 cup water
  • 1 tbs corn syrup

Instructions

  1. Bring the sugar and 1/2 of the water (1/4 cup) to a boil.
  2. Dissolve the cornstarch in the remaining water. Add to the boiling water and cook till clear and thick.
  3. Stir in the corn syrup. Bring back to a boil and remove from heat.
  4. Let cool and then brush onto your fondant.

Notes

*If you let it cool too long, the mixture will be come gelatine-like and too thick to spread. *This recipe will make more than enough glaze. You can cut the recipe in half if you want.

https://shaneskillercupcakes.com/2012/10/a-halloween-treat-maggot-and-worm-cupcakes/

Are you making any Halloween treats this year? What about costumes? I love Halloween costumes and I would love to see yours. Post a picture below or on my Facebook page of your spooky treats and costumes.

Have a wonderful, safe, and happy Halloween!

Here’s a peek at my Roy Lichtenstein comic book girl costume.

By the way, don’t forget to enter my giveaway for a copy of Lily Vanilli’s A Zombie Ate My Cupcake. Giveaway ends Oct. 31st!

Pin It

The Last Cupcake: A Zombie Cupcake Deluge (And Other Halloween Treats) {Recipe}

Posted on

Halloween is my favorite holiday (with Christmas at a close second), so I try to go all out when it comes to costumes and treats.   This year I went with a zombie theme and tried to recreate the Shirt.Woot.com t-shirt design called The Last Cupcake as well as make the scariest zombie costume I could think of.  Both turned out better than expected!

I made the zombie bodies with a template I got from Skip To My Lou and cut the tops off with my Provo Craft paper shapers. I think it was a grass design. I have to give credit to death by cupcake for giving me the idea to make the arms and weapons from paper. It really helped make the cupcakes look exactly like the shirt design.

I also made a couple other Halloween treats for the party I went to this weekend. Since I only used 13 cupcakes to make the zombie display, I divided the rest into skulls and spiders.

I decorated the skulls with white frosting, white jelly beans, M&Ms, half of a mini Oreo, and black gel for the nostrils. The spiders were decorated with chocolate frosting, candy coated sunflower seeds for the eyes, white jimmies for the fangs and metal spider cupcake stands from Target.

The last treat I made were chocolate truffles. They always go over well and are super easy to make. I found the recipe on the Kraft website once and was surprised at how few ingredients went into them.


They can be decorated with pretty much anything. I used a combination of candy melts, unsweetened cocoa, coconut flakes, powdered sugar, Halloween sprinkles and sanding sugar. To make them a little more festive for the holiday, I displayed them in little wooden coffins that I got from Michaels that I painted and decorated with glittery designs.

{Recipe}

Easy Chocolate Truffles

INGREDIENTS

  • 1 pkg. (8 oz.) PHILADELPHIA Cream Cheese, softened
  • 3 cups  powdered sugar
  • 1-1/2 pkg. (12 squares) BAKER’S Semi-Sweet Chocolate, melted
  • 1-1/2 tsp.  vanilla

DIRECTIONS

  • BEAT cream cheese in large bowl with electric mixer on medium speed until smooth. Gradually add sugar, mixing until well blended.
  • ADD melted chocolate and vanilla; mix well. Refrigerate 1 hour or until chilled.
  • SHAPE into 1-inch balls. Roll in walnuts, cocoa, powdered sugar or coconut. Store in refrigerator.

SUGGESTIONS

  • For coatings: Ground walnuts, unsweetened cocoa, powdered sugar and/or flake coconut. The sky is the limit for coatings. Come up with your own toppings if you want.
  • Add liqueur: Make as directed except omit the vanilla and add 2-3 tbsp. of almond, coffee or orange-flavored liqueur to the mixture. If you want to use all three, separate the mixture into thirds and flavor each third with one tbsp. of the liqueurs.
Recipe via Kraft Foods.

Happy Halloween Everyone!!

[polldaddy rating=”5093286″]

Creative Commons License
Shane’s Killer Cupcakes by Shane Russell is licensed under a Creative Commons Attribution-NoDerivs 3.0 Unported License.
Permissions beyond the scope of this license may be available at http://cupcakeattack.wordpress.com/contact/.


Silent Hill Nurse Cake

Posted on

So as I said in a previous post, I’m going to be a zombie nurse for Halloween this year. In my preparation for my costume I’ve come across many photos of the Bubble Head Nurses from the video game and movie Silent Hill. In my search, I found MammaJammaCakes Flickr that had an amazingly realistic looking Silent Hill Nurse cake posted. This cake is fantastic, but I’d be afraid to go anywhere near it. The nurse might start shuffling out of the base and kill me or something. *Shudder*

[polldaddy rating=”5093286″]

Related Posts Plugin for WordPress, Blogger...