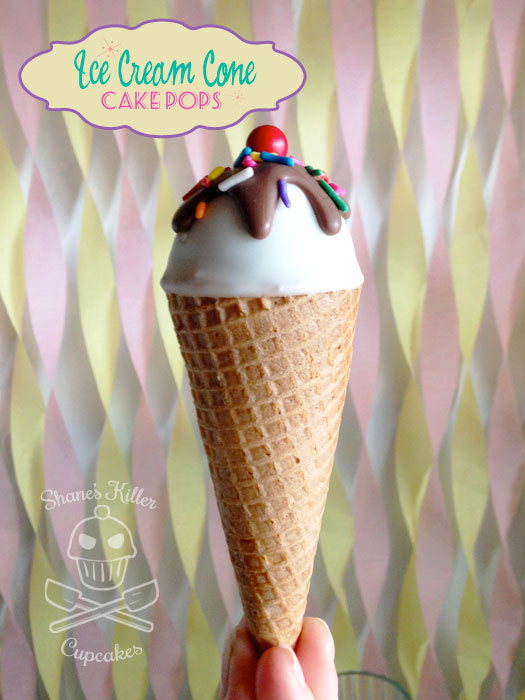
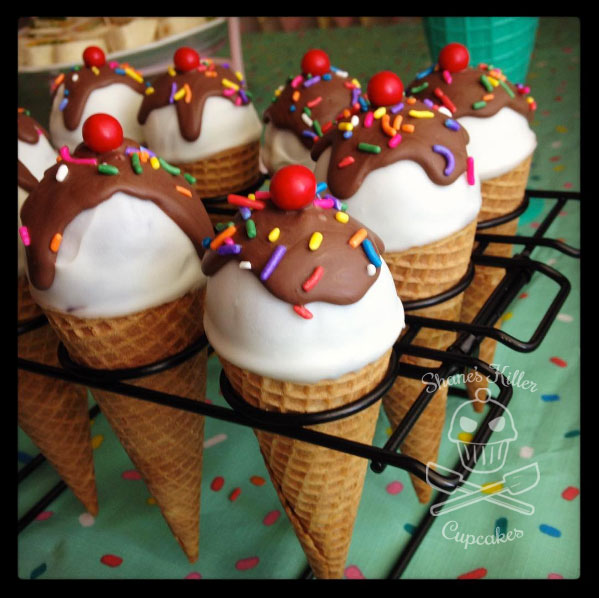
I made these Ice Cream Cone Cake Pops for my recent Ice Cream Social. They were popular. I only made 12 and at some point had to hide one for myself to eat, because they were flying off the table!
They take a bit of prep and construction like most cake pops, but since they aren’t attached to a stick, they are, for me at least, much easier to make.
Ingredients
- 12 pk. of sugar cones
- 2-3 pks. of candy melts in chocolate and white or pink (I used dark chocolate for inside chocolate and milk chocolate for "syrup" on top)
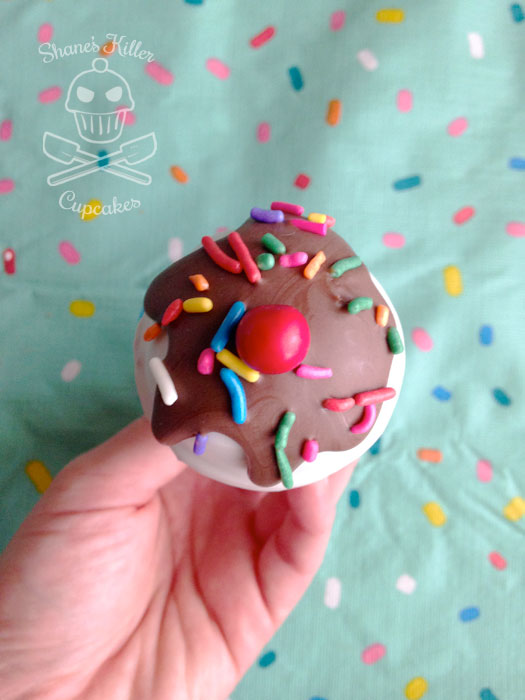
- 12 red round candies for "cherry" (I used Sixlets)
- 1 pk. of cake mix + ingredients used to make the cake (I used Duncan Hines chocolate cake mix)
- 1 can of frosting (I used chocolate but white frosting works too)
- Colored jimmies
- A stand for the cones
Instructions
- Make the cake as per instructions on the box or recipe and cook in a 13" x 9" pan. Let cool completely.
- While cake is cooking, prepare the cones by placing them in a stand and drizzle about an inch or so of melted* chocolate in the bottom of each cone. Stick the cones in the freezer for a few minutes to set the chocolate.
- When cake is cool, crumble the cake finely and mix in up to three fourths of the frosting. Add a little bit at a time until the cake is moist and sticks together.
- Chill mixture covered in plastic wrap for 15 minutes.
- Form cake balls from the chilled mixture into about 1.5"-2" balls, making one side of the ball slightly more pointed than the other. The pointier end will go into the cone.
- To attach the cake ball to the cone, run some melted chocolate around the top inside edges of the cone and stick the ball in. Repeat for all of the pops and then freeze cones again for a few minutes.
- Melt* the white or pink candy melts in a mug to cover the rounded "ice cream" cake ball part of the pops.
- Dip each cake pop until all of the cake ball is covered up to the top of the cone. Place in cone stand and chill once again.
- Melt (or remelt) more chocolate in a Ziploc snip a corner of the bag. Pipe/drip it over the top of the hardened white candy melts. Tap the side of or lightly shake the cone to control the chocolate drips.
- While chocolate "syrup" drips are still wet, place one red candy "cherry" and some jimmies on top. Then chill cake pops once more.
Notes
*Melt chocolate according to instructions on the package
The cake pops are very rich! One pop was enough for me. I wasn’t able to eat my cake pop until the day after the party and the cone was a bit stale by then. I imagine all of the moistness from the chocolate and cake will make the cone less crunchy but it still tastes good and the added chocolate at the bottom of the cone is a nice surprise. It reminds me of those Nestle Drumstick cones.