Handmade KitchenAid Stand Mixer Cover

Posted on

mixer_coverI know a lot of you have a KitchenAid stand mixer and hate that it collects dust on your counter when you’re not using it. I’m new to the stand mixer. When I received mine for my birthday back in December, I had to get used to using it instead of the ancient hand mixer I’d been using since I was a kid.

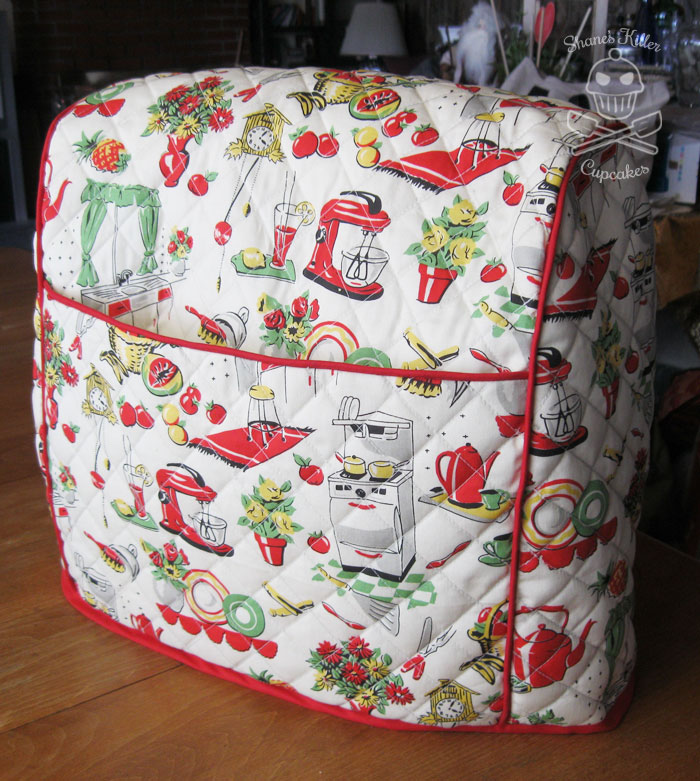
The thing I hated most was having to wash the bowl every time I used it because it was covered in dust. This prompted me to look into getting a cover for it, but which one to choose? They run about $20-$40 on Amazon, but I didn’t see any designs I liked. I figured if I’m going to have to pay that much money for one, I might as well put that money into a customized homemade one.

The past few months I’ve been learning to sew. I’m pretty new at it, but when I saw the instructions for making my own cover on this About.com article, I decided to give it a shot. I even added a few things to it like a lining and a side pocket.

IMG_5621

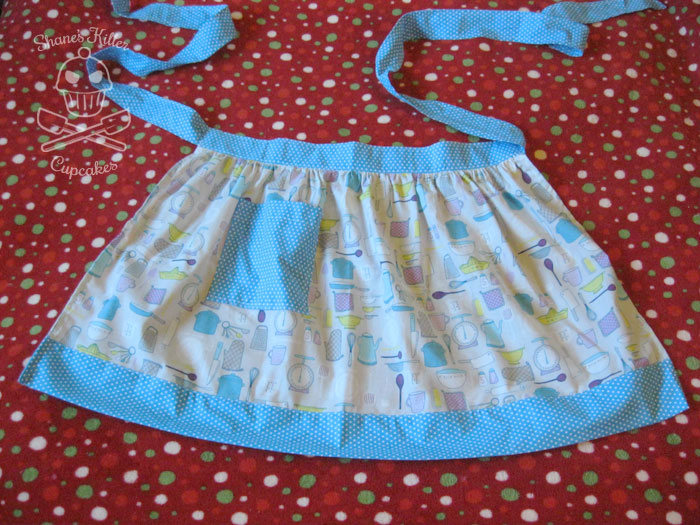
The pocket was a little tricky, but if you have some basic sewing skills, you can figure it out. I started with the outside part of the pocket. Cut out some pieces for the pocket from the outer fabric, interfacing, and the lining that will fit the width of the mixer cover side and go up about 9 inches. Sew the outer fabric (with interfacing attached) and the lining to some piping along one long side, then when you attach the rest of it together, remember to add it on to one side of the cover.

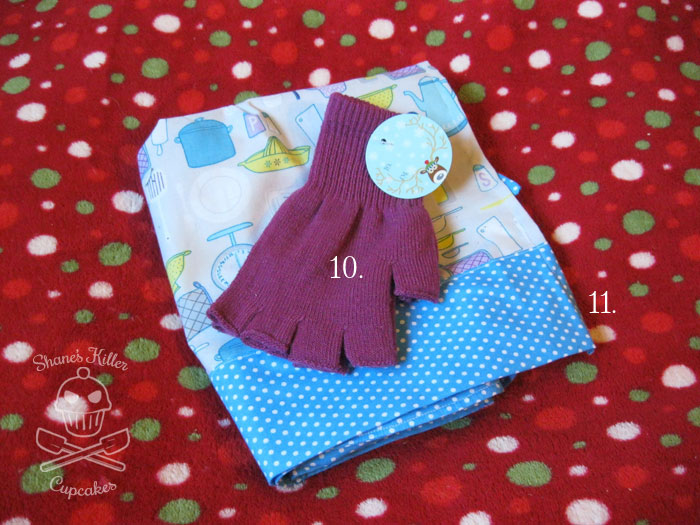
Another alteration I did works well for fabrics that have a pattern that goes in one direction, like the Fifties Kitchen by Michael Miller fabric that I used. I didn’t want the retro kitchen pattern to be upside down on one side, so I added an inch to the length of the long center piece, cut it down the middle and sewed it back together with a 1/2 inch seam so both sides were right side up. It worked out really well.

If you’re even more adventurous, you can quilt the fabric so it has that kind of design on it. I have no idea about quilting, but I just marked out some lines with pencil (although disappearing fabric ink is probably better) and sewed along the lines on the outer fabric that I’d already attached the interfacing to. I used a fusible interfacing that looked sort of like felt. Not sure what it’s called. Then I sewed the whole thing together with the lining added.

The only thing I had a problem with while using the About.com instructions, is that the measurements they gave for the stand mixer cover seemed to be about 1/2 inch too short for my mixer. So make sure it works for the mixer you have before cutting your fabric.

If you make a cover with these instructions or some other way, post a picture of the finished product in the comments below or on my Facebook page! I’d love to see what yours looks like.


Pin It

The Conclusion of 24 Days of Advent Calendar Fun: Days 19-24

Posted on

IMG_5216

These last few days have been busy around here. So much going on for the holidays: baking, present wrapping, last minute present making, etc. With that, the advent calendar has been sort of on a back burner. I haven’t even been able to update the blog about it until now! Three of the days I gave my grandma chocolates, because we were too busy to do any extra activities. But we did get a few fun things done.

Since I’m covering six days in this post, I’ll skip Days 19, 21, and 22 because she only got chocolate those days and there isn’t much to say about it other than that.

Day 20

IMG_5197

On the 20th we made a cute Christmas paper garland kit that I found in the dollar section at Target. It came with stickers, little ornament shapes, and some string. Grandma helped me place the stickers on the ornaments and then I strung it up in our living room.

IMG_5195Day 23

Yesterday we worked on decorating some sugar cookies! I’ve always wanted to try royal icing for cookies but figured that it would be too complicated for my grandma to participate in, so I opted to frost the cookies with canned frosting and let her sprinkle things on them. I also decorated a few since that’s my favorite part of baking.

IMG_5211

I used a Betty Crocker sugar cookie mix for this project to make things quick and simple. They turned out fairly good. I might have made them too thin though, because they are a little crunchier than I like. One thing I thought was interesting is how different each batch baked. The first batch was cooked on a pizza stone, and the dough didn’t change its shape much but took way longer to bake. I baked the second batch on a baking pan lined with a silicone mat and they expanded much more than the first cookies and were done at least 5-7 minutes sooner. Of the two, I think I liked the pizza stone cookies more since they still resembled their original shapes.

IMG_5212

I found that detailed decorating with frosting is not very easy, this is probably why people use different icings on cookies but I think our cookies turned out pretty cute.

IMG_5225Day 24

Today we are going to watch another Christmas themed movie as our final advent calendar activity. I chose Rudolph the Red-Nosed Reindeer this time. It’s a Christmas classic. I remember one time while watching this movie about 20 years ago, my family’s old grandfather clock that hadn’t worked in years, decided to let out one bong out of nowhere. It’s was really odd. That memory has always stuck with me. Maybe it was Santa letting me know he was on his way.

IMG_5227

I hope my grandma enjoys watching this with me today.

Well, that ends the 24 days of Advent Calendar Fun. I hope you had fun following us on our Christmas adventures this year, and maybe even tried some of the activities yourself. Have a great Christmas tomorrow!

If you’ve missed any of the previous days, here are the links:

You can find instructions for how to make this advent calendar at Holiday Crafts and Creations.

**The snowflakes in the title image are from www.obsidiandawn.com and www.graphicssoft.about.com**


Pin It

24 Days of Advent Calendar Fun: Days 17-18

Posted on

IMG_5179Today’s post is covering Day 17 and 18 in the Advent Calendar of Fun. Yesterday was a mellow day and today was a fun one.

Day 17

I gave my grandma more candy yesterday so not much happened with it other than that.

Day 18

Today though, was “Have a Christmas Cocktail” Day! Whoo-hoo! My grandma loves alcohol or as she calls “kick-a-poo juice.” Doesn’t matter what kind: wine, beer, mixed drinks, etc., it’s all good. So I knew she’d appreciate a day where our activity was drinking an alcoholic drink.

It’s a bit cold here today so I chose to make Hot Buttered Rum for us. Never made it before, but now I don’t think I could live without it. I used, I believe, a Rachael Ray recipe from the Food Network website. It was delicious. Although I don’t know how spices, butter, rum, brown sugar and honey couldn’t be delicious. It’s a tad strong (although I did put a little more rum than called for because my bottle was almost empty), so if you don’t like strong drinks, add less rum. I also chose to substitute dark rum for the spiced rum. It should be good with spiced rum too but dark just sounded better to me today.

IMG_5170I didn’t have glass mugs so I used my dad’s beer steins. Doesn’t matter what you drink it out of, it’s going to be good.

I used slightly less honey than was called for and it was still pretty sweet. I might leave out some of the brown sugar next time.

IMG_5167In the next few days we’ll be baking again, so don’t miss it!

If you’ve missed any of the previous days, here are the links:

You can find instructions for how to make this advent calendar at Holiday Crafts and Creations.

**The snowflakes in the title image are from www.obsidiandawn.com and www.graphicssoft.about.com**


Pin It

24 Days of Advent Calendar Fun: Days 12-16

Posted on

IMG_5153Hello, folks! It’s been a few days since I last updated my Advent Calendar of Fun, but I had good reason. My birthday was on Saturday, and I was busy with that, other holiday activities, and the actual advent calendar activities, so I didn’t have some to write the blog post until now.

We did quite a few things these past few days. We made treats, watched movies, and my grandma got a few little trinkets on days 12 – 16.

Day 12

I let my grandma open this a day early, because I gave her some felt tip pens, but forgot to give them to her before we wrote her Christmas cards up on the 11th. Silly me.

Day 13

For lucky Friday the 13th, I just gave her a chocolate marshmallow snowman candy since she hadn’t received candy in a while.

Day 14

Since this day was my birthday, and I knew I’d be too busy for an activity, I gave her a pair of fuzzy warm socks that have anti-slip rubber nubs on the bottom. These kinds of socks are great for her because we don’t want her to slip and fall which is easy to do on our faux wood floors.

IMG_5128Day 15

Yesterday we made mini pie bites with my Babycakes Pie Pop Maker. I love the line of Babycakes products, but sometimes they can be a little out of my price range. I found this Pie Pop Maker at the discount store Big Lots for $10 about a year ago but hadn’t used it much yet. What better time than the holidays to pull it out!

IMG_5140

I usually don’t use the pop sticks because it seems wasteful since I usually eat 4 or 5 mini pies at a time. The size of these treats is perfect for desserts or appetizers. It also comes with its own dough cutting tool so that the crust fits perfectly into the machine.

IMG_5139

For the fillings I tried two different flavors. I always like finding ways to use my IKEA lingonberry jam, so I made half of the mini pies with the jam filling and the other half with Trader Joe’s Cocoa Almond Spread.

IMG_5143Both flavors tasted great! I would definitely use these again. The thing that’s great about the Pie Pop Maker is that it only takes about 2-4 minutes for each batch of 6. I wish I could make more at a time but since they cook so quickly, it didn’t take long before we had a plate full of delicious mini pies.

IMG_5145For the last two pies I made, I put both fillings into one and it was pretty darn good too!

IMG_5147Day 16

Today her advent calendar activity was to watch a Christmas themed movie. She also received a roll of Santa Bubble Tape gum. I haven’t had any of that type of gum since I was a kid.

For the movie, Grandma chose to watch How The Grinch Stole Christmas. This is one of my favorite Christmas movies from my childhood and I can’t wait to see it again. I guess today’s calendar mitten inadvertently had the theme of my childhood.

IMG_5150

I can’t believe Christmas is almost here! I look forward to this Wednesday’s activity. You’ll have to come back to find out what it is.

If you’ve missed any of the previous days, here are the links:

You can find instructions for how to make this advent calendar at Holiday Crafts and Creations.

**The snowflakes in the title image are from www.obsidiandawn.com and www.graphicssoft.about.com**

Pin It

It’s Time For A Christmas Giveaway!

Posted on

IMG_5084_3

It’s time for a Christmas Giveaway! I love the holidays and found a few items that will help with your holiday entertaining needs. There’s even a special handmade item from me!

Here’s what you get:

IMG_5082_2

  1.  Cardboard Christmas Themed Cupcake Stand
  2. Christmas Tree Candy Mold
  3. Santa Cupcake Toppers
  4. Christmas Themed Cupcake Liners and Toppers
  5. Cupcake Corer
  6. Decorative Paper StrawsIMG_5078_2
  7. Card Display Kit
  8. An Ornament Frame
  9. Plastic Mustache Party Shot GlassesIMG_5080_2
  10. Fingerless Gloves
  11. Handemade Kitchen Themed Half Apron

I’ve been in the sewing spirit lately and made a pretty apron for you guys! Here’s what the fabric looks like up close:

IMG_5089And here it is all spread out:

IMG_5094


Enter the Giveaway

To enter this giveaway fill out the Rafflecopter form below. All that is mandatory is that you enter your name and an email address I can contact you with if you win. The rest of the options are optional, but will give you a better chance at winning the more you complete.

Rules

This giveaway is open to all residents of the US who are 18 years or older. Void where prohibited. For complete rules please read the Official Rules page.

a Rafflecopter giveaway

Pin It

24 Days of Advent Calendar Fun: Days 9-11

Posted on

IMG_5060Days 9 through 11 of our Advent Calendar are done and the results were great.

Day 9

On the 9th, I made it easy and gave my grandma a bottle of nail polish. She loves to have her nails painted, so I added another color to her stash. This one is called Mistress. How scandalous!

IMG_5055Day 10

Day 10 was a fun activity. We made a popcorn and cranberry garland for our Christmas tree. I’ve never really made a popcorn garland before and found that it’s trickier to do than I had expected. You have to search through the popcorn to find the right kind of puffy popcorn to string, otherwise they break apart easily.

IMG_5035I used fishing line to string them on, because I figured it would tangle less than thread (which was the case), but it still would get tangled every few minutes or so. If you make one of these, plan to devote a lot of time to it and have patience. You’ll need it.

IMG_5036It ended up looking really pretty though. I think the added cranberries make it look a little classier than a normal popcorn garland and the cream and dark red colors are very nice against our tree.

IMG_5046It even makes our new Martooni ornament stand out nicely.

IMG_5041This activity was a fun one, and my grandma was able to help me by pulling the popcorn and cranberries down the string and keeping them untangled.

Day 11

Today was dedicated to getting Grandma’s Christmas cards written up and mailed. Over the years she’s received a bunch of cute Christmas card sets from organizations she’s donated to so we picked a few cards to send from her stock.

IMG_5051The closer we get to Christmas, the more excited I get! Check back in a couple of days for another installment of 24 Days of Advent Calendar Fun!

If you’ve missed any of the previous days, here are the links:

You can find instructions for how to make this advent calendar at Holiday Crafts and Creations.

**The snowflakes in the title image are from www.obsidiandawn.com and www.graphicssoft.about.com**

Related Posts Plugin for WordPress, Blogger...Pin It