Mini Birthday in a Box

Posted on

Birthdays can feel a little stale as we get older. I know I don’t look forward to my birthday with the same excitement and wonder I had when I was a child. And birthdays are even less exciting when you don’t have the ones you love with you to celebrate them. That’s why I put together this mini birthday in a box for my boyfriend when his birthday rolled around earlier this month and I couldn’t join him for it.

minibdaybox6

The BF had to relocate for work about 1250 miles from where I live and seeing him has gotten a little difficult. It didn’t help that his move also had to happen right before the holidays and we were apart for about 3 holidays and his birthday in the past 2 months. But to make him feel as much like he is at home (and to keep my mind off the fact that he’s MOVED 1250 MILES AWAY!), I’ve been sending him little care packages whenever I could. One of them was this mini party in a box for his birthday.

minibdaybox2

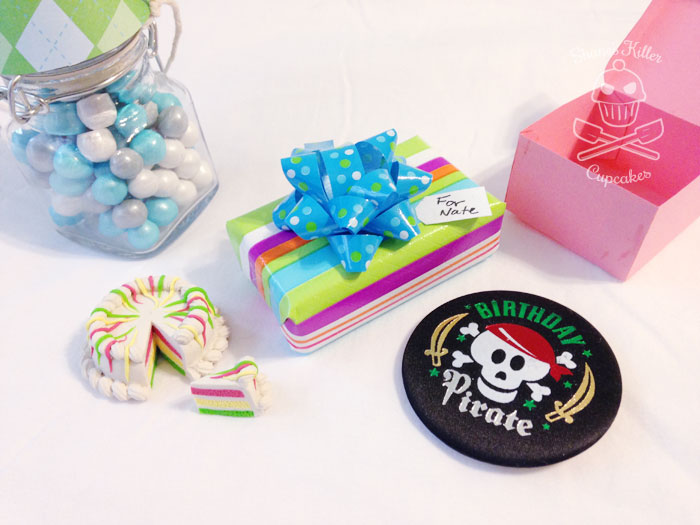
The small 5in x 5in x 5in box includes:

  • Mini birthday banner
  • Birthday pirate badge
  • Tiny party hat
  • Balloon
  • Jar of candy
  • Confetti with instructions on how to distribute it
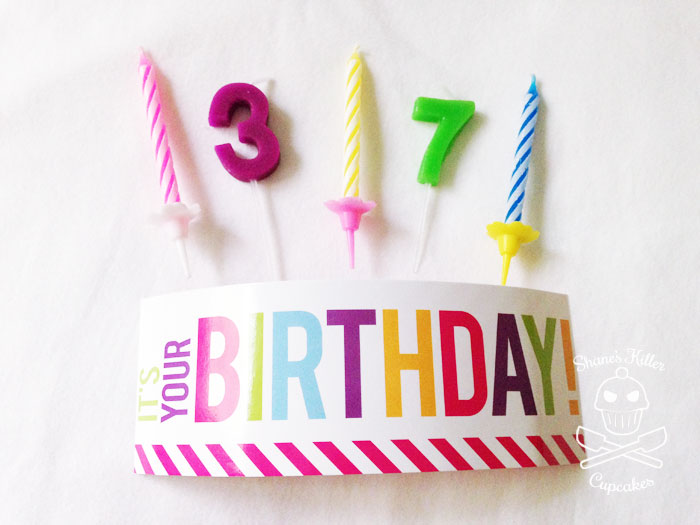
  • Candles (including ones that remind him of his “old age”)
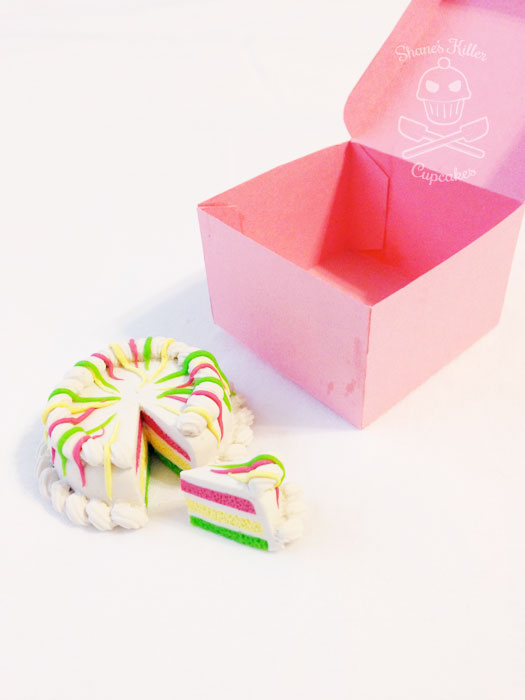
  • Polymer clay cake and an itty bitty pastry box
  • Small wrapped birthday present
  • An “It’s Your Birthday!” sign that I repurposed from a bookmark

minibdaybox5

The clay cake was a new area for me. I make real cakes all the time but making a miniature cake from clay was a totally different experience. I watched a few tutorials to get the hang of working with polymer clay for tiny food, but it was still much harder than I expected! I have new respect for the adorable clay food jewelry I see on Etsy and Tiny Hands Food Jewelry. The pastry box was much easier. I just found a cake box template online and then downsized it and cut it out of pink card stock. Even the glue marks that were left on the paper looked like authentic grease spots!

minibdaybox4

For the mini party hat, I made a circle by tracing a bowl onto the patterned paper I wanted to use. I cut it out and then cut it in half. Next I wrapped the half circle into a cone and glued it together. When the glue was dry, I hot glued a sparkly pom onto the top. I attached the strings to the sides by tying them to small holes I punched on either side of the hat.

minibdaybox7

Luckily, my boyfriend puts up with all my crafty projects and may even enjoy them.

minibdaybox

Do you do anything special for holidays or birthdays for friends and family who live far away? I’d love to hear some of your ideas for care packages!

****Disclosure: I am a Tiny Hands Ambassador.  I make a small commission from Tiny Hands sales made from my Facebook page.**** 
Pin It

Holiday eShakti Dress Giveaway

Posted on

headimage

I’ve reviewed eShakti.com dresses a couple times in the past and really love how customizable they are, yet still affordable. Lucky for you, eShakti has given me the chance to offer my readers another giveaway for their website! One winner will be able to choose any dress they like from eShakti.com’s large selection of fully customizable dresses. What a better time than now to pick out that special holiday dress you’ve been meaning to buy!

eShakti offers many ways to customize a garment including changing the neckline, hem length, or sleeve length. You can also input your personal measurements to make sure your dress it going to fit your exact body type. You can get all of these customizations for just an extra $7.50! Taking a dress to a seamstress or tailor to custom fit it could cost easily ten times as much, sometimes even more. And it even gets better: If you’ve never customized a dress from eShakti before, your first time is free!

customsleeve

If you’d rather buy a dress without customization, they offer sizes from 0-36W. Every woman is welcome at eShakti.

Another perk if you’re new to eShakti, if you register with their website, you get a $30 gift coupon toward your first order! They really want you to have their clothing, guys.

eShakti also offers a selection of skirts, tops, and jackets. Check out their New Arrivals section for their latest beautiful editions.

You can choose any dress you want from eShakti if you win the giveaway, but I’ve selected a few dresses below that I think would be perfect for the holidays:

1. Beaded snowflake ponte sheath dress

2. Beaded crepe sheath dress

3. Beaded polka dot tulle dress

4. Floral lurex jacquard sheath dress

5. Floral jacquard sequin waist dress

6. Grace dress


FOLLOW & CONNECT

You can now connect with and follow eShakti on Facebook, Twitter, Pinterest, Tumblr, Google+, and Instagram!

GIVEAWAY

To Enter: Fill out the mandatory entry of your name and email in the Rafflecopter widget below. After that, enter as many optional entries as you like to increase your chance of winning.

Eligibility: eShakti only ships to the US and Canada at this time, so unfortunately, this giveaway is limited to residents of only those countries.

The giveaway ends at 11:59 pm EST on December 1st, 2014. Come back daily for more entries!

For complete giveaway rules click the link below:

Official Giveaway Rules

a Rafflecopter giveaway

Pin It

Shabby Chic Tea Party

Posted on

The tea party was a success! Putting on a party mostly by yourself is a tad daunting, but I’m really pleased with how everything turned out. Of course I was getting things ready all the way up to when people started to arrive, so I didn’t get all the photographs of the decor I wanted, but these pictures will give you an idea of what it looked like.

I made most of the decor myself. I explained how to make some of the decor here and here. For this lovely background, I found instructions at KoJo Designs for the paper flowers and at Shiny Happy Sprinkles for the paper fringed backdrop. It’s a really great idea for an inexpensive background that looks pretty and covers a good sized area. Something like this would be perfect for a photo booth background too!

I invited my guests with these home made tea invites. The invite is about the size of a business card and I attached it to a bag of tea.

IMG_5716

I asked my friends to dress up in their nicest clothes, and while everyone did, I put an accessories table together just in case someone didn’t have any fancy jewelry or hats to wear.

teaparty1

There was one table that had all the tea supplies ready and I decorated the fireplace and mantel with flowers, candles, and the fabric swag and tea party banner that I showed you how to make last week. I had various glassware for my guests to drink iced teas from, but my favorites were these milk bottles I decorated with ribbon and paper flowers.

IMG_2186

The food table had all sorts of treats that fluctuated throughout the day. I provided tea sandwiches, cookies, biscuits and jam, petits fours, popcorn, fruit salad and candy. There was a ton to eat!

teaparty2

These chocolate-dipped shortbread tea bag cookies were a hit! You can find the recipe for them here. The petits fours were also popular, especially the chocolate ones since they were devoured before I was able to get a closeup photo of them. If you’d like to make the petits fours click here for the recipe.

Thanks for joining me for my tea party!

IMG_2210

Pin It

D.I.Y. Shabby Chic Party Decor {Part 2}

Posted on

DIYShabbyLogopart2_2

In this second and final installment of my Shabby Chic Tea Party crafts series I’m going to go over a couple of easy tissue paper and painting crafts that will instantly add a lot of shabby chic charm to your decor.

Tissue Paper Flowers and Poms

Tissue Flowers and Poms are pretty simple to make. It’s a craft that I think they even teach in elementary school, that’s how easy this is. To make both, follow the instructions below:

tissuepom1. Select your tissue pieces. The length of a sheet of tissue paper is a good starting point and depending on how wide you want your pom, trim it down. I believe for the pink pom above I used 20 inch x 20 inch tissue paper and cut it in half giving me 20 inch x 10 inch sheets. Next, layer about 8-10 sheets on top of each other. For flower poms, you wont need as many sheets, maybe 4 or 5 at most.

2. Next, accordion fold your sheets. Make the folds about one inch in size.

3. Gather up your folds and twist some wire around the center. If you’re making a flower, chenille stems (pipe cleaners) are good for this, because they will hold the paper together and also act as a flower stem. For the poms, make a hook or loop from the other end of the wire for hanging purposes. On the top and bottom, cut a rounded or pointed tip. This will make it look more rounded or flower-like once you open the layers.

4. Fan out the paper and carefully pull the layers apart. Take it slow or you might end up tearing your petals.

Painted Decor

Painted Crate

To paint a crate to look shabby chic, you’re going to want to either start with some old wood or if you buy a new crate, like I did, layer some colors on top of each other. If you start with old, darkened wood, paint on top of it with a soft pastel or white and when it’s dry, sand some of the paint off so that it looks worn and old.

For a new crate, or other wooden object, paint it in a base coat of some brown.

IMG_5742

When that layer is dry, paint it with your top color. I chose a pretty turquoise color. Don’t worry about full coverage here. If some of the brown shows through, that will add to the worn effect.

IMG_5745

When I was done painting the turquoise, I felt like it was a little too bright so I softened it up with a paint mixture of the turquoise and white. I sort of dry brushed it on so that it wouldn’t cover up too much of the original turquoise. Dry brushing is done with a dry brush and just a little paint on the tip. It creates a streaking effect and looks good for this craft.

IMG_5755

The light top coat also gave the paint a sun bleached look that was great. The final step is to sand the edges and across the sides a little so that the brown shows through. The more the paint looks worn and chipped, the better. I even took a knife to it to chip some of the paint off. Distressing is your friend here.

Other Painted Decor

I would highly suggest thrift shopping for shabby chic party decor. If you can find items that you like, even if they don’t quite look right, they can always be painted. I found a set of metal napkin holders that, once painted (and sanded) looked great.

IMG_5753

When I found this candelabra at a local Goodwill it had been sloppily painted a gold color. I loved the plastic crystals hanging off of it, so I grabbed it. A couple of spray painted coats of white later, the gold was gone, and it fit in with my color scheme.

IMG_5752

Another thing I found at thrift stores were mason jars. You can also get them new if  you can’t find them used. I did a quick coat of spray paint on these babies too and then, once again, lightly sanded some of it off to look worn. I’m using these for flower vases.

IMG_5730

If you get imaginative, you can use pretty much anything, and with the right paint job, it’ll look great at your shabby chic party.

I hope these techniques are easy for you to follow. If you have any questions about any of the instructions leave a comment below.

Coming soon, I’ll document my shabby chic tea party (it’s this weekend!) and share with you how it turned out and all the yummy food I made.

If you missed Part 1 of my shabby chic party decor tutorial click here.

Pin It

D.I.Y. Shabby Chic Party Decor {Part 1}

Posted on

DIYShabbyLogopart1

This month is my shabby chic themed tea party, and I have been handcrafting a number of my decor items to keep the cost down. The best things to keep in mind for the shabby chic look is that it should look worn but charming. Chipped paint, ratty, frayed edges, and pastel floral patterns are a good place to start. This installment will cover the different banners and garlands I’ve made for the party.

Fabric Strip Swag

This was fairly easy to make and quick too. I got some pretty floral cotton fabric prints and tore them into strips. I found some of the fabric at local thrift stores for cheap and then filled it out with 1/4 yard cuts of fabric from a fabric store. The great thing about cotton fabric is that if you cut a little snip in it, you can tear the rest, and it will tear straight. This is great for two reasons: it’s super easy and quick to get your strips, and it looks a little tattered and worn for the shabby chic look. These strips are about 2-3 inches wide and vary in lengths. I eyeballed everything so that it wouldn’t look too uniform. Tie or loop the strips to a piece of twine and you’re good to go! You can also add lace or burlap ribbon to it for a varied look.

IMG_1736

Tea Party Banner

For this one, I used 4.5 inch x 6.5 inch sheets of burlap that I found in a pack at the local craft store. Any tight woven burlap will work for this, but these sheets were already the right size. You can cut them into any flag shape you want, I chose to cut them into swallowtail flag shapes.

IMG_1739

IMG_5723

For the lettering, you can do it several different ways. If you have a shape cutting machine you could make a stencil and paint it on, or free hand it, or use a light box with the lettering printed out on some paper. I chose the last option because it looked the most professional without costing me tons of money for expensive tools and it was easy. Not having a light box, I had to get creative. I used my glass serving tray and a flashlight underneath to trace the letters onto the burlap. Any piece of glass would work for this. You could even use a window and tape the printed letters to it. You just need some back lighting.

IMG_1714 IMG_5721

With a marker similar to the color you’re going to paint the letters, trace the outside of the letters. Next, fill in the letter with your paint.

IMG_5724
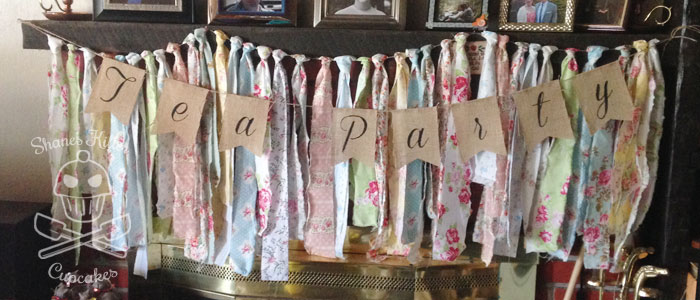
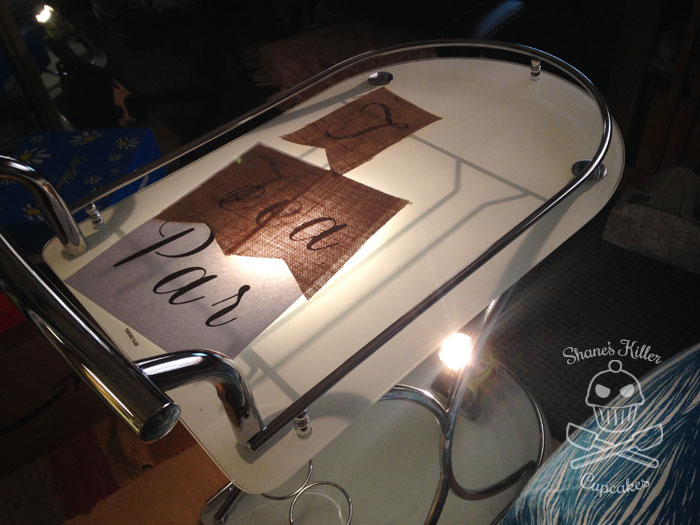
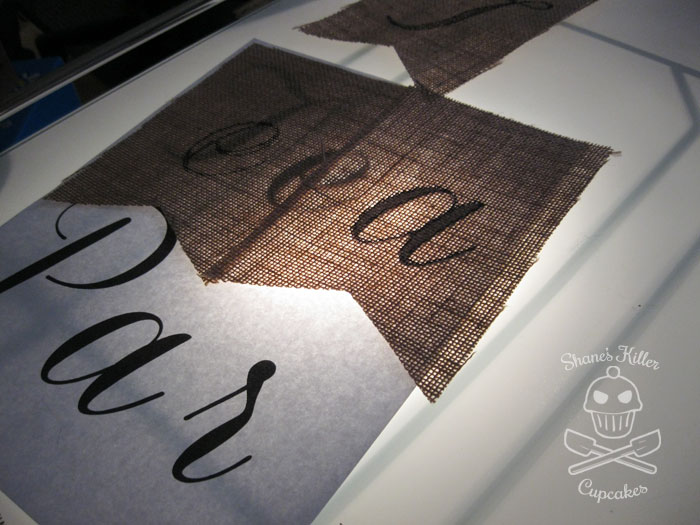
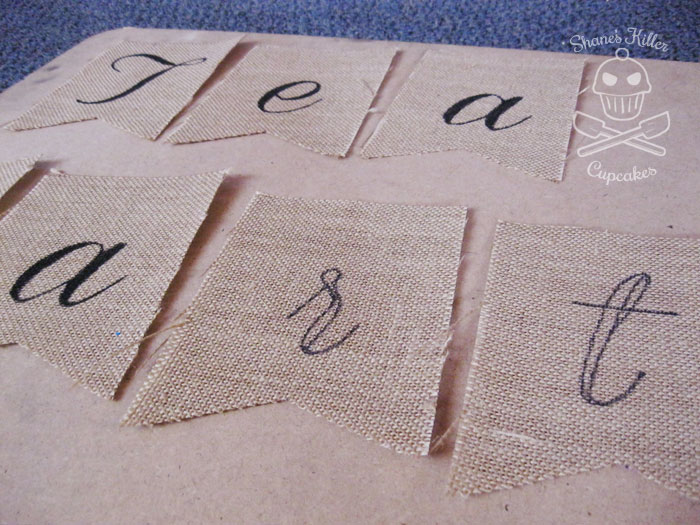
Attach the flags to some twine by folding the top over the string and hot gluing it together. Since burlap is loosely woven, be careful when hot gluing. It could get on your hands easily and burn. You could also use fabric glue but you’ll need to clamp it together while it dries.
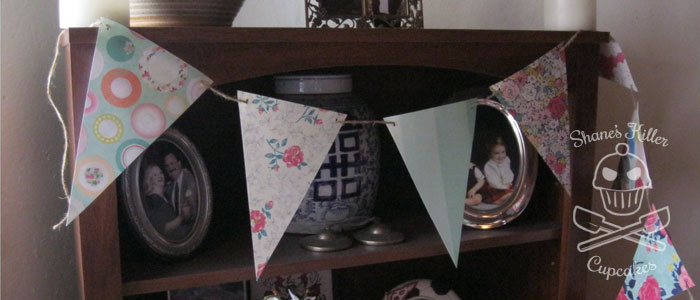
I chose to hang this banner in front of the fabric strip swag.

Pennant Flag Garland 

IMG_5750

This one is also easy. First, get a paper stack of floral prints and other paper you like from the scrapbook section of your craft store. I got an 8.5 inch x 11 inch stack and was able to get 3 pennants from each sheet of paper. Measure to the center of one of the 11 inch sides (5.5 inches) and measure 2.75 inches on either side of the other 11 inch side of the paper. Then connect the measure marks like in the diagram below and cut out your pennant shapes.

pennantflags

With a hole punch, cut a hole in each corner of the top of the pennant and string some twine through for hanging.

IMG_5746

Doily Garland

IMG_5741

This garland is very pretty and takes minimal effort. All you need is a package of 8 inch paper doilies, some paper or fabric flowers, and a piece of ribbon.

IMG_5733

Fold each doily in half, attach to a piece of ribbon and glue a flower to the center of each one. I found some paper flowers on Etsy for this garland.

I used clothespins to arrange the doilies on the ribbon and then one at a time took the pins off and hot glued the doilies down. After that, I glued the flowers down to the front. Easy peasy.

IMG_5738IMG_5740

In Part 2 of D.I.Y Shabby Chic Decor, I’ll be showing you how to make some inexpensive but pretty decor from tissue paper and a few painting projects that add the finishing touches to a shabby chic party.


Pin It

The Photography of Daily Life

Posted on

I got a smart phone for the first time this year, and the one thing I have enjoyed having with me at all times is the camera on that phone. I’m still wrapping my head around the idea that I have a camera at my fingertips pretty much at all times, because for so long I never had my camera with me when I wanted it. It was too much hassle.

I hope that taking pictures becomes more second nature to me now, because I love documenting what I see and experience. Hopefully that will also help me with this blog.

SnapKnot
Courtesy of: SnapKnot
***Disclaimer: Image posted as an entry into a giveaway
Related Posts Plugin for WordPress, Blogger...