Chocolate-Dipped Shortbread Tea Bag Cookies

Posted on

IMG_2225_2I’ve been planning a tea party for some time now and saw a picture of some tea bag cookies on a blog called Le Pétrin that I thought were cute, but it was in French, which I sadly cannot read. That’s when I decided to figure it out myself because I really wanted to include these at my party.

I found some shortbread mix in the baking aisle and decided that would be a great base for these cookies. I made a little tea pot tag in Photoshop and tied them onto the finished cookies with some thread. They were a total hit at my party!

Chocolate-Dipped Shortbread Tea Bag Cookies

Ingredients

  • 1 package Betty Crocker Shortbread Cookie Mix or a recipe from scratch (and whatever ingredients are needed to makes these)
  • 1 package of chocolate melting candy

Instructions

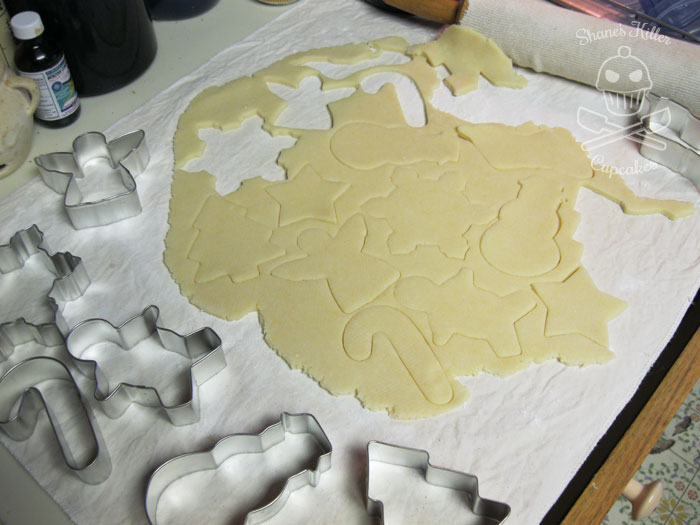
  1. Make the cookie dough according to the instructions of your mix or recipe and roll it out on a floured surface to 1/4 inch thick.
  2. Cut cookies into tea bag shapes by making rectangles and cutting the corners off one short side.
  3. Poke a hole near the top of the cookie with a wooden skewer.
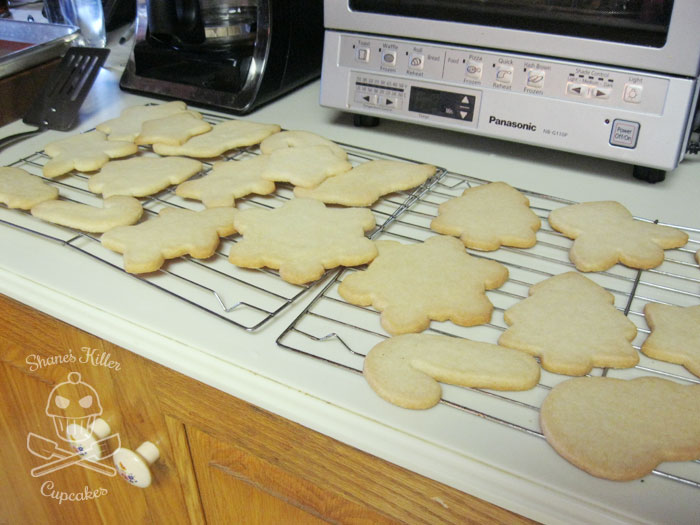
  4. Bake as directed on your cookie mix package or recipe.
  5. After they are done baking, let cool for a minute or two on the baking sheet, and then move them to a cooling rack.
  6. If the holes have closed up a little, re-poke the holes with the skewer while the cookies are still warm.
  7. Once the cookies are fully cooled, melt some chocolate in a mug in 15-30 second increments until its fully melted. If the chocolate is too thick, add a little cooking oil to thin it.
  8. Dip the cookies about a third of the way into the chocolate and place on a baking sheet covered in wax paper.
  9. Place in the fridge until the chocolate sets up.
  10. Create a tag on your computer or just cut up little blank squares and punch a small hole in it for string.
  11. Once the cookies are fully chilled, tie the string with the tag attached to the cookie.
https://shaneskillercupcakes.com/2014/07/chocolate-dipped-shortbread-tea-bag-cookies/

***07/23/14 Edited to include the source for my idea.
Pin It

The Conclusion of 24 Days of Advent Calendar Fun: Days 19-24

Posted on

IMG_5216

These last few days have been busy around here. So much going on for the holidays: baking, present wrapping, last minute present making, etc. With that, the advent calendar has been sort of on a back burner. I haven’t even been able to update the blog about it until now! Three of the days I gave my grandma chocolates, because we were too busy to do any extra activities. But we did get a few fun things done.

Since I’m covering six days in this post, I’ll skip Days 19, 21, and 22 because she only got chocolate those days and there isn’t much to say about it other than that.

Day 20

IMG_5197

On the 20th we made a cute Christmas paper garland kit that I found in the dollar section at Target. It came with stickers, little ornament shapes, and some string. Grandma helped me place the stickers on the ornaments and then I strung it up in our living room.

IMG_5195Day 23

Yesterday we worked on decorating some sugar cookies! I’ve always wanted to try royal icing for cookies but figured that it would be too complicated for my grandma to participate in, so I opted to frost the cookies with canned frosting and let her sprinkle things on them. I also decorated a few since that’s my favorite part of baking.

IMG_5211

I used a Betty Crocker sugar cookie mix for this project to make things quick and simple. They turned out fairly good. I might have made them too thin though, because they are a little crunchier than I like. One thing I thought was interesting is how different each batch baked. The first batch was cooked on a pizza stone, and the dough didn’t change its shape much but took way longer to bake. I baked the second batch on a baking pan lined with a silicone mat and they expanded much more than the first cookies and were done at least 5-7 minutes sooner. Of the two, I think I liked the pizza stone cookies more since they still resembled their original shapes.

IMG_5212

I found that detailed decorating with frosting is not very easy, this is probably why people use different icings on cookies but I think our cookies turned out pretty cute.

IMG_5225Day 24

Today we are going to watch another Christmas themed movie as our final advent calendar activity. I chose Rudolph the Red-Nosed Reindeer this time. It’s a Christmas classic. I remember one time while watching this movie about 20 years ago, my family’s old grandfather clock that hadn’t worked in years, decided to let out one bong out of nowhere. It’s was really odd. That memory has always stuck with me. Maybe it was Santa letting me know he was on his way.

IMG_5227

I hope my grandma enjoys watching this with me today.

Well, that ends the 24 days of Advent Calendar Fun. I hope you had fun following us on our Christmas adventures this year, and maybe even tried some of the activities yourself. Have a great Christmas tomorrow!

If you’ve missed any of the previous days, here are the links:

You can find instructions for how to make this advent calendar at Holiday Crafts and Creations.

**The snowflakes in the title image are from www.obsidiandawn.com and www.graphicssoft.about.com**


Pin It

Show The Protein Bakery Your Muscle {Review & Giveaway}

Posted on

image

I love sweets. And if they weren’t so horribly unhealthy, I’d eat sweets all the time. Like all day long. Making dessert is fun, but sometimes I just want to grab something quick to satisfy a sweet craving, so I was delighted to try The Protein Bakery’s line of baked goods.

IMG_4203

These nutritionally balanced goodies are trans-fat free, preservative free, and wheat flour-free. They are also made with natural ingredients like rolled oats, nuts, light brown sugar, and quality chocolate. And as the name suggests, they are packed with whey protein which is good for those wanting more protein in their diet. As healthy as these treats are though, I’d still suggest eating them in moderation, because they are definitely not low in calorie or fat.

IMG_4213

The delicious Walnut Brownie

I received a sampling of The Protein Bakery’s brownies, blondies, cookies and minis for this review. I found that I really enjoyed some of the items, but others were not quite to my liking. The walnut brownies were delicious and very moist while the peanut butter blondie I tried was flavorful but very dry. The minis were a bit dry as well. Heating them up in the microwave helped a bit but still not as moist as I was hoping for. The cookies were soft and tasted like homemade cookies. Despite dryness in a few of the treats, I liked pretty much everything I tried.

Connect with The Protein Bakery

Catch up with The Protein Bakery in many ways:

Website: http://proteinbakery.com/

Facebook: http://www.facebook.com/proteinbakerycookieswithmuscle?ref=ts

Twitter: http://twitter.com/proteinbakery

Linkedin: http://www.linkedin.com/company/the-protein-bakery?trk=fc_badge

Youtube: http://www.youtube.com/user/TheProteinBakery

Showing muscle is kind of difficult when holding a cookie.

Showing muscle is kind of difficult when holding a cookie.

Show Your Muscle Promotion!

Right now The Protein Bakery is running a “Show us your muscle” promotion! If you buy any of their products, send them a picture of yourself holding your Protein Bakery treat while making a muscle for a chance to win a free baker’s pick gift set (their largest gift set!) and T-shrit, as well as having your photo highlighted on their website. Send your photo submission to info@proteinbakery.com and let them know Shane’s Killer Cupcakes sent you!

gift_banner

If you want to enter the contest without making a purchase, then enter my giveaway below for a chance to win a taste of Protein Bakery (an assortment of 2 brownies/blondies, 2 cookie 2-packs and 2 mini’s), a $45.00 value, courtesy of The Protein Bakery! If you win my giveaway, you can use your prize of treats to enter their “show us your muscle” contest for even more treats! Whoo-hoo!

a Rafflecopter giveaway


****I received product from The Protein Bakery in return for an honest review and to promote their new “Show us your muscle” promotion. All opinions are mine and are entirely honest.
Pin It

You Might Not Want to Eat These Sweets

Posted on

These donuts look yummy, right? Don’t take a bite just yet. They’re made out of foam. That’s right, when I’m not making fun real sweets at home, I’m making these delicious food props at work. I work at a theater and make props for the plays and musicals in production there. This particular batch of donuts was crafted for a production of Sunsets and Margaritas by José Cruz González.

A couple of seasons ago we put on a production of The Baker’s Wife, a musical with music and lyrics by Stephen Schwartz and the book by Joseph Stein, in which we had to create an entire bakery of pastries, bread, and other delectable treats. Unfortunately I didn’t get very many great pictures of the food props we made for that show, but here’s a picture of a strawberry and cherry tart that didn’t turn out too terrible.

Not too long ago I made a chocolate chip cookie for a lunch tray that was used in a production of Dog Sees God: Confessions of a Teenage Blockhead by Bert V. Royal. If I were to make this one again, I’d do something more pronounced for the chunks of chocolate because it looks a little flat, but it worked for its purpose.

Believe it or not, making real treats is soooo much easier than making ones that have to hold up on stage. Sometimes we use real food, but it’s not as practical since it can attract ants, spoil, and be a mess to clean up. It is gratifying to make a prop replica of food and fool the actors with it, though.
Creative Commons License
Shane’s Killer Cupcakes by Shane Russell is licensed under a Creative Commons Attribution-NoDerivs 3.0 Unported License.
Permissions beyond the scope of this license may be available at http://cupcakeattack.wordpress.com/contact/.


Severed Witches’ Fingers {Recipe}

Posted on

Last Halloween I made these Severed Witches’ Fingers for a party I went to. They were very easy to make and can be altered in many ways depending on how you want them to look.

I made mine look like severed ladies’ fingers with red nail polish, but I’ve seen quite a few variations that also look great.

Here are a couple other styles:

1. Green witch fingers via maiapapaya:

Dye the dough with green food coloring and use almonds with skin instead of blanched ones.

2. Bloody crusty unpainted nails via meemoskitchen:

For these, use a little red sugar gel or frosting under the almonds to make the nails looks gross and bloody.

{Recipe}

Severed Witches’ Fingers

INGREDIENTS:

  • 2 tablespoons red food coloring
  • 30 blanched almonds
  • 2 large eggs
  • 1/4 teaspoon pure vanilla extract
  • 8 tablespoons unsalted butter (1 stick), room temperature
  • 1/2 cup confectioners’ sugar
  • 5 tablespoons granulated sugar
  • Pinch of salt
  • 1 and 2/3 cups all-purpose flour

DIRECTIONS:

  1. Heat oven to 350 degrees. Line two baking sheets with Silpats (French nonstick baking mats) or parchment paper, and set aside.
  2. Place food coloring in a shallow bowl. Using a small paintbrush, color one rounded half of each almond. Set aside to dry.
  3. Separate 1 egg. Set aside the white. In a small bowl, whisk together yolk, remaining egg, and vanilla. Set aside.
  4. In the bowl of an electric mixer fitted with the paddle attachment, combine butter, confectioners’ sugar, granulated sugar, and salt. Beat on medium speed until well combined. Add egg mixture, and beat until smooth, about 2 minutes. Add the flour, and mix on low speed just until incorporated. Wrap the dough in plastic, and chill until firm, 20 to 30 minutes.
  5. Divide the dough in half. Work with one piece at a time, keeping remaining dough covered with plastic wrap and chilled. Divide the first half into 15 pieces. On a lightly floured surface, roll each piece back and forth with palms into finger shapes, 3 to 4 inches long. Pinch dough in two places to form knuckles. Score each knuckle lightly with the back of a small knife. Transfer fingers to prepared baking sheets. Repeat with remaining dough.
  6. When all fingers are formed, brush lightly with egg white. Position almond nails; push into dough to attach.
  7. Bake until lightly browned, about 12 minutes. Cool completely.

Recipe via Martha Stewart

[polldaddy rating=”5093286″]

Creative Commons License
Shane's Killer Cupcakes by Shane Russell is licensed under a Creative Commons Attribution-NoDerivs 3.0 Unported License.
Permissions beyond the scope of this license may be available at http://cupcakeattack.wordpress.com/contact/.

Related Posts Plugin for WordPress, Blogger...