

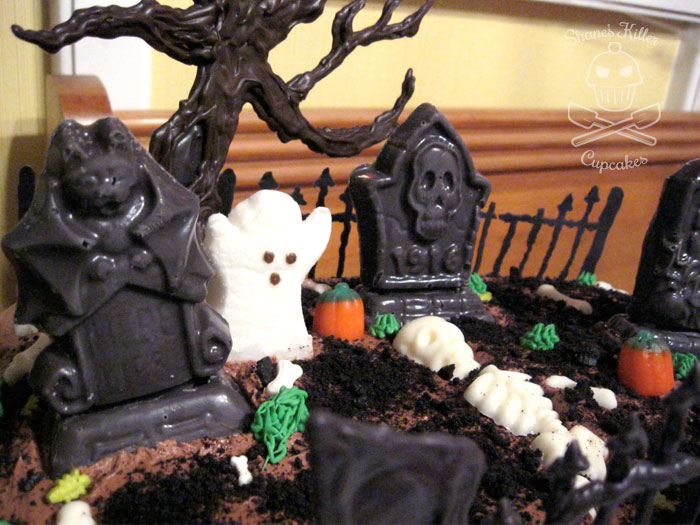
It’s Halloween time! It’s my favorite time of year. This year I decided to do a graveyard cake. I’ve also been busy working on my Zoltar costume the past month. This cake has a bunch of candy melts for decoration and was made with my mom’s Triple Chocolate Cake and Sweet Savory Life’s Chocolate Buttercream Frosting.

First try wasn’t cutting it
I did a graveyard cake in the past but was unhappy with how it turned out, so I felt like trying it again. The original one had cookies for tombstones and a real stick for a tree. It was cute, but I wanted something that was completely edible this time around and a little more extravagant.
Materials
- Frosted 9in x 13in cake
- Green frosting (for grass)
- Candy melts in chocolate, black, and white.
- Tombstones (made from cookies, fondant, candy molds, etc) I used Wilton’s Creepy Tombstone Candy Mold. This has been discontinued, but if you search around in stores and online, you might be able to find it. I found mine just last week at my local Michaels on clearance for $0.99!
- Fence templates (Template 1, Template 2)
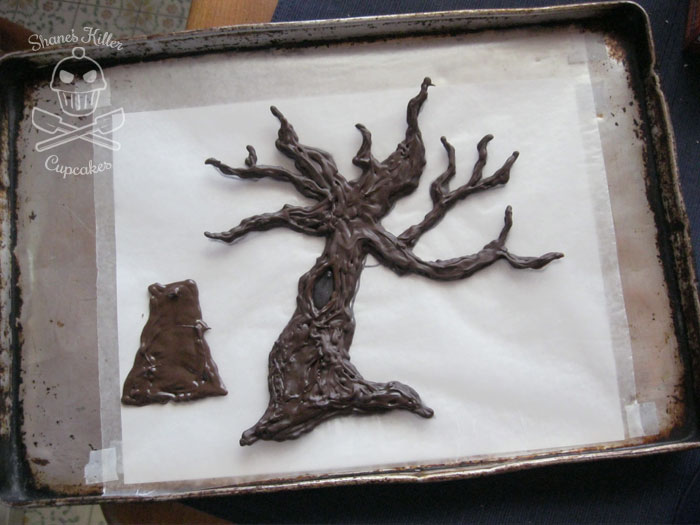
- Tree template
- Candy decor (candy corn pumpkins, Peep ghosts, bone candy, Wilton Skeleton Bones Candy Mold, bug candy, etc). You can decorate it with anything you like really. These were just the items I used for this cake.
- Oreos or other chocolate cookie (for dirt)
I made the cake in a 9in x 13in cake pan but when turned out on the platter, was closer to 7in x 11in. The fence templates I’ve included are made for the 7in x 11in cake (although the fence doesn’t quite meet up everywhere.) If you make a larger (or smaller) cake resize the fences accordingly.
Once the cake has cooled and been frosted, place your tombstones. The ones I used were very big so that dictated the proportion of my cake. Then I made my skeleton with white candy melts in the Skeleton Bones Candy Mold and placed pieces of him in front of one of the tombstones. I also put the Peep ghost and other decor in the graveyard to my liking.
Once most things are in place, separate the Oreo cookies and discard the center cream. Then crush the chocolate cookies up in a ziplock bag until you’ve got the dirt to your liking. Sprinkle the cookies all over the cake.
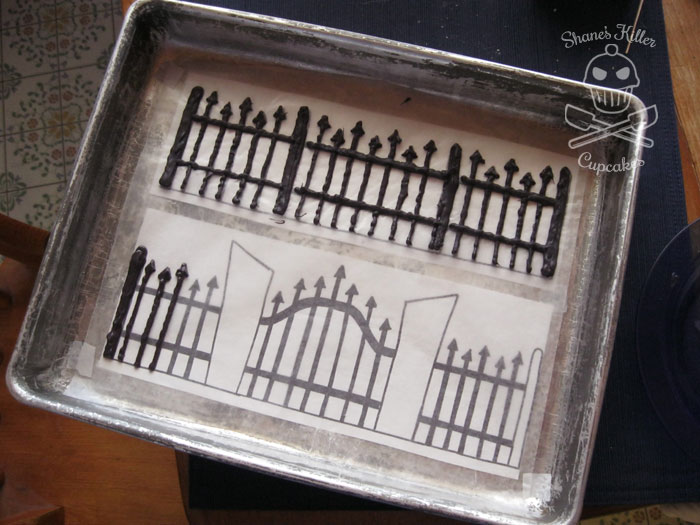
To make the fences melt some black candy melts using the package directions in a ziplock bag. Cut a small corner off the bag and pipe it onto some wax paper with the fence templates underneath. I usually like to do these on cookie trays because they are easy to transport to the fridge while they set up. These fences will be incredibly delicate so be careful when peeling them off the wax paper. If they break they’ll still work! And they might even add a little more creepiness to your graveyard. Stick them to the sides of the cake

Use the chocolate/brown candy melts to do the tree the same way as the fences. I forgot to add to the template the prop piece for the tree. Make a shape with the candy melts similar to the one in the picture below and use it to prop the tree up once it’s on the cake. You could even glue them together with some candy melts for extra support.
 The last thing to do is pipe some green frosting onto the cake to look like grass. You won’t need very much of this so I’d suggest either buying a tub of white frosting and coloring that green or get a tube of green frosting and squeeze it out into a ziplock or frosting bag so you can use a grass tip to pipe it.
Have a safe and awesome Halloween! By the way, here’s my completed costume:


This is an awesome cake! Great job!
I love this!! I would like the templates for the fence and tree. Thank you!! Happy Halloween!