The Royal Wedding Cake

Posted on

Credit: John Stillwell/PA Wire

I can’t say I’ve been much invested in the Royal Wedding between Kate and William, but I just got a look at their wedding cake and it’s magnificent. Created by British baker Fiona Cairns, this multi-tiered fruitcake intricately incorporates scroll work, lattice work, delicate piping techniques and sugar flowers. I wish I had the skill to make something like that.

For more pictures of the cake check out The British Monarchy’s Flickr collection.

[polldaddy poll=4990817]

[polldaddy rating=”5093286″]


Inverse Apple Cobbler Cake + Dinner! {Recipe}

Posted on

I know I haven’t posted any cupcakes lately, but regular cakes keep coming up that I want to try. I’m planning a few new cupcake ideas for the next couple months so stay tuned. Until then, enjoy my write up on a delicious meal that my good friend Amber and I teamed up to make last night. Everything turned out so well, we wanted to share our creations with you.

For the dinner portion of the meal head over to Amber’s blog for a delicious Slow Cook Crockpot Roast Beef. It includes roast beef, potatoes, sweet potatoes, peas, onion, apple and other tasty ingredients. Look how lovely it turned out:

We also made the best Garlic Bread I’ve ever had. For instructions on how to make awesome garlic butter for your french bread, jump over to Amber’s blog for that too.

To keep up with the apple theme of the night, we decided to make a cake. We’ve decided to call it Inverse Apple Cobbler Cake because a normal apple cobbler has a lot of apples on the bottom and a crumbly cake-like top but we reversed that a bit for this cake.

Here are the instructions:

Inverse Apple Cobbler Cake

Ingredients

For Cake:

  • 1 box of yellow cake mix (or your favorite yellow cake recipe)
  • cinnamon (we didn’t measure, but I’d guess about 3 tsp.)

For topping

  • 1 can of vanilla or cream cheese frosting (or your favorite white frosting recipe)
  • 3-4 apples*
  • 1 cup water
  • 1 cup tightly packed brown sugar
  • 2-3 tsp. lemon juice
  • cinnamon
  • ground cloves
  • nugmeg
  • ground ginger

*Note: Our cake mix only made about a half of a batch of a normal cake mix. We used 3 apples for the topping, but for a full batch you may need 4. Add a little more water if you add more than 3 apples.

We used a peanut and egg free yellow cake mix from Cherrybrook Kitchen but we doctored it to fit our needs. We followed the cake instructions (add water and butter or margarine) but the cake looked way too dry so we ended up adding one egg to it.  Follow the directions on your cake mix box or recipe to make the batter. Since we planned to make a cinnamon apple topping, we added a bit of cinnamon to the batter too. Then we whipped it up for a couple of minutes.
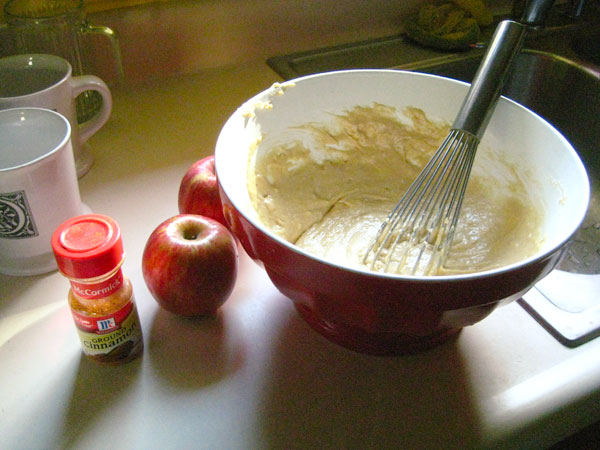
The cake mix only made enough for about a half batch so we had to get a smaller baking pan to cook it in. Thankfully, Amber’s mother-in-law had the perfect sized Pyrex dish.

We baked the cake in a preheated oven at 350?F for about 25 minutes until it was cooked all the way through. To bake your cake, you should follow your cake mix box or recipe directions. While the cake baked, we started making the apple topping. It’s basically the same thing that goes in an apple cobbler.

Skin your apples and cut them into thin slices. In a pan on the stove at medium-high setting, heat some water and the apple slices until it’s at a boil then lower the temperature to low so that the water is just at a simmer. Add your spices next. We didn’t really measure this out but put a dash of the ground cloves, ginger, and nutmeg and if you really like a lot of cinnamon put a a good amount in (several shakes or so). Also add about half of the brown sugar and all of the lemon juice into the simmering apples and mix everything around. We used the other half of brown sugar at the end once a good portion of the water cooked off.

While the water is simmering, put a lid on the pan, allowing the steam to come out one side a little, and let it sit for a while. Stir often. We had our apples simmer with the lid on for about 15 minutes and then took it off for the final 5-10 minutes. It may not take you nearly as long because we put way too much water in (like close to 2 cups) so you may not need to simmer it as long. Keep an eye on it. When it’s done there won’t be very much water left, and the added brown sugar will caramelize a little. It should become a runny, gooey, brown appley treat and look a little like this:

Once it starts to look like that turn the stove off and let it sit there with the lid on until you’re ready to frost the cake.

By now your cake should be ready to come out of the oven. Ours looked like this when it came out. It looked so good, I was ready to dig into it already!

I fought my impulses and let it cool for a long time before frosting it. In fact we ate Amber’s yummy Slow Cooked Roast Beef while it cooled.

Once the cake was completely cooled we frosted it with the vanilla frosting. If I were to do this again, I’d choose cream cheese frosting instead of vanilla because the cake tasted a bit like carrot cake without the carrots, and cream cheese frosting would have been awesome here. Get it good and frosted and then add your apple topping like so:
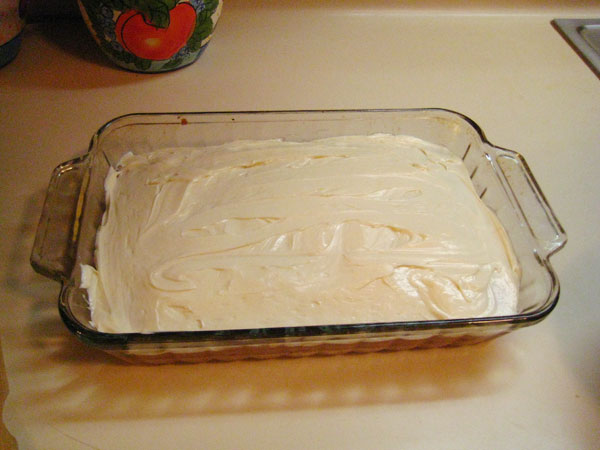
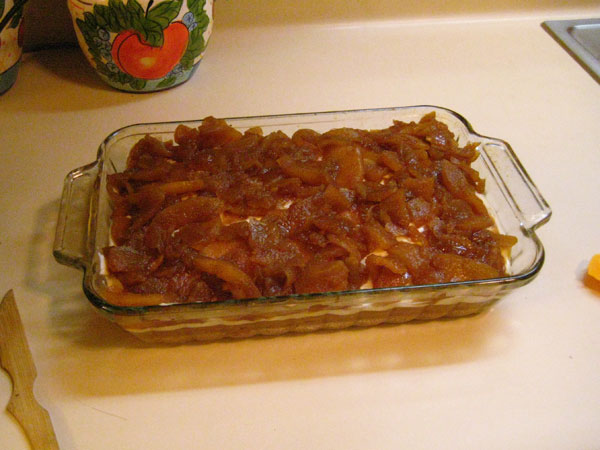
 

The combination of the cake, frosting, and soft cinnamon apple topping really complimented each other nicely. I would definitely try this again sometime.

As always, if you give my recipe a try, share pictures of how it turned out on my Facebook page. Also feel free to share pictures of any other desserts you make.

[polldaddy rating=”5093286″]

Creative Commons License
Shane's Killer Cupcakes by Shane Russell is licensed under a Creative Commons Attribution-NoDerivs 3.0 Unported License.
Permissions beyond the scope of this license may be available at http://cupcakeattack.wordpress.com/contact/.


Secret Baking Project Revealed: Rainbow Bundt Cake! {Recipe}

Posted on

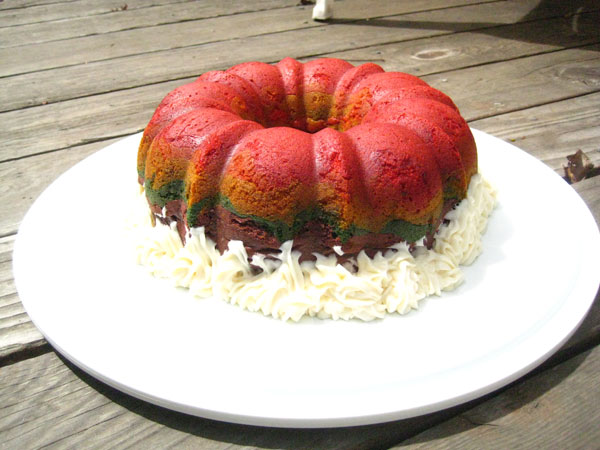
Ok I finally made that super secret cake I promised you. It was a Rainbow Bundt Cake! I decided to make it because I’d never seen a rainbow bundt cake done like I wanted mine to look like. Every time I found a picture of one online it always had the red layer cover the whole outside and didn’t look very interesting before it was cut into. So I set out to see if I could make one that had the colored stripes on the outside. Here was my result:

I think it turned out rather well. It was a bit darker on the outside than I expected and the frosting (which was supposed to be puffy clouds around the bottom) kind of melted when I transported it to a party.

The inside was a bit of a surprise when I cut into it though:

It was so neon! I liked that it had a little bit of shock value on the inside. As you can see in this photo, my frosting melted and puddled everywhere. It still tasted good though.

Here are the instructions if you want to try your hand at a Rainbow Bundt Cake:

Ingredients

  • 1 box of white cake mix (or your favorite white cake batter recipe)
  • 1 (16 oz) can of white or cream cheese frosting (or your own homemade frosting)
  • Food coloring ( I suggest McCormick Neon food dye)

Note about food dye: I used McCormick Neon food colors (sold at Walmart) mixed with Duff’s Concentrated Color Gels in primary (sold at Michaels). This isn’t any kind of advertisement for them, I’ve just found these food colors worked the best to get the colors I wanted.

Speaking of the colors, after you’ve made the batter according to the box instructions or recipe directions, separate the batter into six different bowls. I put a small amount in one, a slightly larger amount in another, and so on until I had the most amount in the sixth bowl. You color the smallest amount of batter red and the largest amount of batter purple. Color the other batter amounts in the rest of the regular rainbow colors (Orange, Yellow, Green, and Blue).

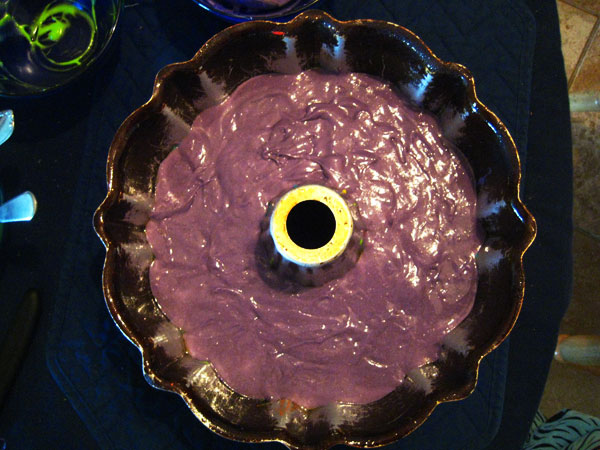
Once you’ve got the colors that you like. Start spooning it into a bundt pan that has been thoroughly covered inside with cooking spray. My batter ended up pretty thick and that aided in the layering process. I started with the red layer at the bottom of the pan and then spooned the orange layer on top using a spatula to move it around a little. Don’t move it too much though or the colors will start to run together and look more tie-dyed (which would probably look pretty awesome too).

I tried to get the color to go all around the sides first to make sure those striped colors would show up on the outside of the cake. That technique seemed to work pretty well. This layering process took a pretty long time, though, like around 30-40 minutes.

The cake mix instructions that I used said to cook the cake in the preheated oven at 350?F for 37-41 minutes. If you use a cake mix too, see if the box suggests cooking times for bundt cakes. A bundt cake tends to take longer to cook than a regular rectangle cake would.

Once the cake is cooked all the way through (I test it with a wooden skewer), take it out of the oven and shake the pan all the way around with pot holders to loosen the cake from the sides of the pan while it’s still hot. Leave the cake in the pan to cool for about 10 minutes and then flip it over onto your cake platter.

While you let your cake cool the rest of the way, start getting your frosting ready. I’m sure there are many ways to decorate this cake with “cloud” frosting, but I chose to pipe the clouds around the bottom. I think whipped frosting might work better, because the regular frosting I used seemed a bit heavy and started to fall down the sides a little (even before it melted).

When you’re done frosting the cake, then your cake is ready to serve!

Even the cake mess was pretty!

I hope you enjoyed this tutorial. If you try to make this cake too, share your photos on my Facebook page.

Makes 12 servings

Nutrition Facts*   Per Serving

Calories 371; Total Fat 15.3g; Sat. Fat 3.2g; Cholest. 47.5mg; Sodium 368mg; Total Carbs. 56g; Fiber <1g; Sugars 39g; Protein 2.5g

*These Nutrition Facts were calculated by myself using a calorie counter. Actual Nutrition Facts may be different. This is just for guidance.

Tip Junkie handmade projects

[polldaddy rating=”5093286″]

Creative Commons License
Shane's Killer Cupcakes by Shane Russell is licensed under a Creative Commons Attribution-NoDerivs 3.0 Unported License.
Permissions beyond the scope of this license may be available at http://cupcakeattack.wordpress.com/contact/.


Mom’s Triple Chocolate Bundt Cake {Recipe}

Posted on

Here’s a clue about my upcoming cake project: It’s a bundt cake!

So for now I’ll give you the cake that inspired my secret project, my mom’s Triple Chocolate Bundt Cake recipe. She’s made this cake for my brother’s and my birthdays for as long as I can remember. It’s deliciously full of chocolate and super moist (also not low in calories). If you’ve been to any of my birthdays before, you’ve probably had a piece.

Triple Chocolate Bundt Cake

Makes 12 servings

Ingredients

  • 1 box of Chocolate cake mix ( I usually get Devil’s Food or Fudge Chocolate)
  • 4 eggs
  • 1 (3.9 oz., sm. size) pkg of Jell-o Instant Chocolate Fudge Pudding
  • 1 cup or small carton of sour cream
  • 1/2 cup warm water
  • 1/2 stick (4 tbs.) of softened butter
  • 1 cup semi-sweet chocolate chips
  • cooking spray
  • powdered sugar (for garnish)

Directions

  1. Preheat oven at 350?F.
  2. Mix all of the ingredients except chocolate chips and powdered sugar in a bowl together. I usually combine the dry ingredients first and then add the wet ones.
  3. Beat ingredients for 5 min on high until thick and fluffy. Then stir in the chocolate chips.
  4. Fully cover the inside of a bundt cake pan with cooking spray.
  5. Pour batter into the pan and cook for 45 min. Test the cake with a wooden pick or skewer. If it comes out clean, it’s done, if not, keep baking it until it does.
  6. Once it’s done baking, shake pan to loosen cake from sides, then let it cool in pan for 10 mins.
  7. Turn out on to a plate and cool completely.
  8. Dust the top with powdered sugar (if desired).

Nutrition Facts*   Per serving

Calories 383, Total Fat 18.3g, Sat. Fat 9.7g, Cholest. 83.5mg, Sodium 517mg, Carb. 54.2g, Fiber 2.4g, Sugars 34.5g, Protein 6.5g

*These Nutrition Facts were calculated by myself using a calorie counter. Actual Nutrition Facts may be different. This is just for guidance.

Also, come join the fun at the My Baking Addiction and GoodLife Eats Holiday Recipe Exchange sponsored by Scharffen Berger.

[polldaddy rating=”5093286″]

Creative Commons License
Shane's Killer Cupcakes by Shane Russell is licensed under a Creative Commons Attribution-NoDerivs 3.0 Unported License.
Permissions beyond the scope of this license may be available at http://cupcakeattack.wordpress.com/contact/.


Coming soon…

Posted on

I’ve got a cake in mind that I’m going to give a try soon. I can see it in my head but not sure how it’s going to come out. I’ve looked for pictures online but haven’t quite found the same thing I’m going to try. Maybe it can’t be done! But I’m going to give it my best shot. I’m not going to reveal my plans just yet but check back for pictures!

Until then, here’s a poll

[polldaddy poll=4892133]

[polldaddy rating=”5093286″]

Related Posts Plugin for WordPress, Blogger...