Shabby Chic Tea Party

Posted on

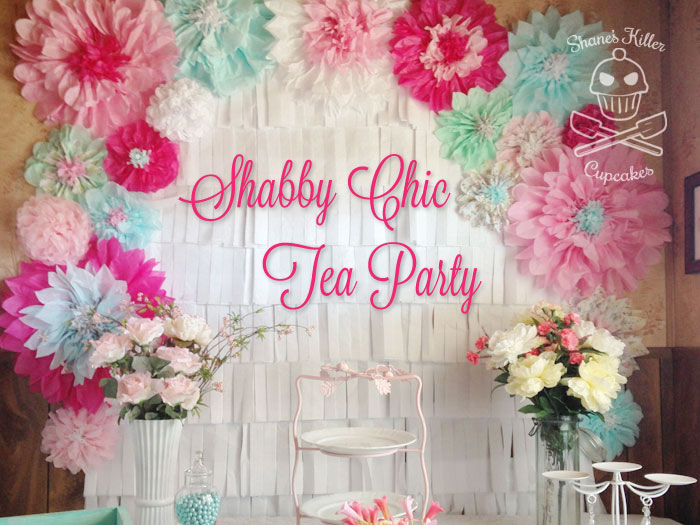
The tea party was a success! Putting on a party mostly by yourself is a tad daunting, but I’m really pleased with how everything turned out. Of course I was getting things ready all the way up to when people started to arrive, so I didn’t get all the photographs of the decor I wanted, but these pictures will give you an idea of what it looked like.

I made most of the decor myself. I explained how to make some of the decor here and here. For this lovely background, I found instructions at KoJo Designs for the paper flowers and at Shiny Happy Sprinkles for the paper fringed backdrop. It’s a really great idea for an inexpensive background that looks pretty and covers a good sized area. Something like this would be perfect for a photo booth background too!

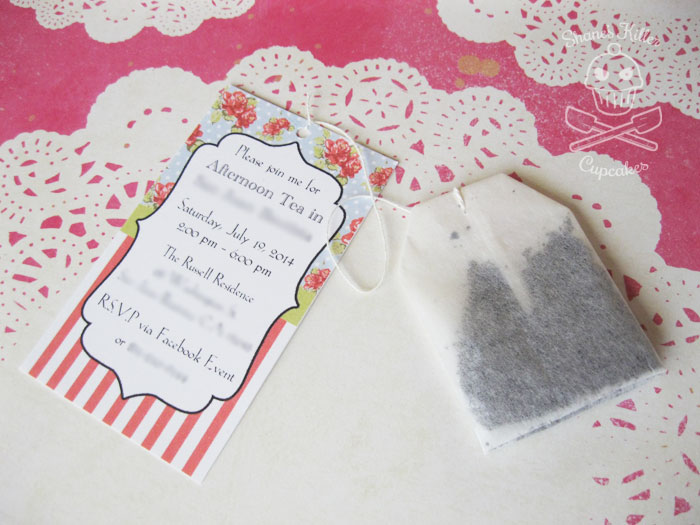
I invited my guests with these home made tea invites. The invite is about the size of a business card and I attached it to a bag of tea.

IMG_5716

I asked my friends to dress up in their nicest clothes, and while everyone did, I put an accessories table together just in case someone didn’t have any fancy jewelry or hats to wear.

teaparty1

There was one table that had all the tea supplies ready and I decorated the fireplace and mantel with flowers, candles, and the fabric swag and tea party banner that I showed you how to make last week. I had various glassware for my guests to drink iced teas from, but my favorites were these milk bottles I decorated with ribbon and paper flowers.

IMG_2186

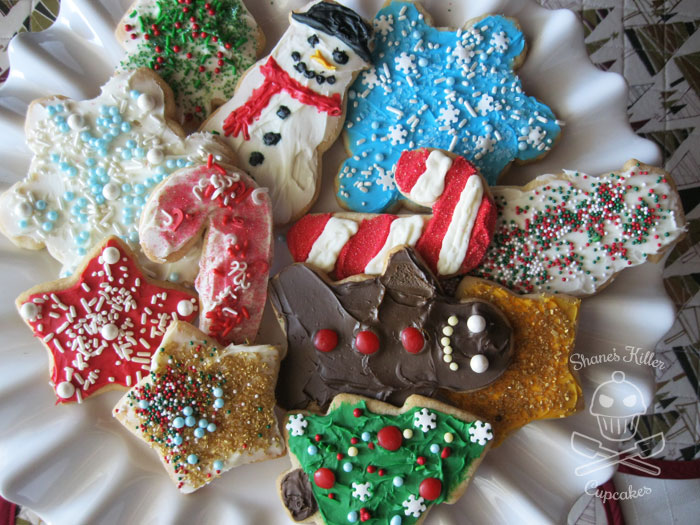
The food table had all sorts of treats that fluctuated throughout the day. I provided tea sandwiches, cookies, biscuits and jam, petits fours, popcorn, fruit salad and candy. There was a ton to eat!

teaparty2

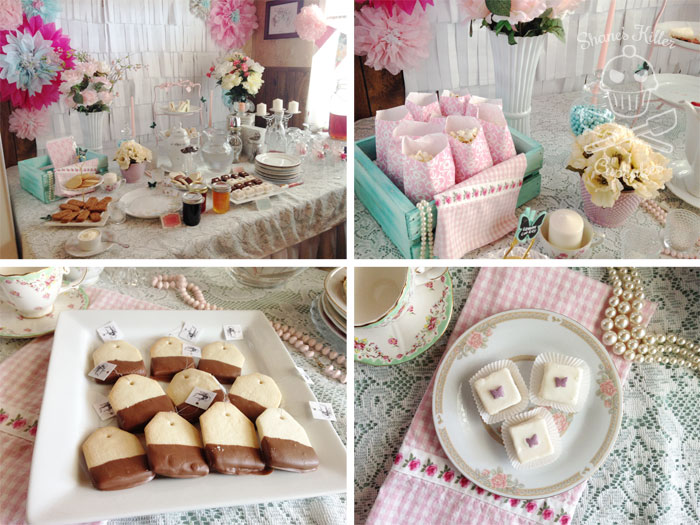
These chocolate-dipped shortbread tea bag cookies were a hit! You can find the recipe for them here. The petits fours were also popular, especially the chocolate ones since they were devoured before I was able to get a closeup photo of them. If you’d like to make the petits fours click here for the recipe.

Thanks for joining me for my tea party!

IMG_2210

Pin It

Chocolate-Dipped Shortbread Tea Bag Cookies

Posted on

IMG_2225_2I’ve been planning a tea party for some time now and saw a picture of some tea bag cookies on a blog called Le Pétrin that I thought were cute, but it was in French, which I sadly cannot read. That’s when I decided to figure it out myself because I really wanted to include these at my party.

I found some shortbread mix in the baking aisle and decided that would be a great base for these cookies. I made a little tea pot tag in Photoshop and tied them onto the finished cookies with some thread. They were a total hit at my party!

Chocolate-Dipped Shortbread Tea Bag Cookies

Ingredients

  • 1 package Betty Crocker Shortbread Cookie Mix or a recipe from scratch (and whatever ingredients are needed to makes these)
  • 1 package of chocolate melting candy

Instructions

  1. Make the cookie dough according to the instructions of your mix or recipe and roll it out on a floured surface to 1/4 inch thick.
  2. Cut cookies into tea bag shapes by making rectangles and cutting the corners off one short side.
  3. Poke a hole near the top of the cookie with a wooden skewer.
  4. Bake as directed on your cookie mix package or recipe.
  5. After they are done baking, let cool for a minute or two on the baking sheet, and then move them to a cooling rack.
  6. If the holes have closed up a little, re-poke the holes with the skewer while the cookies are still warm.
  7. Once the cookies are fully cooled, melt some chocolate in a mug in 15-30 second increments until its fully melted. If the chocolate is too thick, add a little cooking oil to thin it.
  8. Dip the cookies about a third of the way into the chocolate and place on a baking sheet covered in wax paper.
  9. Place in the fridge until the chocolate sets up.
  10. Create a tag on your computer or just cut up little blank squares and punch a small hole in it for string.
  11. Once the cookies are fully chilled, tie the string with the tag attached to the cookie.
https://shaneskillercupcakes.com/2014/07/chocolate-dipped-shortbread-tea-bag-cookies/

***07/23/14 Edited to include the source for my idea.
Pin It

Stars, Flags, and Firecrackers! It’s a 4th of July Dessert Round Up

Posted on

titleimage_2
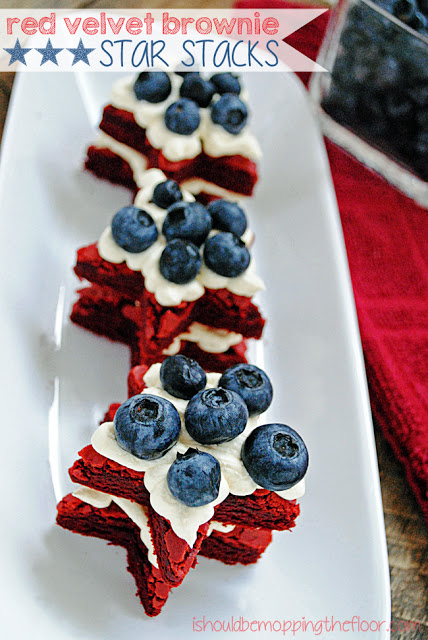
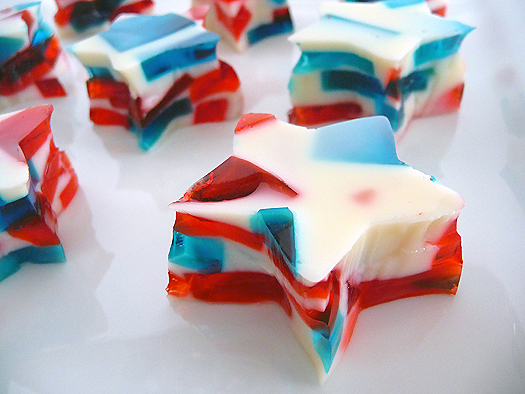
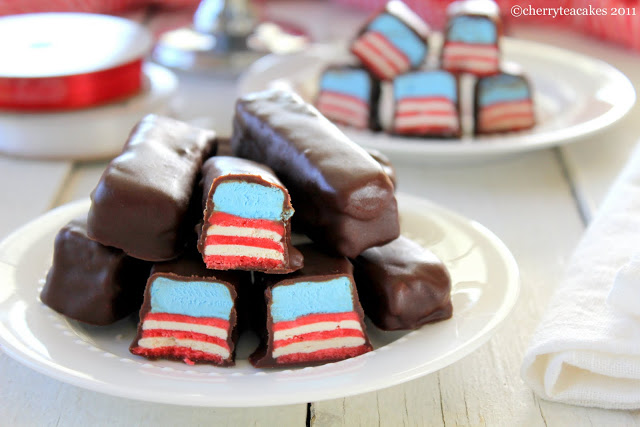
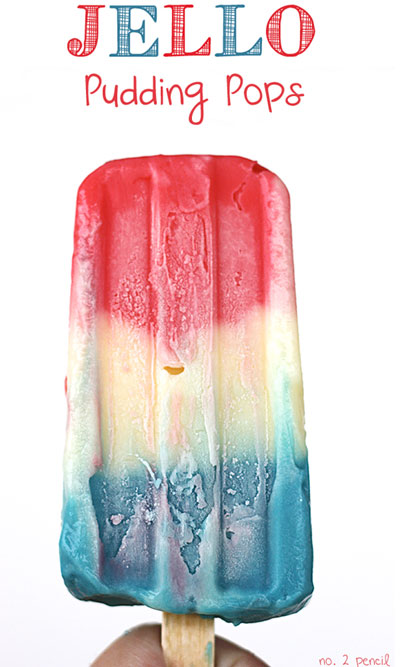
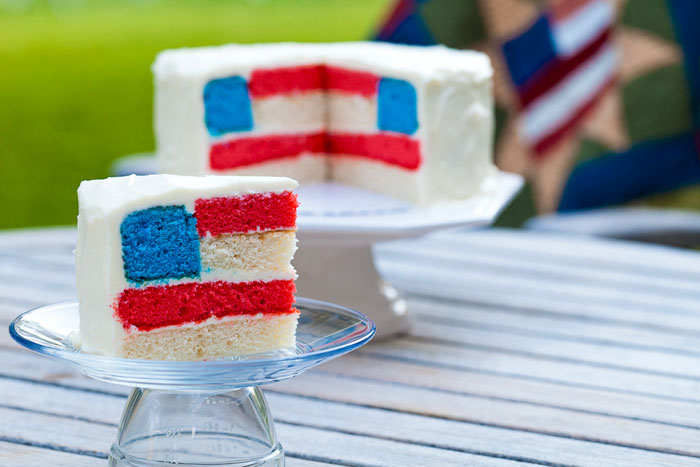
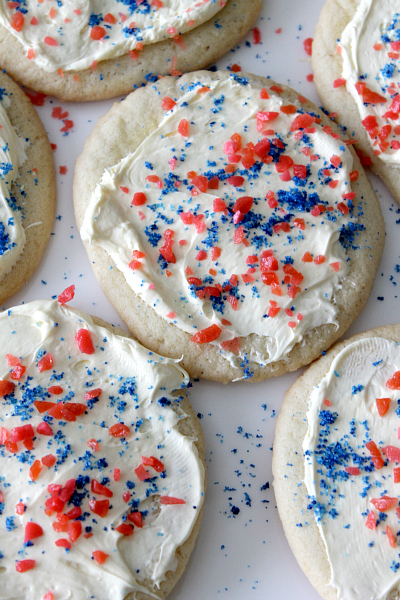
Fourth of July is this week and if you’re in the United States, you probably have a party or BBQ to attend. Still not sure what you’re going to bring to your potluck? Check out these deliciously patriotic sweets I’ve selected from around the Internet.
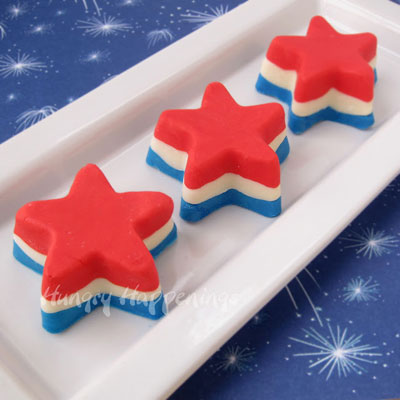
STARS

1. Red, White, and Blue Fudge Stars from Hungry Happenings

These layered stars, made from white chocolate, sweetened condensed milk, and food coloring, give a bright pop to any party table.

red-white-and-blue-desserts-for-4th-of-july-fudge-stars-
2.  Red Velvet Brownie Star Stacks from I Should Be Mopping the Floor

If brownies are more your style, try these stacked red velvet brownie stars with cool whip and blue berries.

red velvet brownies from cake mix


3. Red, White, and Blue Stained Glass Jello Stars from Brown Eyed Baker

I love these because they remind me of the jello desserts of the 1960s.

stained-glass-jello-singlestar


STRIPES

4. Red, White, and Blue Raspberry Candy Bars from Cherry Tea Cakes

These candy bars are a great surprise for your friends! From the outside they look normal, but one bite reveals the red, white, and blue stripes inside. I always love surprise inside treats.

IMG_9081


5. Jello Pudding Pops from Number 2 Pencil

If you have access to a freezer, these pudding pops are great for a hot summer day.

Jello-Pudding-Pops


6. Triple Berry Frozen Smoothies from In Katrina’s Kitchen

Made from a combination of yogurt, fruit, and honey, these delicious smoothies are a perfect cool down on 4th of July.

ae28fbcb48cf2a21572827289197e3e7

FLAGS

7. 4th of July Flag Cake from Secret Life of a Chef’s Wife

Here’s another version of the surprise inside treat. This cake is baked with several colored layers and combined to form a flag when cut into. Can you imagine what your friends will say when they see the inside?

Fourth_of_July_Cake-2


FIRECRACKERS

8. Firecracker Sugar Cookies from Mom Dot

To the unfamiliar, these look like your everyday sugar cookies with candy sugar and sprinkles on top. What they don’t know is these will pop and crackle in your mouth when you eat them! How you ask? The secret ingredient is Pop Rocks!

popcookie


9. Twizzler Firecracker Cupcakes from Tastes Of Lizzy T

To keep with the firecracker theme, here are some cute cupcakes that look like little firecrackers exploding.

Twizzler-Firecracker-Cupcakes-are-so-fun-for-a-July-4th-party


If you aren’t planning a red, white, and blue dish for your party but still want it to look festive, decorate it with flag picks!  To make your own, download my free American flag pick printable by clicking on the picture below:

IMG_3444

Have a fun and safe Independence Day!


***All photos were used with permission
Pin It

The Conclusion of 24 Days of Advent Calendar Fun: Days 19-24

Posted on

IMG_5216

These last few days have been busy around here. So much going on for the holidays: baking, present wrapping, last minute present making, etc. With that, the advent calendar has been sort of on a back burner. I haven’t even been able to update the blog about it until now! Three of the days I gave my grandma chocolates, because we were too busy to do any extra activities. But we did get a few fun things done.

Since I’m covering six days in this post, I’ll skip Days 19, 21, and 22 because she only got chocolate those days and there isn’t much to say about it other than that.

Day 20

IMG_5197

On the 20th we made a cute Christmas paper garland kit that I found in the dollar section at Target. It came with stickers, little ornament shapes, and some string. Grandma helped me place the stickers on the ornaments and then I strung it up in our living room.

IMG_5195Day 23

Yesterday we worked on decorating some sugar cookies! I’ve always wanted to try royal icing for cookies but figured that it would be too complicated for my grandma to participate in, so I opted to frost the cookies with canned frosting and let her sprinkle things on them. I also decorated a few since that’s my favorite part of baking.

IMG_5211

I used a Betty Crocker sugar cookie mix for this project to make things quick and simple. They turned out fairly good. I might have made them too thin though, because they are a little crunchier than I like. One thing I thought was interesting is how different each batch baked. The first batch was cooked on a pizza stone, and the dough didn’t change its shape much but took way longer to bake. I baked the second batch on a baking pan lined with a silicone mat and they expanded much more than the first cookies and were done at least 5-7 minutes sooner. Of the two, I think I liked the pizza stone cookies more since they still resembled their original shapes.

IMG_5212

I found that detailed decorating with frosting is not very easy, this is probably why people use different icings on cookies but I think our cookies turned out pretty cute.

IMG_5225Day 24

Today we are going to watch another Christmas themed movie as our final advent calendar activity. I chose Rudolph the Red-Nosed Reindeer this time. It’s a Christmas classic. I remember one time while watching this movie about 20 years ago, my family’s old grandfather clock that hadn’t worked in years, decided to let out one bong out of nowhere. It’s was really odd. That memory has always stuck with me. Maybe it was Santa letting me know he was on his way.

IMG_5227

I hope my grandma enjoys watching this with me today.

Well, that ends the 24 days of Advent Calendar Fun. I hope you had fun following us on our Christmas adventures this year, and maybe even tried some of the activities yourself. Have a great Christmas tomorrow!

If you’ve missed any of the previous days, here are the links:

You can find instructions for how to make this advent calendar at Holiday Crafts and Creations.

**The snowflakes in the title image are from www.obsidiandawn.com and www.graphicssoft.about.com**


Pin It

Show The Protein Bakery Your Muscle {Review & Giveaway}

Posted on

image

I love sweets. And if they weren’t so horribly unhealthy, I’d eat sweets all the time. Like all day long. Making dessert is fun, but sometimes I just want to grab something quick to satisfy a sweet craving, so I was delighted to try The Protein Bakery’s line of baked goods.

IMG_4203

These nutritionally balanced goodies are trans-fat free, preservative free, and wheat flour-free. They are also made with natural ingredients like rolled oats, nuts, light brown sugar, and quality chocolate. And as the name suggests, they are packed with whey protein which is good for those wanting more protein in their diet. As healthy as these treats are though, I’d still suggest eating them in moderation, because they are definitely not low in calorie or fat.

IMG_4213

The delicious Walnut Brownie

I received a sampling of The Protein Bakery’s brownies, blondies, cookies and minis for this review. I found that I really enjoyed some of the items, but others were not quite to my liking. The walnut brownies were delicious and very moist while the peanut butter blondie I tried was flavorful but very dry. The minis were a bit dry as well. Heating them up in the microwave helped a bit but still not as moist as I was hoping for. The cookies were soft and tasted like homemade cookies. Despite dryness in a few of the treats, I liked pretty much everything I tried.

Connect with The Protein Bakery

Catch up with The Protein Bakery in many ways:

Website: http://proteinbakery.com/

Facebook: http://www.facebook.com/proteinbakerycookieswithmuscle?ref=ts

Twitter: http://twitter.com/proteinbakery

Linkedin: http://www.linkedin.com/company/the-protein-bakery?trk=fc_badge

Youtube: http://www.youtube.com/user/TheProteinBakery

Showing muscle is kind of difficult when holding a cookie.

Showing muscle is kind of difficult when holding a cookie.

Show Your Muscle Promotion!

Right now The Protein Bakery is running a “Show us your muscle” promotion! If you buy any of their products, send them a picture of yourself holding your Protein Bakery treat while making a muscle for a chance to win a free baker’s pick gift set (their largest gift set!) and T-shrit, as well as having your photo highlighted on their website. Send your photo submission to info@proteinbakery.com and let them know Shane’s Killer Cupcakes sent you!

gift_banner

If you want to enter the contest without making a purchase, then enter my giveaway below for a chance to win a taste of Protein Bakery (an assortment of 2 brownies/blondies, 2 cookie 2-packs and 2 mini’s), a $45.00 value, courtesy of The Protein Bakery! If you win my giveaway, you can use your prize of treats to enter their “show us your muscle” contest for even more treats! Whoo-hoo!

a Rafflecopter giveaway


****I received product from The Protein Bakery in return for an honest review and to promote their new “Show us your muscle” promotion. All opinions are mine and are entirely honest.
Pin It

D.I.Y Dessert Stand

Posted on

Dessert stands can be pretty pricy, and finding one that goes with the decor of the events and parties you throw can be difficult. Making one yourself is fairly easy and much cheaper. The tutorial I found over at Decor-ganize Crafts is simple, inexpensive, and totally customizable!

View the tutorial for the Three-tiered Dessert Stand

[polldaddy rating=”5093286″]

Related Posts Plugin for WordPress, Blogger...