Holiday eShakti Dress Giveaway

Posted on

headimage

I’ve reviewed eShakti.com dresses a couple times in the past and really love how customizable they are, yet still affordable. Lucky for you, eShakti has given me the chance to offer my readers another giveaway for their website! One winner will be able to choose any dress they like from eShakti.com’s large selection of fully customizable dresses. What a better time than now to pick out that special holiday dress you’ve been meaning to buy!

eShakti offers many ways to customize a garment including changing the neckline, hem length, or sleeve length. You can also input your personal measurements to make sure your dress it going to fit your exact body type. You can get all of these customizations for just an extra $7.50! Taking a dress to a seamstress or tailor to custom fit it could cost easily ten times as much, sometimes even more. And it even gets better: If you’ve never customized a dress from eShakti before, your first time is free!

customsleeve

If you’d rather buy a dress without customization, they offer sizes from 0-36W. Every woman is welcome at eShakti.

Another perk if you’re new to eShakti, if you register with their website, you get a $30 gift coupon toward your first order! They really want you to have their clothing, guys.

eShakti also offers a selection of skirts, tops, and jackets. Check out their New Arrivals section for their latest beautiful editions.

You can choose any dress you want from eShakti if you win the giveaway, but I’ve selected a few dresses below that I think would be perfect for the holidays:

1. Beaded snowflake ponte sheath dress

2. Beaded crepe sheath dress

3. Beaded polka dot tulle dress

4. Floral lurex jacquard sheath dress

5. Floral jacquard sequin waist dress

6. Grace dress


FOLLOW & CONNECT

You can now connect with and follow eShakti on Facebook, Twitter, Pinterest, Tumblr, Google+, and Instagram!

GIVEAWAY

To Enter: Fill out the mandatory entry of your name and email in the Rafflecopter widget below. After that, enter as many optional entries as you like to increase your chance of winning.

Eligibility: eShakti only ships to the US and Canada at this time, so unfortunately, this giveaway is limited to residents of only those countries.

The giveaway ends at 11:59 pm EST on December 1st, 2014. Come back daily for more entries!

For complete giveaway rules click the link below:

Official Giveaway Rules

a Rafflecopter giveaway

Pin It

Evil Witch Cupcakes

Posted on

IMG_3209

Wicked witches are one of my favorite Halloween monsters. I love that they use potions and spells and cats (CATS! I love cats) to enact evil. I just can’t get enough of them.

There are many ways to make them into cupcakes, but after looking for ideas online for witch cupcakes, none of them quite looked like how I wanted my witches to look. Some were too cutesy, others hinted at witches but didn’t have faces, and so on. I knew I wanted my witches to have certain features: a mean or scary face, a hat, and a nice big hooked nose with warts.

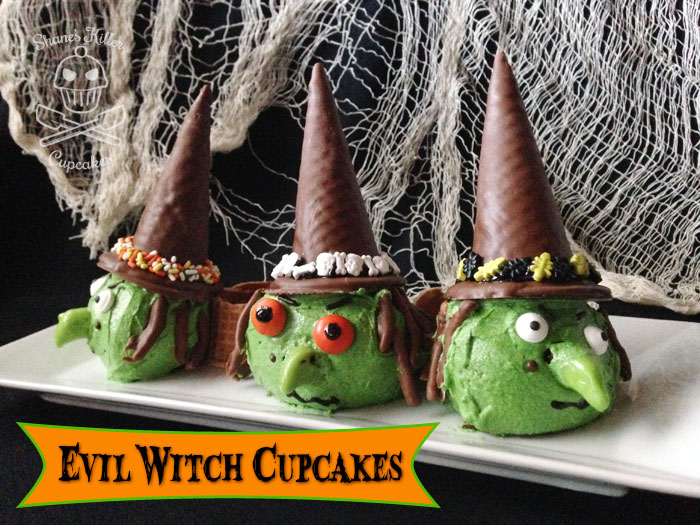
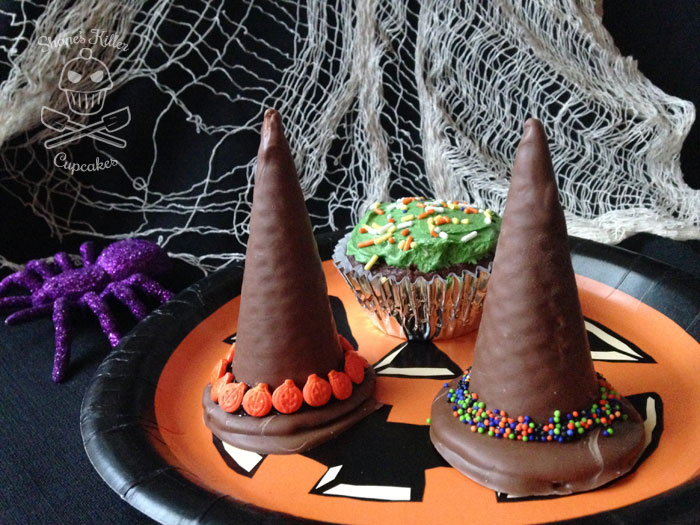
These were the cupcakes I came up with! Of course, when coming up with something new, you learn a few things along the way, especially what not to do! I like how they turned out, but they did put up a little fight while I was building them.

My troubles started when I could no longer find chocolate sugar cones in the stores. I know they existed in the past, because I bought some once, but I guess they have since been discontinued, as every store I checked only had regular sugar cones. I acquiesced and got the regular ones, but the chocolate ones would have worked better. I’ll get to why a little later.

IMG_3196

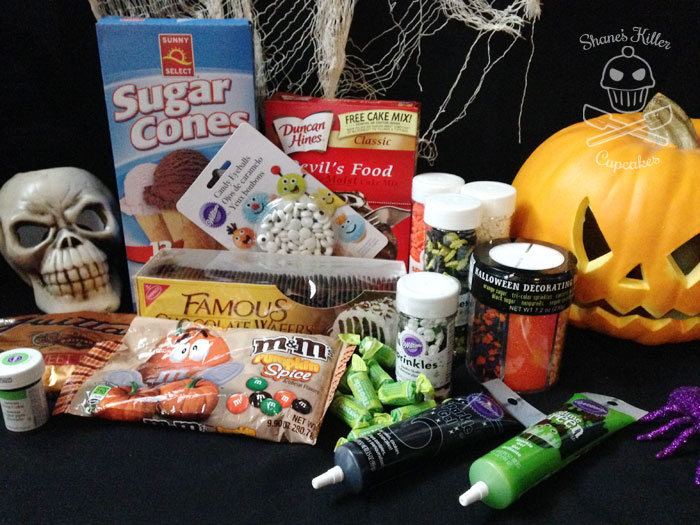
You’re going to want to collect quite a few things for this project. I’ll give you a list of all the items I used, but you’re in no way confined to it:

  • Sugar cones (preferably chocolate ones if you can find them)
  • Cupcakes of your choosing (I used Duncan Hines Devil’s Food)
  • Chocolate wafers (I used Nabisco Famous Chocolate Wafers)
  • Green chewy candy (Starbursts or Tootsie Rolls)
  • Decor gel in black and green
  • Green and yellow food coloring drops or gels
  • White frosting (I used this recipe from the Food Network)
  • Halloween candies and sprinkles (bugs, pumpkins, skulls and bones, colored sprinkles, etc.)
  • Candy eyeballs and/or M&Ms for eyes
  • Crispy chow mein noodles (I used these ones)
  • Candy melts in chocolate or black color

While you bake your cupcakes, you can get some of the decor items made. I made the witch hats first, because I knew they were going to take some construction time and need time to chill. If you can find chocolate sugar cones, this process will be much faster, as you won’t need to cover them in chocolate. Using chocolate cones is the preferred method, because the chocolate dipped hats were just a tad too heavy for my cupcakes and they toppled over! But if you can’t find the chocolate cones, here’s how to construct the hats.

IMG_3204

Cut the cones down a bit with a small serrated knife to make them fit the chocolate wafer cookies better. To keep it from cracking apart, make small cuts all the way around and then gently break it off. If it’s jagged, use a small cheese grater or a Microplane zester to file the bottom smooth.

IMG_3205

Next, melt your candy melts in a bowl and dip both the cookie wafers and the outside of the cones in it. While the chocolate is still wet, on a wax paper-lined cookie sheet, place the cone on top of the wafer to form a hat.

IMG_3206

If you find the chocolate cones, all you need to do is dip the bottoms of the cones in the melted chocolate and place them on the wafer brims to glue them together. Since the cookie wafers and chocolate cones are relatively the same color brown/black, they don’t need to be dipped fully in chocolate. This also makes the hats lighter and less likely to tip your witches over.

Stick the freshly dipped hats in the fridge to harden.

IMG_3208

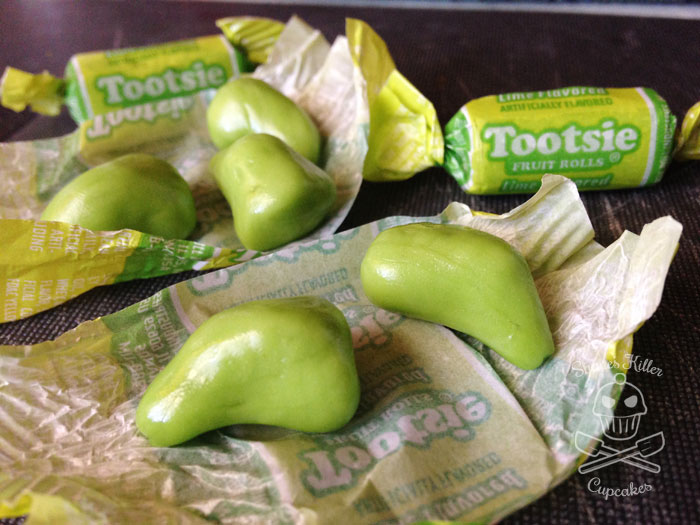
The next things to work on are the noses. Warm the green chewy candies in the microwave for 10-15 seconds to make them pliable. I used green Tootsie Fruit Rolls for my noses. Each Tootsie Roll makes two noses. Shape the noses with your fingers until they look how you like. One thing I found out while making these is that the noses fell off the face easily, so to keep them on, cut a toothpick in two and stick it into the back of the nose.

Make your frosting, or use canned frosting, and color it the same green as the noses. You may need to use a little yellow coloring too.

For the witch hair, I used the crispy chow mein noodles dipped in chocolate. Chill these as well. You could use a number of things for the hair though. Another idea would be black licorice string.

IMG_3219

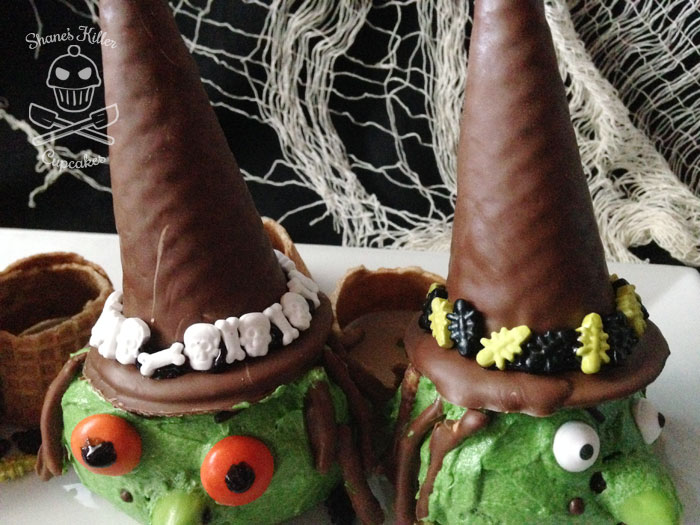
Decorate the hats when they are chilled with candy sprinkles. I used some of the decorating gel to draw a band around the hats and then placed different candies and sprinkles on them.

Once the cupcakes are cooled, peel the wrappers off of the ones you plan to make into witches. For the faces, the cupcakes will be placed on their sides, so cut off part of a side of a cupcake to create a flat surface for the cupcake to sit on. Cut off the opposite side to make a flat surface for the hat too. Then frost the cupcakes with your green frosting.

Place the eyes, nose, and hair onto the cupcake. For a craggily-looking witch, add some warts. I used a brown round candy sprinkle for her face warts and the decorating gels for warts on the noses. Draw on a mouth and for angry eyebrows, use a single sprinkle each. Lastly, place the hats on the top. If the hats are too heavy, like mine were, prop the cupcake up in the back with something. I used the tops of the ice cream cones that I had cut off earlier.

IMG_3232

Since the witches were difficult to put together, and kept threatening to fall apart, I only ended up making three and used the rest of my supplies to make other treats. The chocolate-dipped hats are pretty good treats on their own. Since I still had about 20 cupcakes left, I just frosted them normally, and decorated them with the Halloween sprinkles.

IMG_3224

One thing I loved about these witches is that each witch ended up with a different facial expression and personality. One looked mean, another scared, and the other looked confused.

IMG_3210I hope you give these evil witch cupcakes a try this year even if they are a little difficult to construct. Since they are so customizable, they would be great for a decorating party.

Even my cat wanted to get in on the decorating!

IMG_3200

Photo shoot crasher

Have a safe and happy Halloween, everyone!

Pin It

Cheers to Vegan Sweets Cookbook #Giveaway (8/7-8/15) US

Posted on

IMG_2487
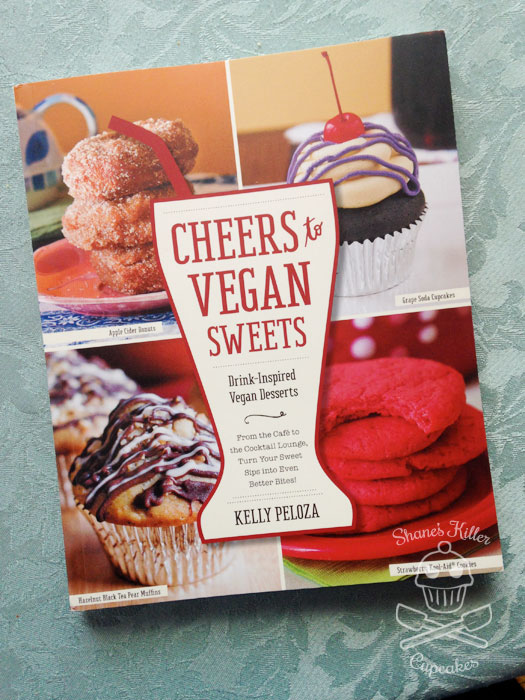
You know what’s more awesome than winning a copy of Cheers to Vegan Sweets: Drink-Inspired Vegan Desserts by Kelly Peloza? Winning TWO copies of it! A couple of months ago I won a copy of Cheers to Vegan Sweets from Cut Out and Keep. The prize finally showed up this past week. I was excited to get it, because I haven’t made vegan treats before and I’m interested in trying them out.

Then two days later another copy of it showed up! What!? Someone at the publishing company must have made a mistake. Should I have contacted the publisher to return the second book? Probably. But I’m sure they’d tell me to keep it. Plus, I have a group of awesome readers who love baking, so hopefully they won’t have a problem with me sharing it with you!

If you’d like to check out a couple of the recipes from the book, click here!

How to Enter

To enter, leave your name and email address in the mandatory entry in the Rafflecopter widget below. That’s it! If you’d like to increase your chances of winning, enter as many of the optional entries as you want. Some are even daily!

Rules

Entrant must be 18 years of age or older and be a resident of the US. Shane’s Killer Cupcakes is mailing this prize and only US addresses will be accepted. This giveaway starts at 12:01am EST on 08/07/14 and ends at 11:59pm EST 08/15/14.

For the complete giveaway rules, click here.

a Rafflecopter giveaway

Pin It

Shabby Chic Tea Party

Posted on

The tea party was a success! Putting on a party mostly by yourself is a tad daunting, but I’m really pleased with how everything turned out. Of course I was getting things ready all the way up to when people started to arrive, so I didn’t get all the photographs of the decor I wanted, but these pictures will give you an idea of what it looked like.

I made most of the decor myself. I explained how to make some of the decor here and here. For this lovely background, I found instructions at KoJo Designs for the paper flowers and at Shiny Happy Sprinkles for the paper fringed backdrop. It’s a really great idea for an inexpensive background that looks pretty and covers a good sized area. Something like this would be perfect for a photo booth background too!

I invited my guests with these home made tea invites. The invite is about the size of a business card and I attached it to a bag of tea.

IMG_5716

I asked my friends to dress up in their nicest clothes, and while everyone did, I put an accessories table together just in case someone didn’t have any fancy jewelry or hats to wear.

teaparty1

There was one table that had all the tea supplies ready and I decorated the fireplace and mantel with flowers, candles, and the fabric swag and tea party banner that I showed you how to make last week. I had various glassware for my guests to drink iced teas from, but my favorites were these milk bottles I decorated with ribbon and paper flowers.

IMG_2186

The food table had all sorts of treats that fluctuated throughout the day. I provided tea sandwiches, cookies, biscuits and jam, petits fours, popcorn, fruit salad and candy. There was a ton to eat!

teaparty2

These chocolate-dipped shortbread tea bag cookies were a hit! You can find the recipe for them here. The petits fours were also popular, especially the chocolate ones since they were devoured before I was able to get a closeup photo of them. If you’d like to make the petits fours click here for the recipe.

Thanks for joining me for my tea party!

IMG_2210

Pin It

Dainty Petits Fours

Posted on

IMG_2231_2

One of the cute treats I made for my Afternoon Tea Party this weekend was a batch of cute petits fours. They are a little labor intensive, but I cut some corners to make them a little easier than some petits fours can be.

They’re made out of pre-made poundcake that you can find in the freezer section of your grocery store, strawberry jam, and melted canned frosting. If you want them to be a little decorated, use sprinkles, frosting or candy confetti. I also made some petits fours with chocolate frosting, but they were eaten before I could get a picture of them!

IMG_2241

Dainty Petits Fours

Ingredients

  • 1 frozen loaf of pre-made poundcake
  • 1 can of vanilla frosting and/or 1 can of chocolate frosting
  • Candies, frosting, or sprinkles for decor
  • Fruit jam or jelly for filling

Instructions

  1. Defrost the poundcake and then trim off the dark edges all the way around the cake. Don't trim off too much cake though.
  2. Cut the cake into 1/2 inch slices.
  3. With a 1-1.5 inch square cookie cutter, cut slices into squares. You should be able to get two squares per slice.
  4. Spread jam on one square and sandwich it with another square. Repeat until you've used all the cake pieces.
  5. Take a jellyroll pan or a pan with a raised edge lined with foil or waxed paper and place a cookie rack in it.
  6. Melt the frosting in a bowl for 10-15 seconds. If the frosting is thin enough, move onto the next instruction, otherwise, heat for a few more seconds until the frosting is nice and runny.
  7. Put the cake sandwiches on the rack and drizzle melted frosting over them until they are fully covered on all visible sides.
  8. Before the frosting sets up, place your decor candy or sprinkles on top of each petit four.
  9. Place the pan in the fridge until the frosting has set completely.
  10. Serve petits fours in mini cupcake wrappers for clean handling.
https://shaneskillercupcakes.com/2014/07/dainty-petits-fours/

Pin It

Chocolate-Dipped Shortbread Tea Bag Cookies

Posted on

IMG_2225_2
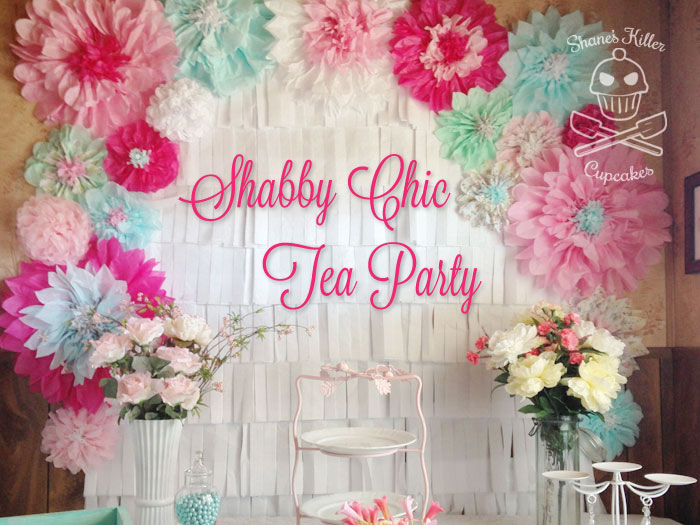
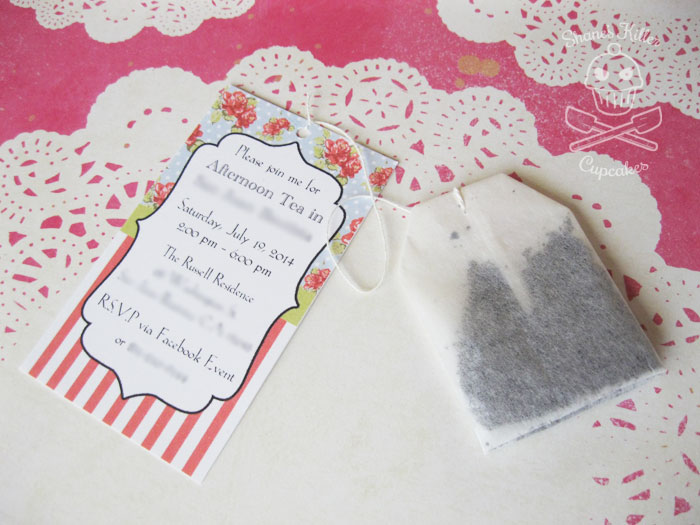
I’ve been planning a tea party for some time now and saw a picture of some tea bag cookies on a blog called Le Pétrin that I thought were cute, but it was in French, which I sadly cannot read. That’s when I decided to figure it out myself because I really wanted to include these at my party.

I found some shortbread mix in the baking aisle and decided that would be a great base for these cookies. I made a little tea pot tag in Photoshop and tied them onto the finished cookies with some thread. They were a total hit at my party!

Chocolate-Dipped Shortbread Tea Bag Cookies

Ingredients

  • 1 package Betty Crocker Shortbread Cookie Mix or a recipe from scratch (and whatever ingredients are needed to makes these)
  • 1 package of chocolate melting candy

Instructions

  1. Make the cookie dough according to the instructions of your mix or recipe and roll it out on a floured surface to 1/4 inch thick.
  2. Cut cookies into tea bag shapes by making rectangles and cutting the corners off one short side.
  3. Poke a hole near the top of the cookie with a wooden skewer.
  4. Bake as directed on your cookie mix package or recipe.
  5. After they are done baking, let cool for a minute or two on the baking sheet, and then move them to a cooling rack.
  6. If the holes have closed up a little, re-poke the holes with the skewer while the cookies are still warm.
  7. Once the cookies are fully cooled, melt some chocolate in a mug in 15-30 second increments until its fully melted. If the chocolate is too thick, add a little cooking oil to thin it.
  8. Dip the cookies about a third of the way into the chocolate and place on a baking sheet covered in wax paper.
  9. Place in the fridge until the chocolate sets up.
  10. Create a tag on your computer or just cut up little blank squares and punch a small hole in it for string.
  11. Once the cookies are fully chilled, tie the string with the tag attached to the cookie.
https://shaneskillercupcakes.com/2014/07/chocolate-dipped-shortbread-tea-bag-cookies/

***07/23/14 Edited to include the source for my idea.
Related Posts Plugin for WordPress, Blogger...Pin It