D.I.Y. Shabby Chic Party Decor {Part 2}

Posted on

DIYShabbyLogopart2_2

In this second and final installment of my Shabby Chic Tea Party crafts series I’m going to go over a couple of easy tissue paper and painting crafts that will instantly add a lot of shabby chic charm to your decor.

Tissue Paper Flowers and Poms

Tissue Flowers and Poms are pretty simple to make. It’s a craft that I think they even teach in elementary school, that’s how easy this is. To make both, follow the instructions below:

tissuepom1. Select your tissue pieces. The length of a sheet of tissue paper is a good starting point and depending on how wide you want your pom, trim it down. I believe for the pink pom above I used 20 inch x 20 inch tissue paper and cut it in half giving me 20 inch x 10 inch sheets. Next, layer about 8-10 sheets on top of each other. For flower poms, you wont need as many sheets, maybe 4 or 5 at most.

2. Next, accordion fold your sheets. Make the folds about one inch in size.

3. Gather up your folds and twist some wire around the center. If you’re making a flower, chenille stems (pipe cleaners) are good for this, because they will hold the paper together and also act as a flower stem. For the poms, make a hook or loop from the other end of the wire for hanging purposes. On the top and bottom, cut a rounded or pointed tip. This will make it look more rounded or flower-like once you open the layers.

4. Fan out the paper and carefully pull the layers apart. Take it slow or you might end up tearing your petals.

Painted Decor

Painted Crate

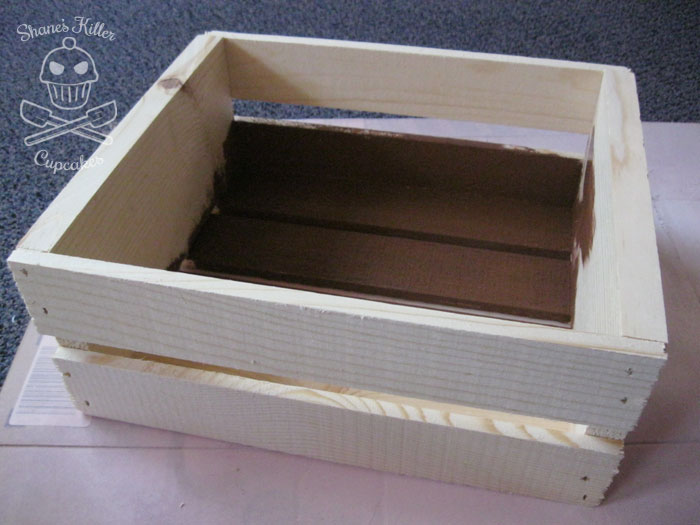
To paint a crate to look shabby chic, you’re going to want to either start with some old wood or if you buy a new crate, like I did, layer some colors on top of each other. If you start with old, darkened wood, paint on top of it with a soft pastel or white and when it’s dry, sand some of the paint off so that it looks worn and old.

For a new crate, or other wooden object, paint it in a base coat of some brown.

IMG_5742

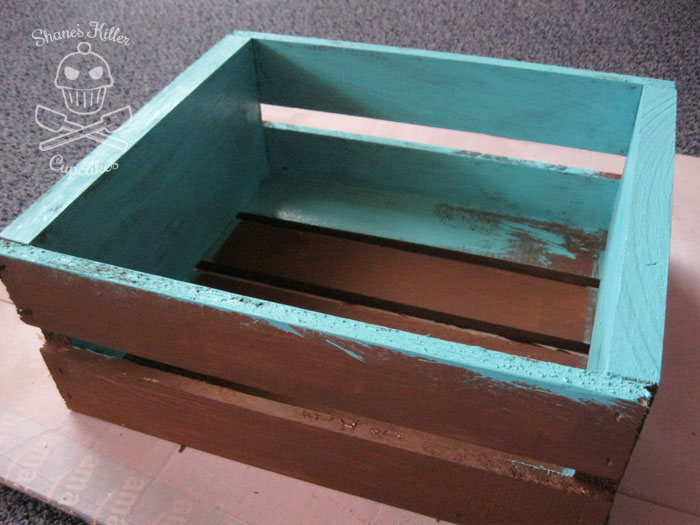
When that layer is dry, paint it with your top color. I chose a pretty turquoise color. Don’t worry about full coverage here. If some of the brown shows through, that will add to the worn effect.

IMG_5745

When I was done painting the turquoise, I felt like it was a little too bright so I softened it up with a paint mixture of the turquoise and white. I sort of dry brushed it on so that it wouldn’t cover up too much of the original turquoise. Dry brushing is done with a dry brush and just a little paint on the tip. It creates a streaking effect and looks good for this craft.

IMG_5755

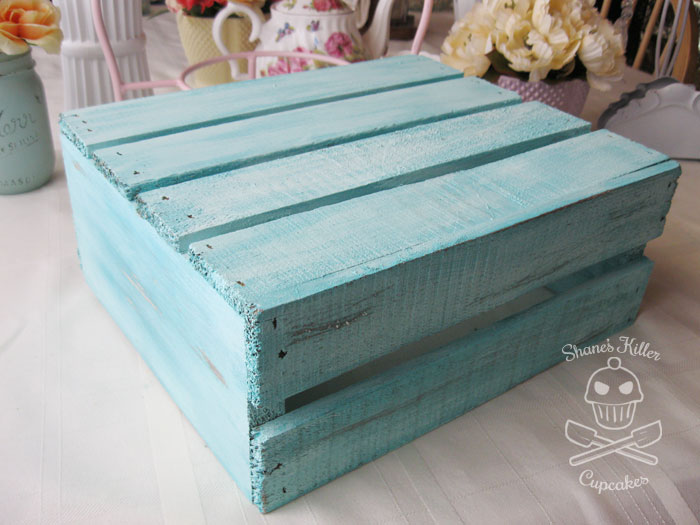
The light top coat also gave the paint a sun bleached look that was great. The final step is to sand the edges and across the sides a little so that the brown shows through. The more the paint looks worn and chipped, the better. I even took a knife to it to chip some of the paint off. Distressing is your friend here.

Other Painted Decor

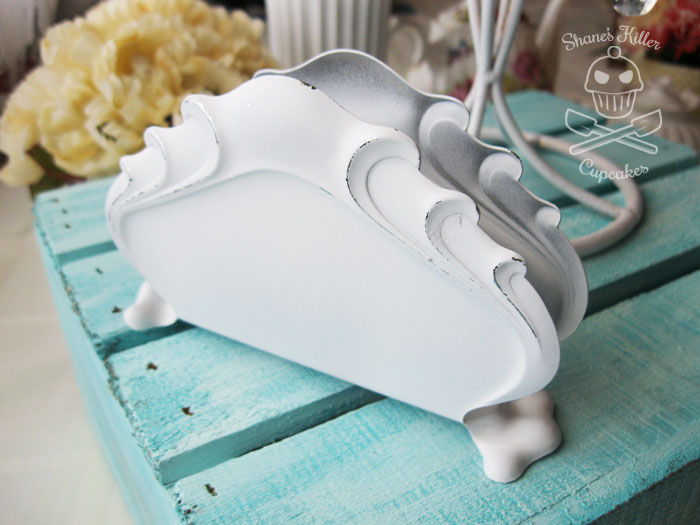
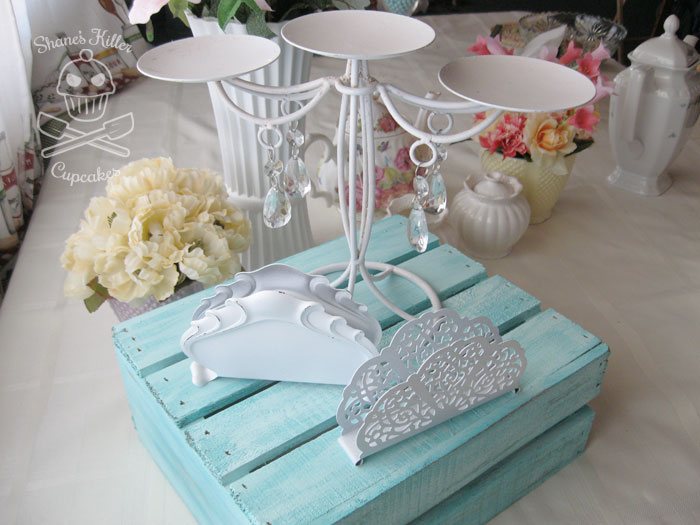
I would highly suggest thrift shopping for shabby chic party decor. If you can find items that you like, even if they don’t quite look right, they can always be painted. I found a set of metal napkin holders that, once painted (and sanded) looked great.

IMG_5753

When I found this candelabra at a local Goodwill it had been sloppily painted a gold color. I loved the plastic crystals hanging off of it, so I grabbed it. A couple of spray painted coats of white later, the gold was gone, and it fit in with my color scheme.

IMG_5752

Another thing I found at thrift stores were mason jars. You can also get them new if  you can’t find them used. I did a quick coat of spray paint on these babies too and then, once again, lightly sanded some of it off to look worn. I’m using these for flower vases.

IMG_5730

If you get imaginative, you can use pretty much anything, and with the right paint job, it’ll look great at your shabby chic party.

I hope these techniques are easy for you to follow. If you have any questions about any of the instructions leave a comment below.

Coming soon, I’ll document my shabby chic tea party (it’s this weekend!) and share with you how it turned out and all the yummy food I made.

If you missed Part 1 of my shabby chic party decor tutorial click here.

Pin It

D.I.Y. Shabby Chic Party Decor {Part 1}

Posted on

DIYShabbyLogopart1

This month is my shabby chic themed tea party, and I have been handcrafting a number of my decor items to keep the cost down. The best things to keep in mind for the shabby chic look is that it should look worn but charming. Chipped paint, ratty, frayed edges, and pastel floral patterns are a good place to start. This installment will cover the different banners and garlands I’ve made for the party.

Fabric Strip Swag

This was fairly easy to make and quick too. I got some pretty floral cotton fabric prints and tore them into strips. I found some of the fabric at local thrift stores for cheap and then filled it out with 1/4 yard cuts of fabric from a fabric store. The great thing about cotton fabric is that if you cut a little snip in it, you can tear the rest, and it will tear straight. This is great for two reasons: it’s super easy and quick to get your strips, and it looks a little tattered and worn for the shabby chic look. These strips are about 2-3 inches wide and vary in lengths. I eyeballed everything so that it wouldn’t look too uniform. Tie or loop the strips to a piece of twine and you’re good to go! You can also add lace or burlap ribbon to it for a varied look.

IMG_1736

Tea Party Banner

For this one, I used 4.5 inch x 6.5 inch sheets of burlap that I found in a pack at the local craft store. Any tight woven burlap will work for this, but these sheets were already the right size. You can cut them into any flag shape you want, I chose to cut them into swallowtail flag shapes.

IMG_1739

IMG_5723

For the lettering, you can do it several different ways. If you have a shape cutting machine you could make a stencil and paint it on, or free hand it, or use a light box with the lettering printed out on some paper. I chose the last option because it looked the most professional without costing me tons of money for expensive tools and it was easy. Not having a light box, I had to get creative. I used my glass serving tray and a flashlight underneath to trace the letters onto the burlap. Any piece of glass would work for this. You could even use a window and tape the printed letters to it. You just need some back lighting.

IMG_1714 IMG_5721

With a marker similar to the color you’re going to paint the letters, trace the outside of the letters. Next, fill in the letter with your paint.

IMG_5724
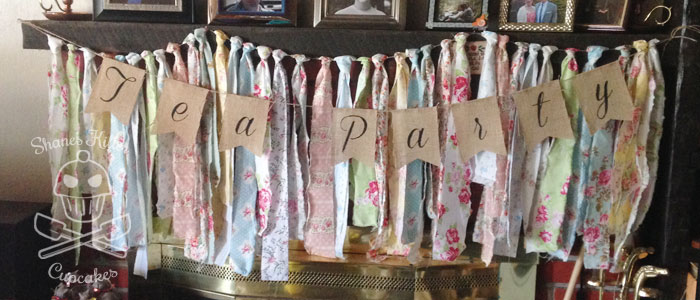
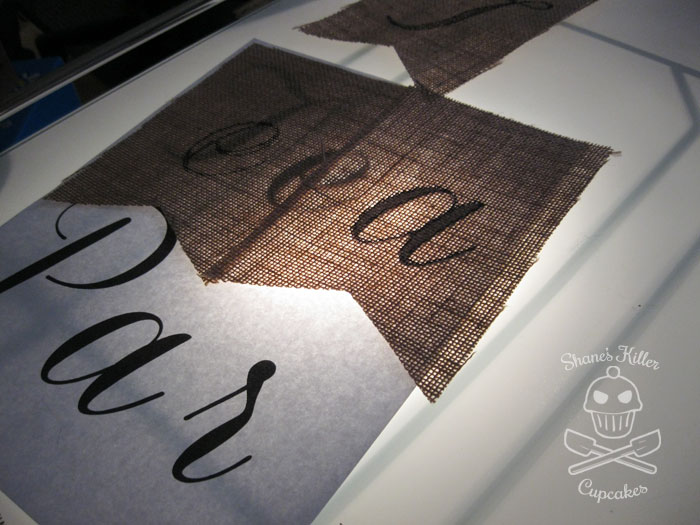
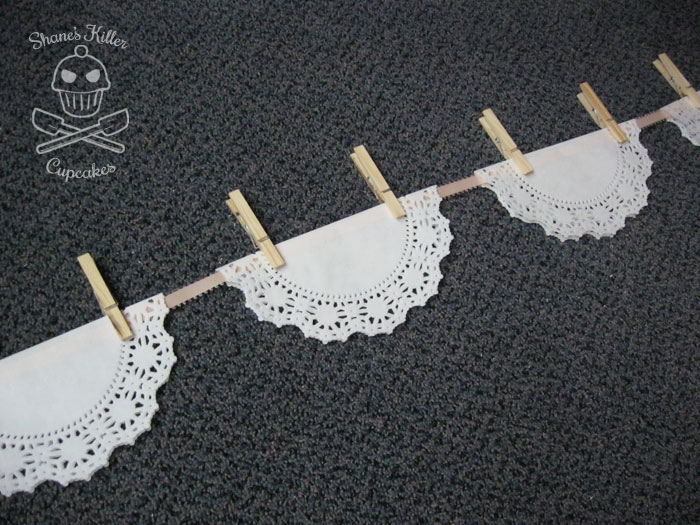
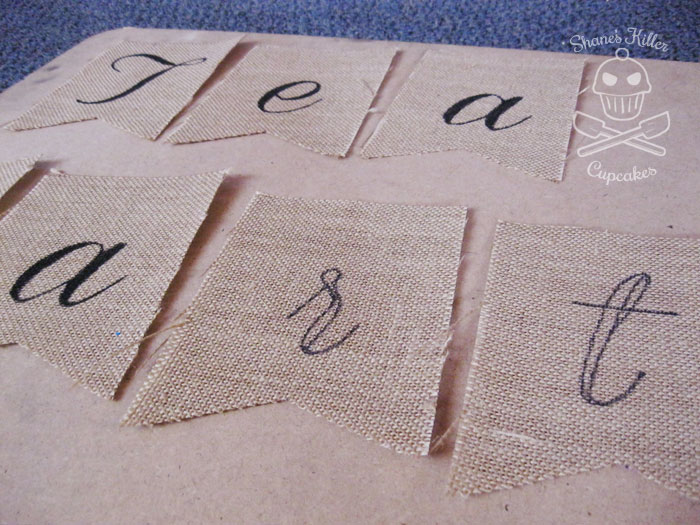
Attach the flags to some twine by folding the top over the string and hot gluing it together. Since burlap is loosely woven, be careful when hot gluing. It could get on your hands easily and burn. You could also use fabric glue but you’ll need to clamp it together while it dries.

I chose to hang this banner in front of the fabric strip swag.

Pennant Flag Garland 

IMG_5750

This one is also easy. First, get a paper stack of floral prints and other paper you like from the scrapbook section of your craft store. I got an 8.5 inch x 11 inch stack and was able to get 3 pennants from each sheet of paper. Measure to the center of one of the 11 inch sides (5.5 inches) and measure 2.75 inches on either side of the other 11 inch side of the paper. Then connect the measure marks like in the diagram below and cut out your pennant shapes.

pennantflags

With a hole punch, cut a hole in each corner of the top of the pennant and string some twine through for hanging.

IMG_5746

Doily Garland

IMG_5741

This garland is very pretty and takes minimal effort. All you need is a package of 8 inch paper doilies, some paper or fabric flowers, and a piece of ribbon.

IMG_5733

Fold each doily in half, attach to a piece of ribbon and glue a flower to the center of each one. I found some paper flowers on Etsy for this garland.

I used clothespins to arrange the doilies on the ribbon and then one at a time took the pins off and hot glued the doilies down. After that, I glued the flowers down to the front. Easy peasy.

IMG_5738IMG_5740

In Part 2 of D.I.Y Shabby Chic Decor, I’ll be showing you how to make some inexpensive but pretty decor from tissue paper and a few painting projects that add the finishing touches to a shabby chic party.


Pin It

Stars, Flags, and Firecrackers! It’s a 4th of July Dessert Round Up

Posted on

titleimage_2
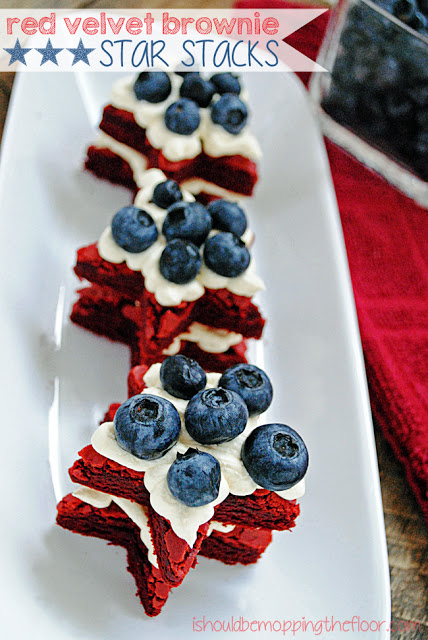
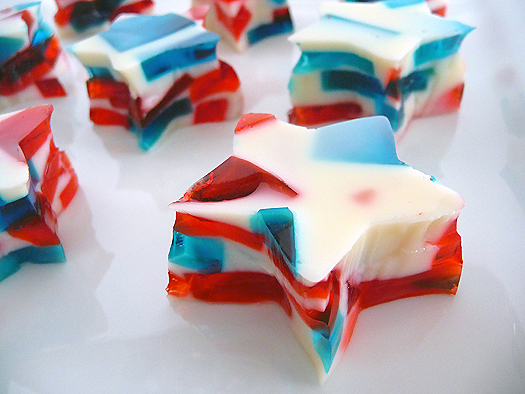
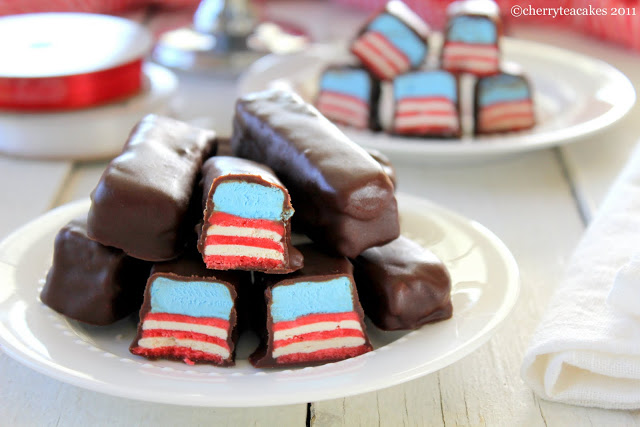
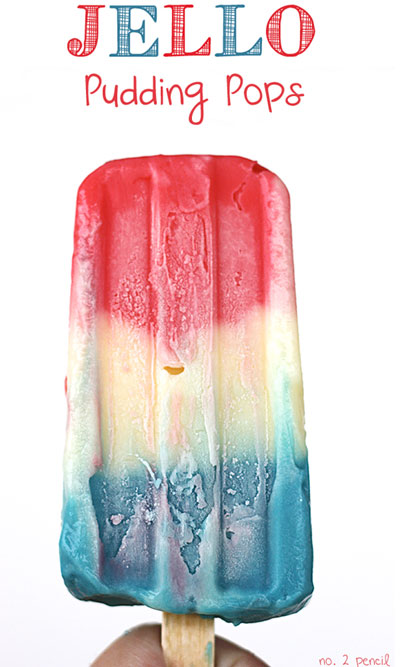
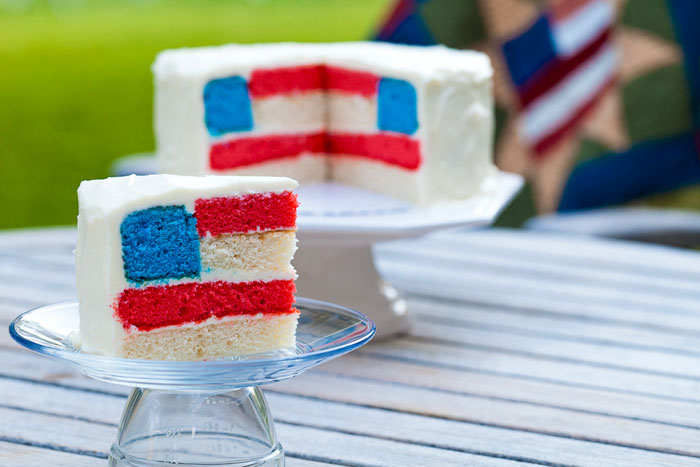
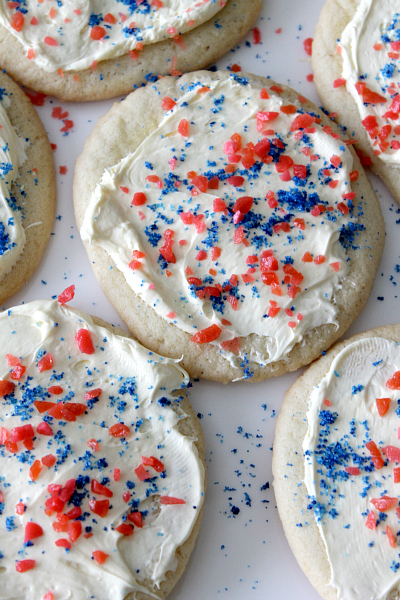
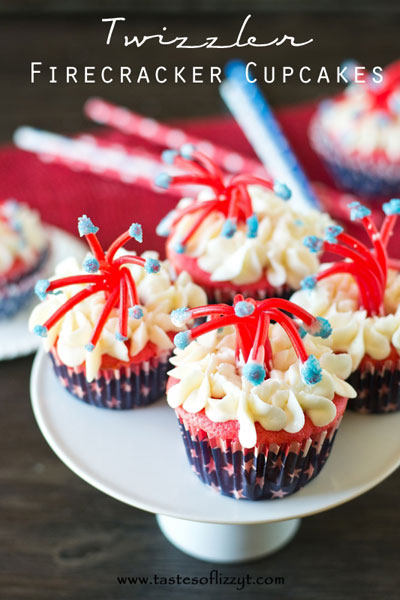
Fourth of July is this week and if you’re in the United States, you probably have a party or BBQ to attend. Still not sure what you’re going to bring to your potluck? Check out these deliciously patriotic sweets I’ve selected from around the Internet.
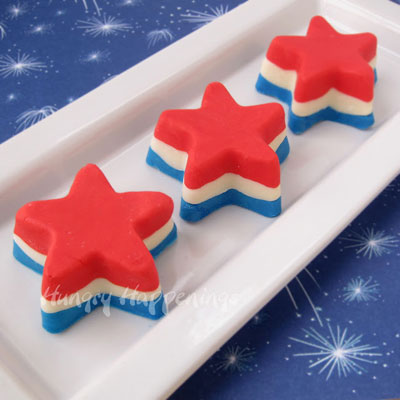
STARS

1. Red, White, and Blue Fudge Stars from Hungry Happenings

These layered stars, made from white chocolate, sweetened condensed milk, and food coloring, give a bright pop to any party table.

red-white-and-blue-desserts-for-4th-of-july-fudge-stars-
2.  Red Velvet Brownie Star Stacks from I Should Be Mopping the Floor

If brownies are more your style, try these stacked red velvet brownie stars with cool whip and blue berries.

red velvet brownies from cake mix


3. Red, White, and Blue Stained Glass Jello Stars from Brown Eyed Baker

I love these because they remind me of the jello desserts of the 1960s.

stained-glass-jello-singlestar


STRIPES

4. Red, White, and Blue Raspberry Candy Bars from Cherry Tea Cakes

These candy bars are a great surprise for your friends! From the outside they look normal, but one bite reveals the red, white, and blue stripes inside. I always love surprise inside treats.

IMG_9081


5. Jello Pudding Pops from Number 2 Pencil

If you have access to a freezer, these pudding pops are great for a hot summer day.

Jello-Pudding-Pops


6. Triple Berry Frozen Smoothies from In Katrina’s Kitchen

Made from a combination of yogurt, fruit, and honey, these delicious smoothies are a perfect cool down on 4th of July.

ae28fbcb48cf2a21572827289197e3e7

FLAGS

7. 4th of July Flag Cake from Secret Life of a Chef’s Wife

Here’s another version of the surprise inside treat. This cake is baked with several colored layers and combined to form a flag when cut into. Can you imagine what your friends will say when they see the inside?

Fourth_of_July_Cake-2


FIRECRACKERS

8. Firecracker Sugar Cookies from Mom Dot

To the unfamiliar, these look like your everyday sugar cookies with candy sugar and sprinkles on top. What they don’t know is these will pop and crackle in your mouth when you eat them! How you ask? The secret ingredient is Pop Rocks!

popcookie


9. Twizzler Firecracker Cupcakes from Tastes Of Lizzy T

To keep with the firecracker theme, here are some cute cupcakes that look like little firecrackers exploding.

Twizzler-Firecracker-Cupcakes-are-so-fun-for-a-July-4th-party


If you aren’t planning a red, white, and blue dish for your party but still want it to look festive, decorate it with flag picks!  To make your own, download my free American flag pick printable by clicking on the picture below:

IMG_3444

Have a fun and safe Independence Day!


***All photos were used with permission
Pin It

The Photography of Daily Life

Posted on

I got a smart phone for the first time this year, and the one thing I have enjoyed having with me at all times is the camera on that phone. I’m still wrapping my head around the idea that I have a camera at my fingertips pretty much at all times, because for so long I never had my camera with me when I wanted it. It was too much hassle.

I hope that taking pictures becomes more second nature to me now, because I love documenting what I see and experience. Hopefully that will also help me with this blog.

SnapKnot
Courtesy of: SnapKnot
***Disclaimer: Image posted as an entry into a giveaway

Easter Basket Cupcakes

Posted on

IMG_5664When I was a kid, my favorite part of Easter was going on an egg hunt around the house. Sometimes my parents would hide presents with each egg as well so it was double the fun!

This year I decided to relive my youth with adorable Easter basket cupcakes. I found these Wilton basket wraps in a store a while ago but never did anything with them. As I was going through my baking supplies recently, I came across them and figured they would be prefect for Easter cupcakes.

IMG_5675I’m not even sure if these are widely available anymore since they’re at least 2-3 years old, but you can still buy them on Amazon.

IMG_5669The cupcakes themselves are super easy to make and don’t even take long to put together. Just make a batch of any flavor cupcakes, frost them and cover them with dyed green coconut flakes and egg-shaped candy like M&Ms. That’s it!

Easter Basket Cupcakes

Ingredients

  • One batch of cupcakes (any flavor)
  • Coconut Flakes
  • Green and yellow food dye
  • Frosting
  • Egg-shaped candy (such as M&Ms)

Instructions

  1. Make a batch of cupcakes in any flavor and let them cool completely.
  2. Make your favorite kind of frosting (I used buttercream) and frost the tops of the cooled cupcakes.
  3. Put some coconut flakes in a ziplock bag, add a few drops of green and yellow food dye, close the bag, and shake it up until the flakes are a good grass-green color.
  4. Sprinkle the coconut on top of the frosting.
  5. Place 3 egg-shaped candies in the middle of each cupcake.
  6. For the baskets, construct the basket wrappers and drop a cupcake into each one.
https://shaneskillercupcakes.com/2014/04/easter-basket-cupcakes/

IMG_5670Have a wonderful Easter everyone! What types of Easter goodies do you make?


Pin It

Handmade KitchenAid Stand Mixer Cover

Posted on

mixer_coverI know a lot of you have a KitchenAid stand mixer and hate that it collects dust on your counter when you’re not using it. I’m new to the stand mixer. When I received mine for my birthday back in December, I had to get used to using it instead of the ancient hand mixer I’d been using since I was a kid.

The thing I hated most was having to wash the bowl every time I used it because it was covered in dust. This prompted me to look into getting a cover for it, but which one to choose? They run about $20-$40 on Amazon, but I didn’t see any designs I liked. I figured if I’m going to have to pay that much money for one, I might as well put that money into a customized homemade one.

The past few months I’ve been learning to sew. I’m pretty new at it, but when I saw the instructions for making my own cover on this About.com article, I decided to give it a shot. I even added a few things to it like a lining and a side pocket.

IMG_5621

The pocket was a little tricky, but if you have some basic sewing skills, you can figure it out. I started with the outside part of the pocket. Cut out some pieces for the pocket from the outer fabric, interfacing, and the lining that will fit the width of the mixer cover side and go up about 9 inches. Sew the outer fabric (with interfacing attached) and the lining to some piping along one long side, then when you attach the rest of it together, remember to add it on to one side of the cover.

Another alteration I did works well for fabrics that have a pattern that goes in one direction, like the Fifties Kitchen by Michael Miller fabric that I used. I didn’t want the retro kitchen pattern to be upside down on one side, so I added an inch to the length of the long center piece, cut it down the middle and sewed it back together with a 1/2 inch seam so both sides were right side up. It worked out really well.

If you’re even more adventurous, you can quilt the fabric so it has that kind of design on it. I have no idea about quilting, but I just marked out some lines with pencil (although disappearing fabric ink is probably better) and sewed along the lines on the outer fabric that I’d already attached the interfacing to. I used a fusible interfacing that looked sort of like felt. Not sure what it’s called. Then I sewed the whole thing together with the lining added.

The only thing I had a problem with while using the About.com instructions, is that the measurements they gave for the stand mixer cover seemed to be about 1/2 inch too short for my mixer. So make sure it works for the mixer you have before cutting your fabric.

If you make a cover with these instructions or some other way, post a picture of the finished product in the comments below or on my Facebook page! I’d love to see what yours looks like.


Related Posts Plugin for WordPress, Blogger...Pin It