Ice Cream Cone Cake Pops

Posted on

cakepoptitle2

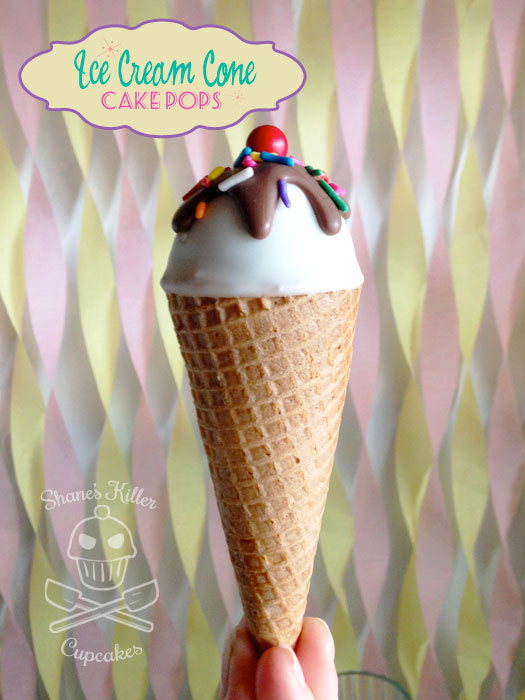
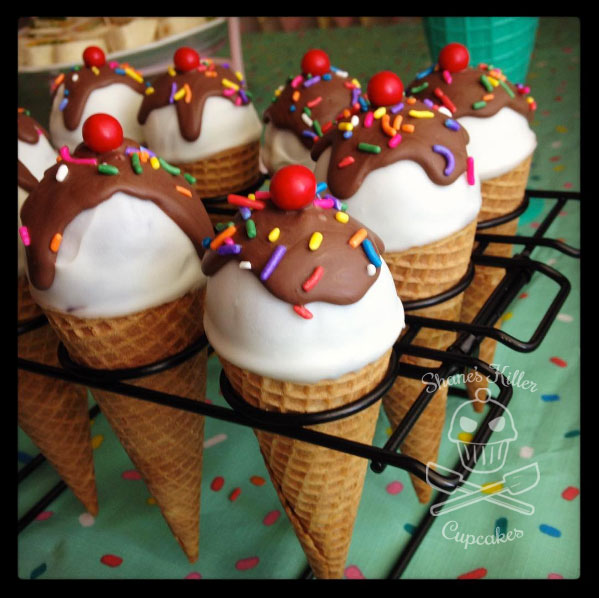
I made these Ice Cream Cone Cake Pops for my recent Ice Cream Social. They were popular. I only made 12 and at some point had to hide one for myself to eat, because they were flying off the table!

They take a bit of prep and construction like most cake pops, but since they aren’t attached to a stick, they are, for me at least, much easier to make.
cakepops

Ice Cream Cone Cake Pops

Yield: 12 cake pops

Serving Size: 1 cake pop

Ingredients

  • 12 pk. of sugar cones
  • 2-3 pks. of candy melts in chocolate and white or pink (I used dark chocolate for inside chocolate and milk chocolate for "syrup" on top)
  • 12 red round candies for "cherry" (I used Sixlets)
  • 1 pk. of cake mix + ingredients used to make the cake (I used Duncan Hines chocolate cake mix)
  • 1 can of frosting (I used chocolate but white frosting works too)
  • Colored jimmies
  • A stand for the cones

Instructions

  1. Make the cake as per instructions on the box or recipe and cook in a 13" x 9" pan. Let cool completely.
  2. While cake is cooking, prepare the cones by placing them in a stand and drizzle about an inch or so of melted* chocolate in the bottom of each cone. Stick the cones in the freezer for a few minutes to set the chocolate.
  3. When cake is cool, crumble the cake finely and mix in up to three fourths of the frosting. Add a little bit at a time until the cake is moist and sticks together.
  4. Chill mixture covered in plastic wrap for 15 minutes.
  5. Form cake balls from the chilled mixture into about 1.5"-2" balls, making one side of the ball slightly more pointed than the other. The pointier end will go into the cone.
  6. To attach the cake ball to the cone, run some melted chocolate around the top inside edges of the cone and stick the ball in. Repeat for all of the pops and then freeze cones again for a few minutes.
  7. Melt* the white or pink candy melts in a mug to cover the rounded "ice cream" cake ball part of the pops.
  8. Dip each cake pop until all of the cake ball is covered up to the top of the cone. Place in cone stand and chill once again.
  9. Melt (or remelt) more chocolate in a Ziploc snip a corner of the bag. Pipe/drip it over the top of the hardened white candy melts. Tap the side of or lightly shake the cone to control the chocolate drips.
  10. While chocolate "syrup" drips are still wet, place one red candy "cherry" and some jimmies on top. Then chill cake pops once more.

Notes

*Melt chocolate according to instructions on the package

https://shaneskillercupcakes.com/2016/06/ice-cream-cone-cake-pops/

IMG_0502

The cake pops are very rich! One pop was enough for me. I wasn’t able to eat my cake pop until the day after the party and the cone was a bit stale by then. I imagine all of the moistness from the chocolate and cake will make the cone less crunchy but it still tastes good and the added chocolate at the bottom of the cone is a nice surprise. It reminds me of those Nestle Drumstick cones.

IMG_0504


Cake It Easy No-Bake Cake Pop Kit Review

Posted on

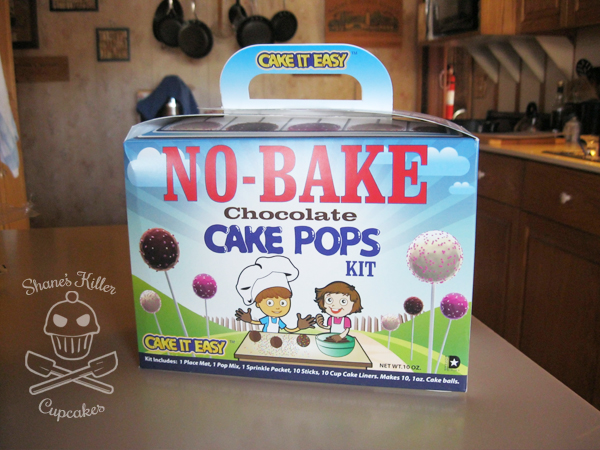
IMG_3600I received this cake pop kit for review from Cake It Easy last week and couldn’t wait to try it once I had enough time to really review it properly. The kit is very easy to use and would be a great activity for kids to do on their own since it doesn’t require a hot oven.

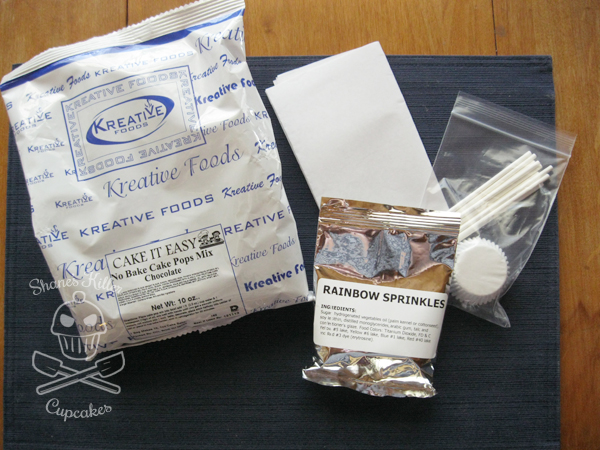
IMG_3608The kit includes the following supplies:

  • No Bake Cake Pops Mix in Chocolate
  • Rainbow sprinkles
  • 10 cake pop sticks
  • 10 paper cupcake liners
  • A paper mat to work on

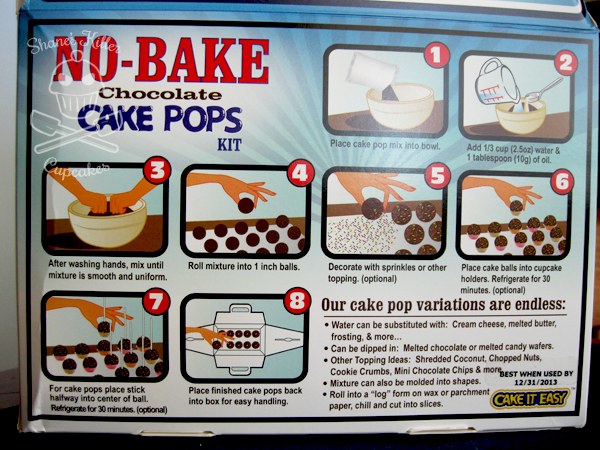
The only thing you need to complete the kit is some water and oil. The box also has a couple variation suggestions if you don’t want to use water. It says the water can be substituted with cream cheese, melted butter, frosting, etc., but I don’t know if it’s an exact amount substitution or if you have to use different amounts of those other ingredients. Also, if you use the melted butter instead of water, do you still use the oil? That wasn’t clear. Although I like that they include other options for making the cake pops, I find this substitution section a little vague and ambiguous. The rest of the instructions are easy to follow though.

IMG_3609I like that they include a paper workspace sheet so that you don’t get your table or countertop messy. A sheet of wax paper or parchment paper would also suffice if you need more space to work than just the sheet that is included.

IMG_3613

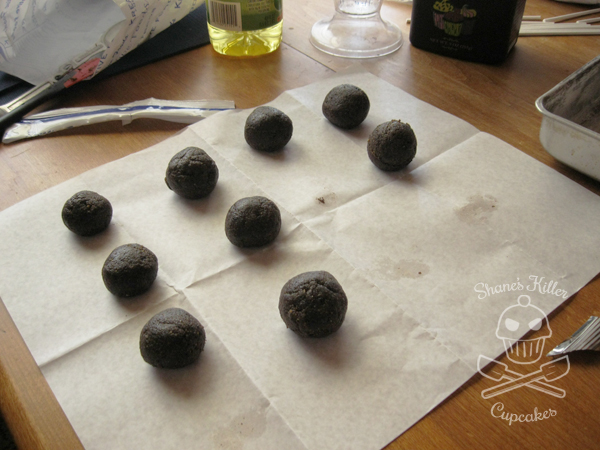
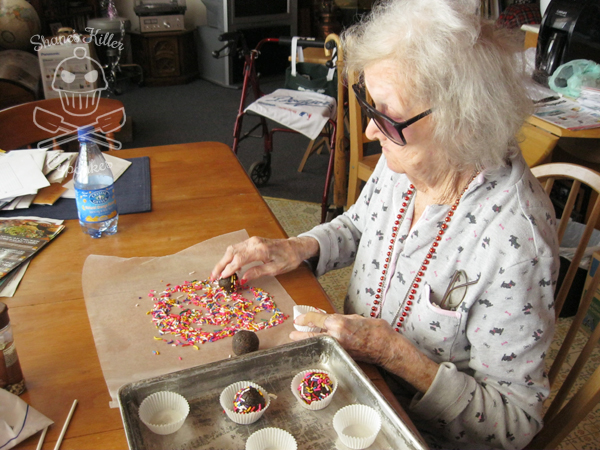
I used the included sheet to lay out the cake balls as I made them and got a sheet of wax paper out for the decorating. This kit is so easy to use, even my 93 year old grandma was decorating like a champ!

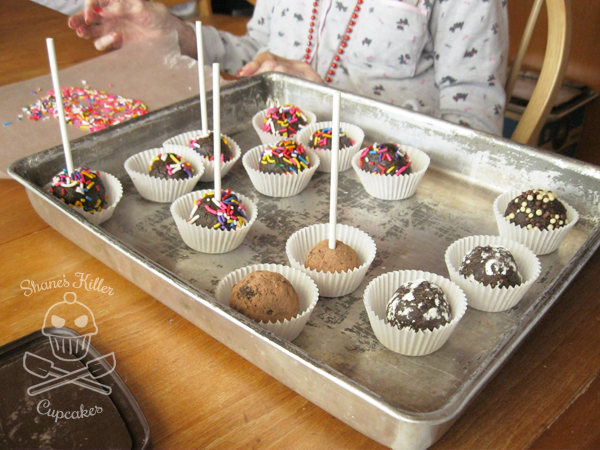
IMG_3612Once you’re done decorating the cake balls you can put them in the included paper cups and add the sticks if you want to make them into pops. The instructions say to put the sticks into the balls and then chill them, but I found that without some kind of “glue” like candy melts, the sticks didn’t really stay attached to the cake balls even after chilling them for a while.

I used the rainbow sprinkles that came with the kit, as well as some of my own cocoa powder, powdered sugar, and some other candy sprinkles to decorate these with.

IMG_3616If I were to make these again, I think I’d try the cream cheese substitution because the water and oil cake balls were not as rich as I was hoping they’d be. They didn’t taste bad but were just too plain.

It took no more than 30 minutes to make these and were super easy put together. Despite a few of the drawbacks like the sticks not staying in the cake balls, I’d definitely recommend this cake pop kit, especially if you have kids. I had a lot of fun making these with my grandma. I just wish it made more pops! These cake pops went quickly.

The kit retails for $19.95 USD and ships for free! You can buy these kits directly from their website or on Amazon.

Connect with Cake It Easy on the web!

Cake It Easy’s website

Cake It Easy on Facebook

Cake It Easy on Twitter


***DISCLAIMER: I received this kit in exchange for my honest review of the product. I was not compensated monetarily.***
Pin It

Batman Cake Pops {Giveaway}

Posted on

In honor of the release of The Dark Knight Rises, I decided to make some Batman cake pops. I meant to do this a couple of weeks ago when the movie came out, but I ordered the background poster too late and have been waiting for it to arrive in the mail. So here they are!

I don’t know how Bakerella does it. Her cake pops are perfection. Mine never come out how I want them to, and it takes all of my patience to not throw the pops against the wall while I’m making them. Truthfully, I’m not sure why I keep making cake pops. Anyway, these aren’t exactly how I envisioned them, but they did turn out pretty cute.

Items you’ll need for this project are cake, frosting, candy melts in yellow, black, white and orange, oil, white sprinkles, pop sticks, pop stand, a toothpick, and candy coated sunflower seeds.

I used brownie mix for this one instead of cake but you can use anything you want. A box mix or your favorite cake recipe will work. Make the brownie or cake according to the directions and let it cool. Once it’s cool, break it up in a bowl and mix a little frosting with it. I used chocolate frosting but white frosting works well too. I’m not sure how much frosting to use, I just put a little plop and mixed it in with my hands. The consistency should be like clay: not too dry, not too moist. Cover the cake mixture with some pastic and chill it in the fridge for a few minutes.

Create a pop stand before you start working on the pops. This can be made out of a block of styrofoam with some holes pre-poked into it, or buy a cardboard cake pop stand from the store. I got mine at Walmart in the baking section.

For the Bat Signals, melt the yellow candy using the instructions on the package and add some oil to it a little bit at a time, until it’s nice and smooth. Dip the end of one of the pop sticks in the candy, and push it about halfway into a rolled up ball of cake. Place it on your stand.

For the Batman cake pops, melt some white candy melts with a little bit of orange and the yellow until it’s the skin color you want. Using the same technique as the other cake pops, glue the sticks onto the cake balls. When you’re done gluing the cake balls onto the sticks, put the cake pops in the fridge for about 15 minutes so the candy hardens.

Next step is to dip the pops. Dip the Signals in the yellow candy and the Batman ones in the skin-colored candy and knock off the extra. Place two candy coated sunflower seeds on each Batman pop for the bat ears. Return them to the stand and chill once again.

Melt some black candy in a bowl or mug and also melt a little bit in a ziplock bag. Dip the Batman pops in the black candy half way and stick a white sprinkle for each eye and place on the stand.

Draw the bat logo with a toothpick on the yellow pops and fill it in with the melted candy in the ziplock (cut the tip off of the bag’s corner). Also draw a mouth on the Batman pops with the bag of black candy. For the last time, chill the cake pops. You’re done!

{Giveaway}

I’ve decided to give away the Batman poster I got for the background. It’s a silk wall poster measuring 40″ x 24.” It shows Gotham City with Christian Bale’s Batman to one side. This is for US residents only as I will be paying for shipping myself.

The poster is brand new but the tape that I used to put it up for the photos with pulled off some of the ink on the corners. So if you win, you will be receiving the poster slightly damaged.

The giveaway will end on August 8th, 2012 at 11:59pm.

Read the Official Rules for more information.

a Rafflecopter giveaway

Pin It


Crazy for Cake Pops Review and Giveaway

Posted on

I received a copy of Crazy for Cake Pops: 50 All-New Delicious and Adorable Creations by Molly Bakes for review from Ulysses Press recently and decided to make something from the book. There are many great decoration ideas in this book with lots of photographs of each cake pop.

Besides the cake pop decorations, there are also many other sections of the book. It starts out with descriptions of all the equipment you’ll need for the projects, as well as recipes for chocolate, red velvet, vanilla, peanut butter, toffee, and lemon cakes and the frostings that go with them. There is also a section in the back that shows some techniques for making the cake pops.

Never made cake pops before? Don’t worry. There are detailed explanations of how to make cake pops and plenty of colorful photos to show you the process. I’ve made cake pops once before, so I was familiar with the instructions, but it was nice to refresh my memory.

As I flipped through the book I came across a ton of designs I wanted to try, but I settled on the Moustache Cake Pops. I thought these looked great and simple.

Unfortunately, I had a few issues with making these. One thing I’ve realized from making cake pops is they always end up more complicated to make than they look. I used the recipe for the chocolate cake and chocolate frosting from the book (recipes below). The cake turned out pretty good although I may have overcooked it. This didn’t matter too much though, because I mixed it with the frosting and it became moist again.

The frosting was a little weird though. I followed the instructions exactly, but the mixture was less like frosting and more like a truffle mixture. It tasted great but wasn’t fluffy like the instructions said it would be. Not sure what happened. I mixed a little half and half in to soften it, but it was still really hard. It did mix into the cake crumbles well though and the mixture seemed right, so I guess this “frosting” didn’t mess it up, but I wouldn’t use the recipe for actual frosting.

Another problem I had was that my cake mixture wasn’t holding together well enough to form the moustache. It kept falling apart. I don’t think I mixed enough of the frosting into the cake.  Oops! I was able to make regular cake pops though so this is what I ended up with:

Not too bad, although I was bummed that the moustaches didn’t work out. I’ll try them again sometime. If you think you could do better, the recipes and instructions for the Moustache Cake Pops are below. Post a picture on my facebook page if you give these ones a shot. I’d love to see them!

Chocolate Cake

Yield: Makes enough for approx. 20 medium cake balls

Ingredients

  • 55 grams (8 tablespoons) cocoa powder
  • 250 milliliters (1 cup) boiling water
  • 120 grams (½ cup) unsalted butter, softened, plus more for greasing
  • 200 grams (1 cup) granulated sugar
  • 200 grams (1-2/3 cups) self-rising flour*, plus more for the tin
  • 1 teaspoon baking powder
  • ¼ teaspoon baking soda
  • ¼ teaspoon salt
  • 1 teaspoon vanilla extract
  • 2 eggs, at room temperature

Instructions

  1. Put the cocoa into a heatproof bowl, pour in the boiling water and stir until combined. Set aside to cool. Preheat the oven to 375°F (190°C). Lightly grease and flour a 10-inch (25-centimeter) round cake tin. Sift together the flour, baking powder, baking soda and salt. Cream the butter and sugar until pale and fluffy. Mix in the vanilla. Add the eggs one at a time, mixing well. Pour in the dry ingredients and gently beat until combined. Fold in the cooled cocoa until the color of the mixture is even. Pour into the tin and bake for 45–60 minutes, or until a toothpick inserted into the center of the cake comes out clean. Once baked, leave to cool in the tin for 20 minutes. Turn out onto a wire rack to finish cooling.

Notes

*I didn't have self-rising flour so I made some using this recipe: 1 cup flour, ½ tsp. salt, 1½ tsp. baking powder sifted together.

https://shaneskillercupcakes.com/2012/03/crazy-for-cake-pops-review-and-giveway/

Chocolate Frosting

Ingredients

  • 120 grams (½ cup) unsalted butter, softened
  • 200 grams (2 cups) powdered sugar, sifted
  • 100 grams (1-2/3 cups) chocolate, melted and cooled

Instructions

  1. Cream the butter. Gradually add the powdered sugar and then the chocolate. Continue to cream until light and fluffy. Refrigerate for 30 minutes before using.
https://shaneskillercupcakes.com/2012/03/crazy-for-cake-pops-review-and-giveway/

Moustache Pops

Ingredients

  • 20 medium cake balls, chilled
  • 1 (14-ounce) bag black candy melts

Instructions

  1. Roll each cake ball into a log shape with your hands. Use a lollipop stick to make an indentation in the top center and bottom center of each “log.” Squeeze and pinch the center of the “log” to shape the middle of the moustache. Now squeeze and pinch the ends, curling each one upwards to create a handlebar moustache shape.
  2. Melt the candy. Dip the end of each lollipop stick ¾ inch into the candy and insert a stick into the center of each moustache. Leave to set. Dip each pop into the candy, dipping from left to right to get an even coating. Insert into a polystyrene block to dry.
https://shaneskillercupcakes.com/2012/03/crazy-for-cake-pops-review-and-giveway/

{Overall Opinion}

Overall, I love this book. I personally need to practice making cake pops more often so I can make some of the more complicated cake pops in the book. For those of you that are cake pop newbies like myself, there are some easier designs to make in the book too. The great thing about cake pops is there are many ways they can be decorated, and even the easiest ones (like mine above) still look nice. I would definitely recommend this book to anyone interested in making cake pops.

{Buy It}

Crazy for Cake Pops is available on several websites such as Amazon and Barnes and Noble in paperback and e-book form.

{Win It}

Ulysses Press has graciously offered to send one of my readers a copy of Crazy for Cake Pops: 50 All-New Delicious and Adorable Creations! To enter fill out the Rafflecopter form below. If you’ve never filled one out before, sign in with either Facebook or log in with your name and email address. Then fill out the first three entries. You don’t have to complete the first three entries but you can’t get to the other entries without finishing them. Once completed, all of the extra entries will become available for completion. Let me know if you have any problems filling out the form.

I WILL BE VERIFYING ENTRIES! So please leave any requested info for the entries. If any requested info is missing from the form, I will not be able to verify your entry and will choose another winner.

The giveaway will end at 11:59pm EST on March 17, 2012. US entries only, please. Terms and Conditions are located at the bottom of the Rafflecopter widget.

Continue reading »

Pin It

Valentine’s Day Dessert Roundup

Posted on

I absolutely LOVE Pinterest! It has become an addiction. Over the past few weeks I’ve been pinning my favorite desserts and crafts for that lovey-dovey holiday that’s coming up on my Valentine’s Day board.

Follow Me on Pinterest

There are a lot of fun things on Pinterest for Valentine’s Day, and I wanted to share with you a few of my favorite desserts that I’ve come across for this holiday.

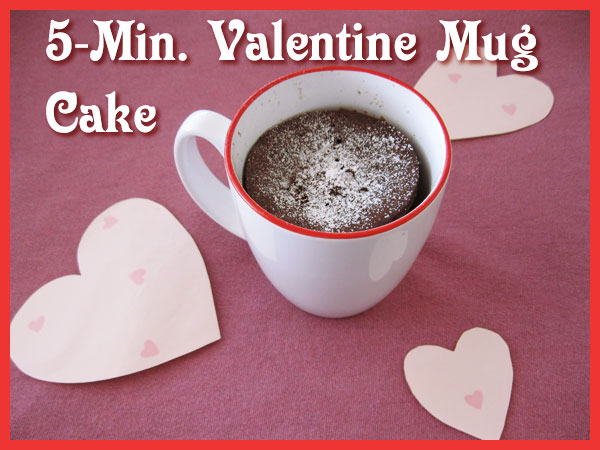
1. Of course I shared with you the 5-Minute Valentine Mug Cake a little while ago. It’s a quick and easy dessert that’s perfect for one or two people, like say, you and your special someone on Valentine’s Day!

2. Next up is Love From The Oven’s Pink Velvet Cake Pops. The cake pops are made with a pink velvet cake recipe (that’s provided on the website) and mixed with frosting to give it a malleable texture. Then they are rolled in balls, stuck on sticks with a little bit of melted candy as glue, chilled, dipped in white chocolate, and decorated with lovely sprinkles from ABC Cake Decorating Supplies.

3. Confessions of a Cookbook Queen is one of my favorite blogs to read, and I just love how her Cherry Vanilla Tuxedo Cake turned out. It’s pretty and pink with a delicious sparkly chocolate glaze over the top. Yum. Also, I dare you to leave her blog without a chuckle or two. She’s too funny.

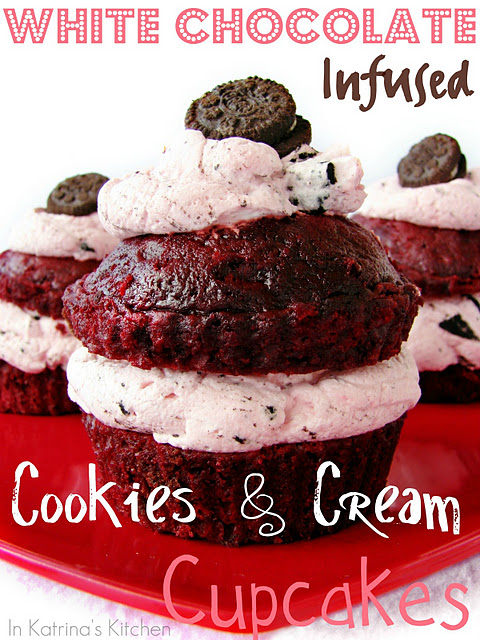
4. In Katrina’s Kitchen has these lovely White Chocolate Infused Cookies and Cream Cupcakes for Valentine’s Day. I just love the idea of layering the red velvet cupcakes with the filling. Why haven’t I ever thought of that?

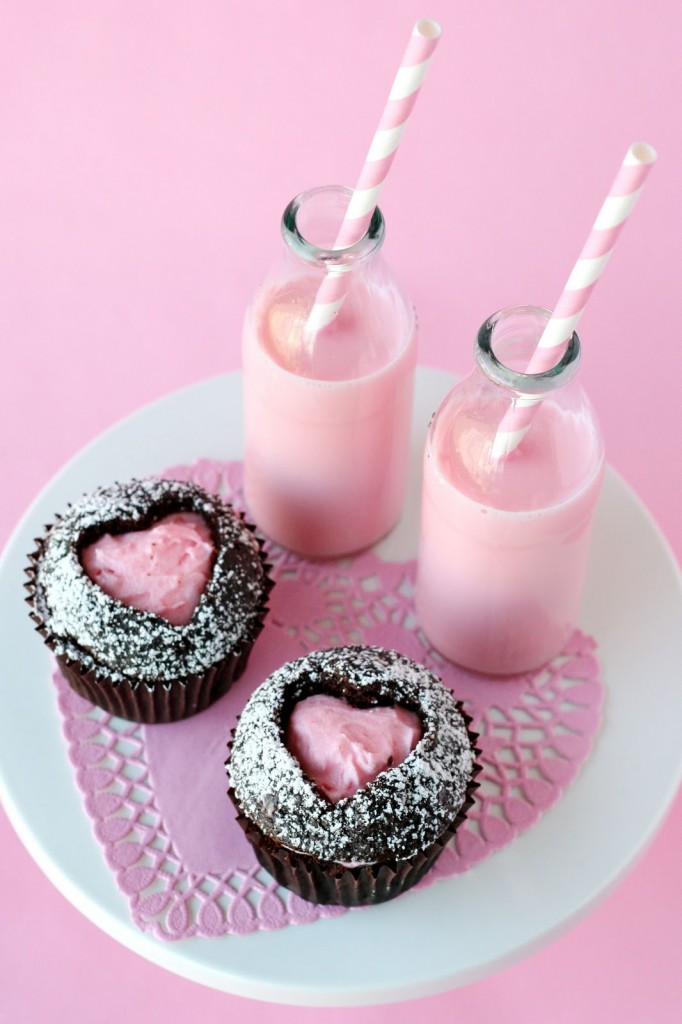
5. Another cupcake with a Valentine theme that I loved was Glorious Treats’ Sweet Heart Cupcakes. They are so cute and use the same idea as above by cutting the top off but on these you cut out a small heart with a cookie cutter on the top piece. Then you frost on the top of the bottom piece and replace the top. Head to their website for the recipes. Such a great idea! I want to thank Glorious Treats for allowing me to use their photo.

6. If a cookie is more to your style, try The Busty Baker’s Valentine Brownie Cut Out Cookies. They are tasty brownie cookies with decorative royal icing on top. She gives you many great suggestions about how to make these too!

What’s your favorite Valentine dessert? Do you have any special plans for Valentine’s Day? Leave me a comment and don’t forget to follow me on Pinterest! Leave your Pinterest username below, and I’ll follow you back.

Related Posts Plugin for WordPress, Blogger...Pin It