Dainty Petits Fours

Posted on

IMG_2231_2

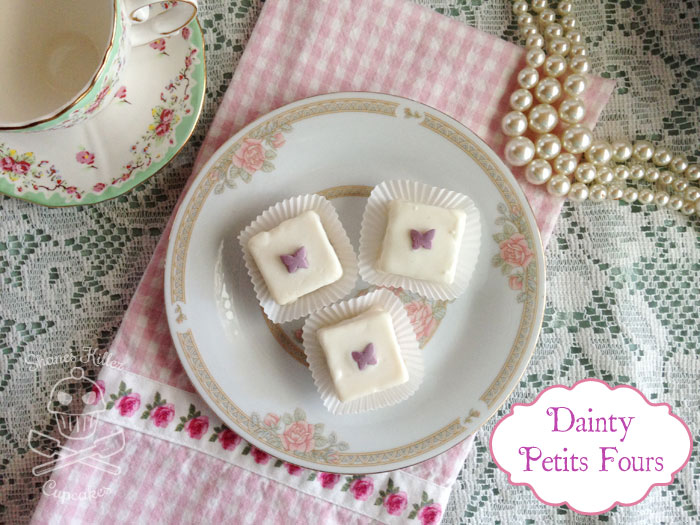
One of the cute treats I made for my Afternoon Tea Party this weekend was a batch of cute petits fours. They are a little labor intensive, but I cut some corners to make them a little easier than some petits fours can be.

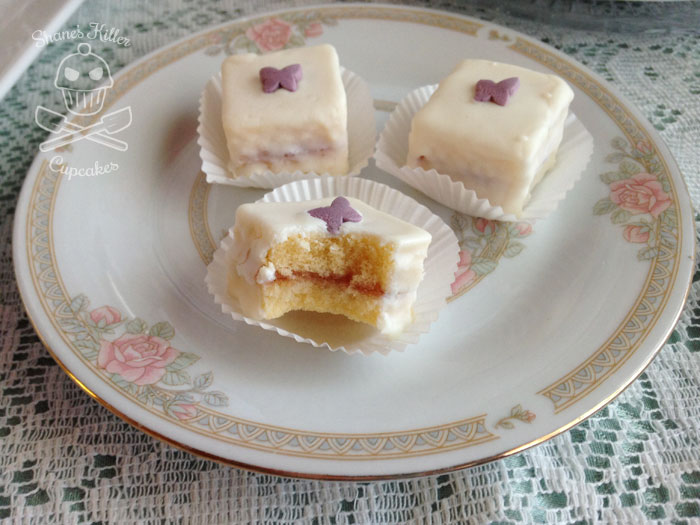
They’re made out of pre-made poundcake that you can find in the freezer section of your grocery store, strawberry jam, and melted canned frosting. If you want them to be a little decorated, use sprinkles, frosting or candy confetti. I also made some petits fours with chocolate frosting, but they were eaten before I could get a picture of them!

IMG_2241

Dainty Petits Fours

Ingredients

  • 1 frozen loaf of pre-made poundcake
  • 1 can of vanilla frosting and/or 1 can of chocolate frosting
  • Candies, frosting, or sprinkles for decor
  • Fruit jam or jelly for filling

Instructions

  1. Defrost the poundcake and then trim off the dark edges all the way around the cake. Don't trim off too much cake though.
  2. Cut the cake into 1/2 inch slices.
  3. With a 1-1.5 inch square cookie cutter, cut slices into squares. You should be able to get two squares per slice.
  4. Spread jam on one square and sandwich it with another square. Repeat until you've used all the cake pieces.
  5. Take a jellyroll pan or a pan with a raised edge lined with foil or waxed paper and place a cookie rack in it.
  6. Melt the frosting in a bowl for 10-15 seconds. If the frosting is thin enough, move onto the next instruction, otherwise, heat for a few more seconds until the frosting is nice and runny.
  7. Put the cake sandwiches on the rack and drizzle melted frosting over them until they are fully covered on all visible sides.
  8. Before the frosting sets up, place your decor candy or sprinkles on top of each petit four.
  9. Place the pan in the fridge until the frosting has set completely.
  10. Serve petits fours in mini cupcake wrappers for clean handling.
https://shaneskillercupcakes.com/2014/07/dainty-petits-fours/

Pin It

Stars, Flags, and Firecrackers! It’s a 4th of July Dessert Round Up

Posted on

titleimage_2
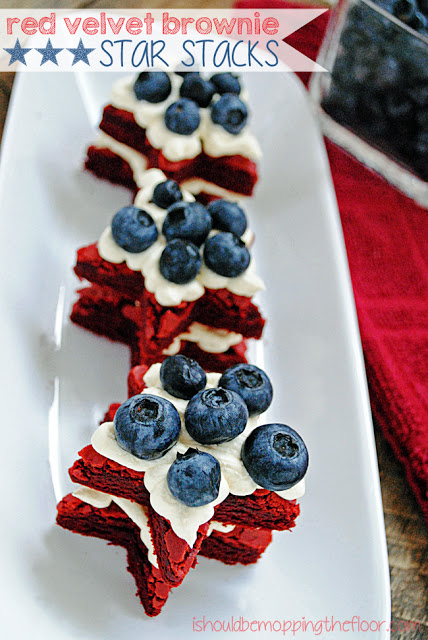
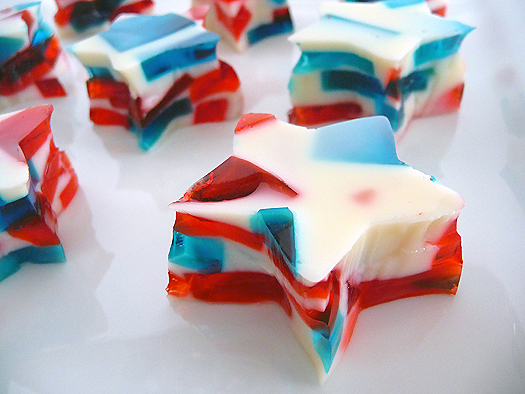
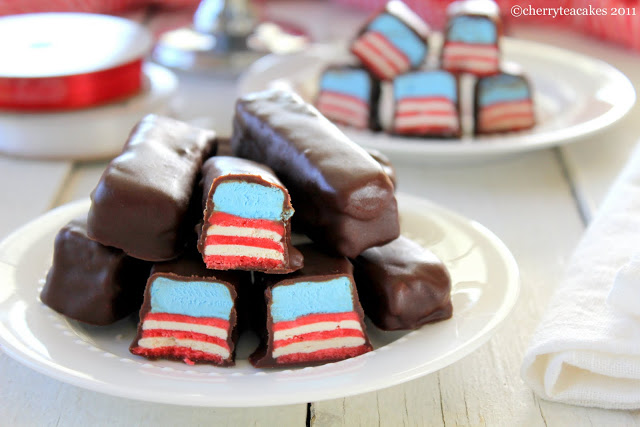
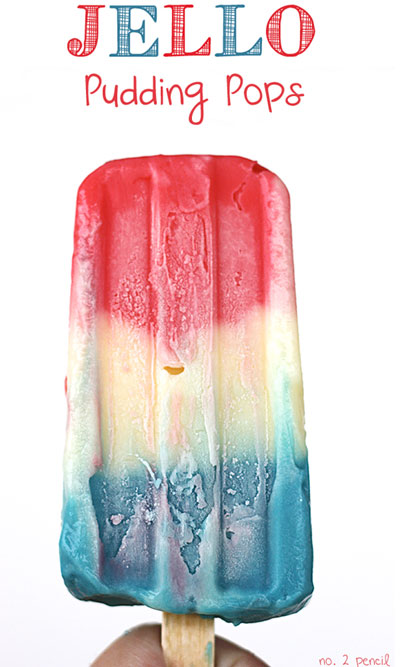
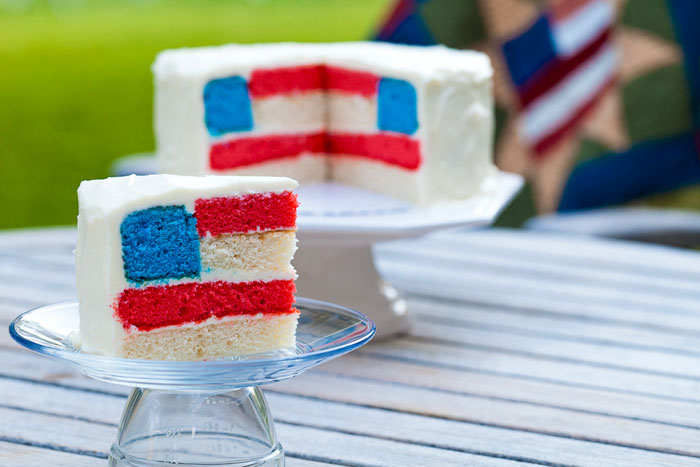
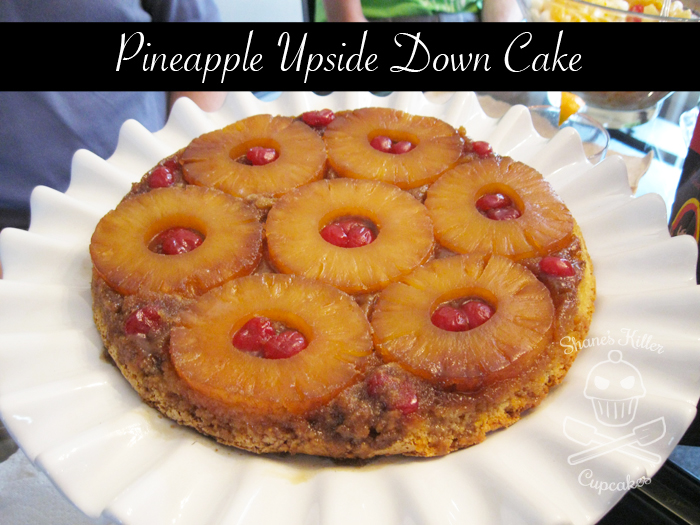
Fourth of July is this week and if you’re in the United States, you probably have a party or BBQ to attend. Still not sure what you’re going to bring to your potluck? Check out these deliciously patriotic sweets I’ve selected from around the Internet.

STARS

1. Red, White, and Blue Fudge Stars from Hungry Happenings

These layered stars, made from white chocolate, sweetened condensed milk, and food coloring, give a bright pop to any party table.

red-white-and-blue-desserts-for-4th-of-july-fudge-stars-
2.  Red Velvet Brownie Star Stacks from I Should Be Mopping the Floor

If brownies are more your style, try these stacked red velvet brownie stars with cool whip and blue berries.

red velvet brownies from cake mix


3. Red, White, and Blue Stained Glass Jello Stars from Brown Eyed Baker

I love these because they remind me of the jello desserts of the 1960s.

stained-glass-jello-singlestar


STRIPES

4. Red, White, and Blue Raspberry Candy Bars from Cherry Tea Cakes

These candy bars are a great surprise for your friends! From the outside they look normal, but one bite reveals the red, white, and blue stripes inside. I always love surprise inside treats.

IMG_9081


5. Jello Pudding Pops from Number 2 Pencil

If you have access to a freezer, these pudding pops are great for a hot summer day.

Jello-Pudding-Pops


6. Triple Berry Frozen Smoothies from In Katrina’s Kitchen

Made from a combination of yogurt, fruit, and honey, these delicious smoothies are a perfect cool down on 4th of July.

ae28fbcb48cf2a21572827289197e3e7

FLAGS

7. 4th of July Flag Cake from Secret Life of a Chef’s Wife

Here’s another version of the surprise inside treat. This cake is baked with several colored layers and combined to form a flag when cut into. Can you imagine what your friends will say when they see the inside?

Fourth_of_July_Cake-2


FIRECRACKERS

8. Firecracker Sugar Cookies from Mom Dot

To the unfamiliar, these look like your everyday sugar cookies with candy sugar and sprinkles on top. What they don’t know is these will pop and crackle in your mouth when you eat them! How you ask? The secret ingredient is Pop Rocks!

popcookie


9. Twizzler Firecracker Cupcakes from Tastes Of Lizzy T

To keep with the firecracker theme, here are some cute cupcakes that look like little firecrackers exploding.

Twizzler-Firecracker-Cupcakes-are-so-fun-for-a-July-4th-party


If you aren’t planning a red, white, and blue dish for your party but still want it to look festive, decorate it with flag picks!  To make your own, download my free American flag pick printable by clicking on the picture below:

IMG_3444

Have a fun and safe Independence Day!


***All photos were used with permission
Pin It

Spooky Graveyard Cake

Posted on

IMG_4585

It’s Halloween time! It’s my favorite time of year. This year I decided to do a graveyard cake. I’ve also been busy working on my Zoltar costume the past month. This cake has a bunch of candy melts for decoration and was made with my mom’s Triple Chocolate Cake and Sweet Savory Life’s Chocolate Buttercream Frosting.

100_3903

First try wasn’t cutting it

I did a graveyard cake in the past but was unhappy with how it turned out, so I felt like trying it again. The original one had cookies for tombstones and a real stick for a tree. It was cute, but I wanted something that was completely edible this time around and a little more extravagant.

Materials

  • Frosted 9in x 13in cake
  • Green frosting (for grass)
  • Candy melts in chocolate, black, and white.
  • Tombstones (made from cookies, fondant, candy molds, etc) I used Wilton’s Creepy Tombstone Candy Mold. This has been discontinued, but if you search around in stores and online, you might be able to find it. I found mine just last week at my local Michaels on clearance for $0.99!
  • Fence templates (Template 1, Template 2)
  • Tree template
  • Candy decor (candy corn pumpkins, Peep ghosts, bone candy, Wilton Skeleton Bones Candy Mold, bug candy, etc). You can decorate it with anything you like really. These were just the items I used for this cake.
  • Oreos or other chocolate cookie (for dirt)

I made the cake in a 9in x 13in cake pan but when turned out on the platter, was closer to 7in x 11in. The fence templates I’ve included are made for the 7in x 11in cake (although the fence doesn’t quite meet up everywhere.) If you make a larger (or smaller) cake resize the fences accordingly.

Once the cake has cooled and been frosted, place your tombstones. The ones I used were very big so that dictated the proportion of my cake. Then I made my skeleton with white candy melts in the Skeleton Bones Candy Mold and placed pieces of him in front of one of the tombstones. I also put the Peep ghost and other decor in the graveyard to my liking.

IMG_4578

Continue reading »

Pin It

Pineapple Upside Down Cake {Recipe}

Posted on

IMG_3562_2

I went to a ’60s themed cocktail party last week and wanted to bring something of the era as a treat, so I scoured my mom’s recipe box and found my grandma’s recipe for a Pineapple Upside Down Cake that seemed perfect. I love how it turned out.

Pineapple Upside Down Cake

Prep Time: 20 minutes

Cook Time: 50 minutes

Total Time: 1 hour, 10 minutes

Ingredients

    For the topping:
  • Large can of sliced pineapple (save the juice)
  • Maraschino cherries
  • 1/4 cup butter
  • 2/3 cup packed brown sugar
  • For the cake:
  • 2 eggs (separate the yolk from the whites and put both aside)
  • 3/4 cup sugar
  • 1/4 cup boiling pineapple juice
  • 3/4 cup cake flour (I used all-purpose flour and it worked just fine)
  • 1/8 teaspoon salt
  • 1/2 teaspoon baking powder

Instructions

  1. Preheat oven to 325*F.
  2. In a small pan over medium heat, melt the butter and brown sugar until completely mixed together and caramelized. Don't let it burn.
  3. Pour into an 8" cake pan, making sure to coat the whole bottom.
  4. Arrange pineapple slices in the bottom of the cake pan on top of the caramel mixture. I put one in the middle and six around it.
  5. Place halved cherries inside and in between the pineapple slices.
  6. Beat egg yolks until very thick.
  7. Gradually add sugar to yolks and continue beating.
  8. Boil pineapple juice in a small sauce pan and add to egg/sugar mixture. Combine well.
  9. Then add the dry ingredients slowly to the wet mixture; mix until smooth.
  10. Beat the egg whites until stiff and fold into the batter.
  11. Bake for 50 minutes, checking it every so often.***
  12. It should be done once a toothpick comes out clean or almost clean.

Notes

***Notes on baking time

The recipe I used somehow forgot to put how long to cook the cake on it. At 325*F, mine took 50-55 minutes to completely cook. Since it was taking so long, I ended up changing the temperature to 350*F for the last few minutes. My experience may be different from yours, so check on the cake occasionally to make sure you don't over bake it.

https://shaneskillercupcakes.com/2013/07/pineapple-upside-down-cake-recipe/

Here’s some other great photos from the cocktail party:


Pin It

Cake Artist Spotlight: Marcella Robin of MRobin Cakes

Posted on

As an artist and a baker, I like to explore the art form of cake decorating. It’s one of the reasons I’d rather decorate a cake than bake them, although recipe experimentation can be its own form of art as well. When I come across other bakers who express their artistic abilities through cake design, I take notice. The cake artist I’m spotlighting today has found a beautiful way to make sculptural pieces of art through the baking process.

cakes

Meet Marcella Robin, owner, baker, and cake designer at MRobin Cakes in Portland, Oregon. She has created her own unique style of cake design using jaconde, a thin decorative exterior sponge cake, that she forms into classic patterns reminiscent of mid-century motifs. The insides of these entremet cakes are filled with sponge cake, creams, custards, fruits, mousses, etc. With her bachelors degree in sculpture and as a graduate of the Professional Pastry and Bread program at the Northwest Culinary Academy of Vancouver in British Columbia, Robin feels she’s found the perfect balance between her two loves: art and baking:

I have found cake design to be the perfect blend of my love for art and baking. While I prefer a traditional cake form, the process I use is creative and modern. After years of cake making and designing, my current focus is on entremet wedding cakes. These specialty cakes include layers of mousse, bavaroise, dacquoise, sponge cake, caramels, fruit and other fillings. With its bold design and enticing outer layer of decorative sponge cake, the entremet is unique and above all delicious.

I highly recommend watching Cineastas great video highlighting MRobin Cakes below. It gives Marcella Robin the opportunity to describe her style of cake design and shows us her amazing process for creating such beautifully elegant cakes.

M. Robin – Cake Design from Cineastas on Vimeo.

Just look at all these awesome designs!

donteatdaisies pinkstripe sillychocolate wobble[Photos from MRobin Cakes]
 
Pin It

Grumpy Cat Says Birthdays Are Awful

Posted on


IMG_2824wm

IMG_2834

Recently, a couple of my friends had birthdays, so I wanted to make them a special cake. We all love cats, and I am obsessed with little Miss Tarder Sauce a.k.a Grumpy Cat, so I created this Grumpy Cat cake.

I used a cute “vintage” Wilton cake cake pan from the 1970s for the shape and then frosted Tard’s adorably sourpuss face onto it. I love how it turned out. If I had had more time, I would have gone into more detail. Have any of you ever made a cool cake for a birthday before?

IMG_2829wm

Related Posts Plugin for WordPress, Blogger...Pin It